Even though many communications are now sent electronically using email, Mail Merge is a useful technology to understand. Originally designed to simplify mass mailings using the USPS, it has many additional uses.
Mail Merge is an important concept to understand. There are still businesses today not using it to simplify sending material to several recipients. Instead, they make multiple copies of the item to be mailed, insert them into envelopes, and address the envelopes either by hand or using labels photocopied from a master list.
Mail Merge simplifies the process and allows more than just the name and address to be inserted into the letter. Other bits of data in the database can be strategically placed within the body of each letter to truly personalize the communications.
This article steps you through creating a letter to be mass mailed, accessing and adding to an existing database, and then merging the two to produce individual letters for everyone on the mailing list.
The following steps through accomplishing a Mail Merge using the commands on the Mailings ribbon.
The Database
This example assumes a set of data created using Excel containing the information that follows.
Either create the following table in an Excel worksheet and save the workbook as ardata.xlsx or download the file at ardata.
Format the Zip column as Special > Zip Code and the Balance column as Comma Style > Right Aligned.

Let’s assume we are a food distributor and these restaurants have overdue balances. The worksheet is a summary of overdue accounts listing the total amount due. Letters need to be generated to inform them of their overdue status and ask them to send the appropriate amount due as payment.
Create The Letter
Open Microsoft Word
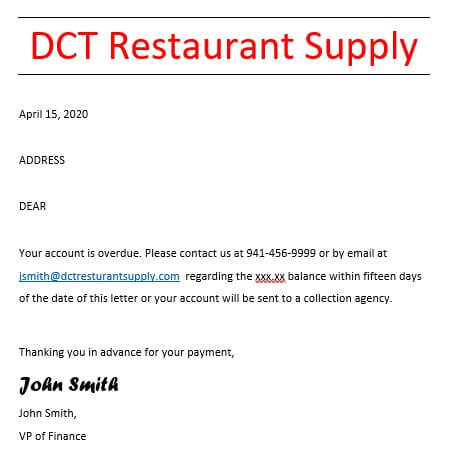
Type the letter leaving a place to have Mail Merge insert the Name and Address, the greeting line, and the amount due.
Cut and Paste the following text into the body of the letter:
Your account is overdue. Please contact us at 941-456-9999
or by email at jsmith@dctrestaurantsupply.com regarding the
xxx.xx balance within fifteen days of the date of this
letter or your account will be sent to a collection agency.
Save the collection letter as a Word document named collection.docx
The letter is now ready to have data from the Excel file merged
Merge Fields From Database
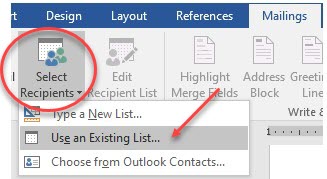
Mailings > Select Recipients > Use Existing List…
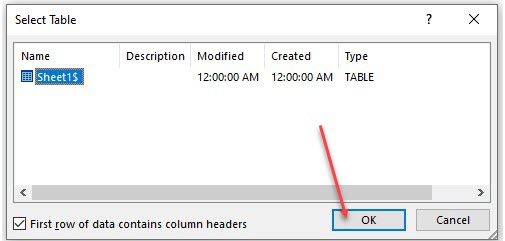
Locate and Open the ardata.xlsx database, select the sheet containing the data, and then click OK.
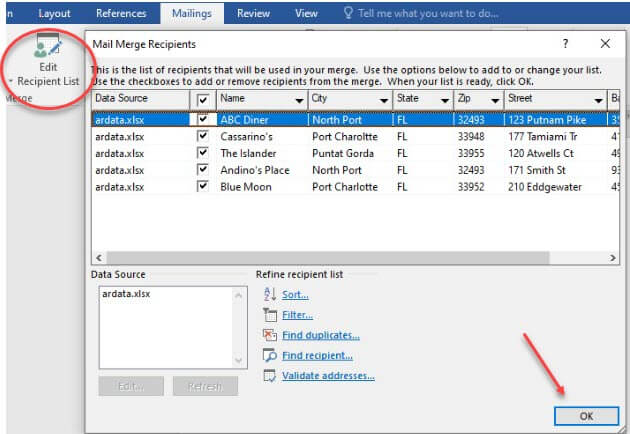
To review or edit the database while in Word, click Edit Recipient List. The Mail Merge Recipients dialog box opens. The data may be sorted, selected, changed, or new records added. You can uncheck the accounts you do want to be merged. The Filter will allow you to select based on criteria such as Balance more than $200. After selecting the data to be included in the merge, click OK.
Merge The Name And Address Fields
Select the location in the document where the address block is to be placed, delete the current entry, and then click Insert Merge Field.
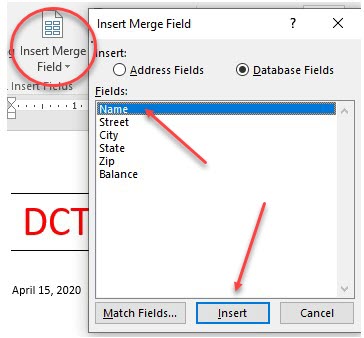
Insert Merge Field > Database Fields > Name > Insert > Close > Enter
Insert Merge Field > Database Fields > Street > Insert > Close> Enter
Insert Merge Field > Database Fields > City> Insert > Close> , > Space
Insert Merge Field > Database Fields > State > Insert > Close> > Space Space
Insert Merge Field > Database Fields > Zip > Insert > Close > Enter
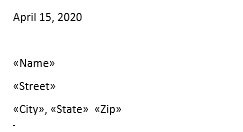
Now the name and address fields are ready for a merge with the data.
Create The Greeting Line
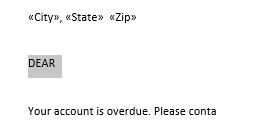
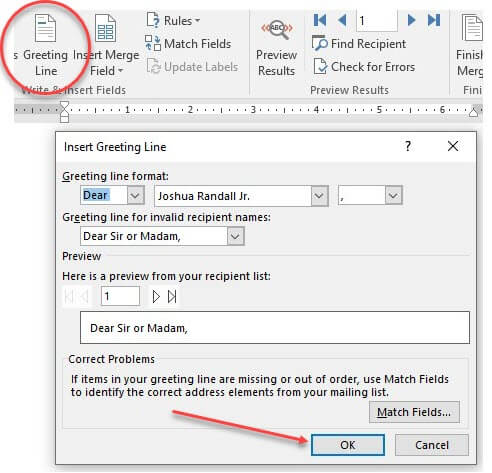
Select the area where the greeting line is to be placed, delete the current entry, and then click Greeting Line.
Since the database does not contain a contact name, leave the default Dear Sir or Madam and click OK

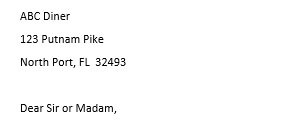
To check the results, click Preview Results. Use the VCR control to move forward and back in the database to see the results.
Insert The Balance Due
Now let’s insert the amount they owe into the paragraph replacing the xxx.xx.
First, select the xxx.xx in the body of the letter.
Insert Merge Field > Balance > Insert > Close
Formatting The Amount
This places the Balance amount for each letter in the body but we need a $ sign to show dollars and cents. To format a numeric merge field, we need to use the \# switch. To display the Balance field as “$125.23”, the merge field should be defined as {MERGEFIELD Balance \# $#,##0.00} .

Select the balance in the body of the letter, then with the amount selected press Shift+F9 to display the code behind the numbers. Now add \# $#,##0.00 to the end of the code line, before the ending } and with a space before the \”

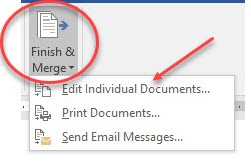
Save the file and preview the results. All the amounts are now formatted correctly and we are ready for the actual merge. Use the VCR control to view additional merged records. When satisfied with the results, click Finish & Merge.
Create The Merged Letters
The first Merge option creates a new document containing the merged letters. It does not print the letters. I believe this option is the best to use as it gives the option of viewing all the letters for errors before printing, allows printing of small portions of the letters at one time, and creates a file to save containing all the actual letters sent.
The second option sends all the merged documents straight to the printer.
Click Edit Individual Documents…
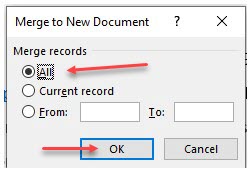
Click OK to merge all records in the database to the letters
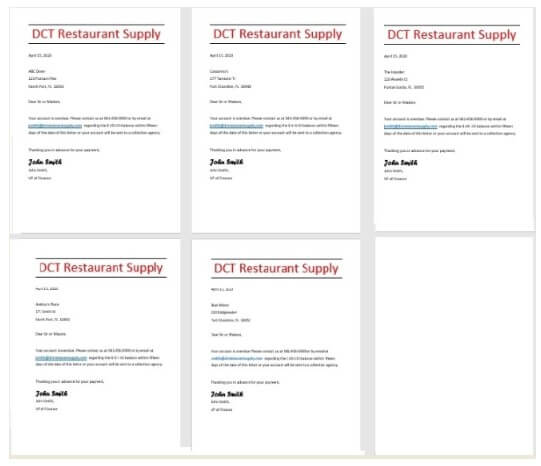
A new document is created containing all the letters– one page each. Save the new document as merged.docx. Then save the original letter.
We saw how to create a database using Excel. Then we created a letter to be mailed to all the accounts in the database. We added merge fields for the names and addresses, then added a generic greeting, and finally inserted an amount field from the database formatted as dollars and cents.
I have found Mail Merge to be an important tool for my toolbox. I hope after reading through this article you have as well.
Dick
—

Stellar article.
Thanks!
Thanks, Henry. I am glad you have added it to your toolbox!