EaseUS Data Recovery Wizard Pro
Data recovery is a necessary evil in today’s computer world. We all mistakenly click that Delete button from time to time. And, in the worst-case scenario, we don’t realize that mistake until the Recycle Bin is too outdated to help anymore. When that happens it is good to have a top-quality recovery tool by your side. EaseUS Data Recovery Wizard Pro is just such a tool. It is easy to use, the interface is intuitive, and it is fast and thorough.
At the time of writing, this program is discounted by $20 (US) to $69.95. EaseUS also offers a free trial period so you can try before you buy. The trial version will only show the scan results and the free version has a 2GB recovery limit.
System Requirements
You will need one of the following systems to run this program:
- Windows 10/8.1/8/7/Vista/XP
- Windows Server 2019/2016/2012/2008/2003
It’s not just for Windows– there is also a Mac version available.
File Systems
This program works with these file systems:
- FAT(FAT12,FAT16,FAT32)
- exFAT
- NTFS
- NTFS5
- ext2/ext3
- HFS+
- ReFS
Ease Of Use
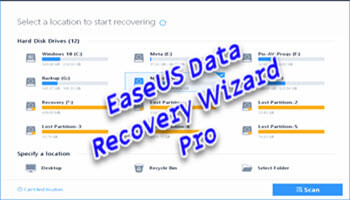
As you will soon see, the interface is a straightforward affair. When you first run Data Recovery Wizard you will be presented with this window:
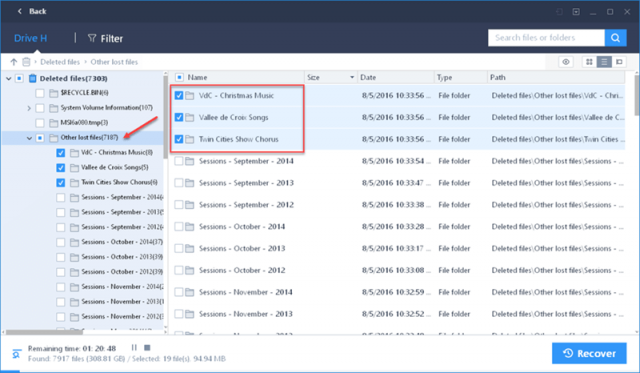
Choose the drive you want to focus on. For this example, I chose a partition where I keep a bunch of movies. Make your choice and click the Scan button. After a very few seconds, I was presented with this result:
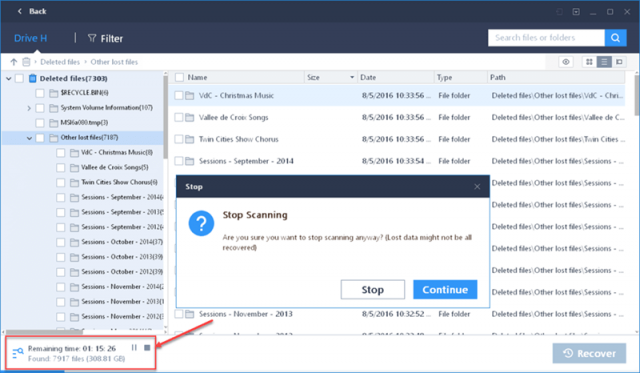
To my surprise, Data Recovery Wizard found over seven thousand files and it was still finding more because it continues running a deep scan in the background. Its progress is shown in the lower-left corner of the window. You will notice that these files are very old, some dating back to 2012! Please note that I rarely change the contents of this drive so that explains the age of these files or they would have been overwritten by now and recovery would be improbable at this point.
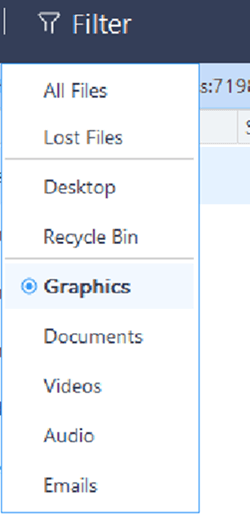
You can use the Filter option in the menu bar to limit the results to certain file types. This is a great way to narrow down the results to exactly what you are looking for:
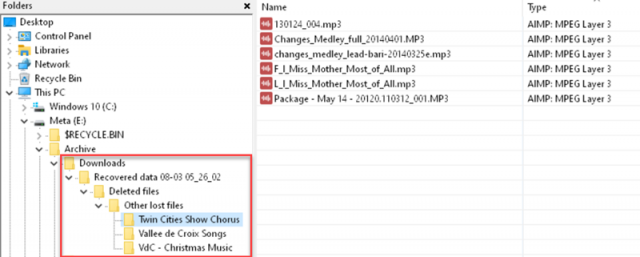
After picking the files you want to recover, Data Recovery Wizard will ask where you want to save them. You must choose another drive or partition location. I chose a temporary workspace I use for this sort of thing and these were the results:
Data Recovery Wizard Created a new directory under the one I had chosen, then created a number of sub-directories matching the ones on the original drive. This makes it very easy to follow. No more lists of file0001.xxx, file0002.xxx, file0003.xxx, and so on. I’m happy those days are gone.
Deep Scan
I mentioned Deep Scan before and it is a very powerful feature. You will notice in the above image that there are Play/Pause buttons. After the initial scan results are displayed, Data Recovery Wizard continues to run a deep scan to find more files than the original scan. As you can see, it estimates another hour and some minutes to complete this more thorough scan. You can let it run if you like, or stop it at any time. When compared to the original number of files it found, you can see that it has found even more files that might be recovered– over 600 more, in fact, and I didn’t let it run that long.
Conclusions 👍
I can wholeheartedly recommend EaseUS Data Recovery Wizard for those dire times when data recovery is needed. It is fast, easy to use, and thorough. The fact that it found files that were over seven years old proves a point– just because you delete a file, doesn’t mean that it’s gone. It’s nice to know that you can still recover them if need be.
EaseUS also provides a complete online User’s Guide should you have any questions.
—
