I’ve made it pretty clear in previous articles that, rather than installing 3rd party software to do the job, I’d much prefer to see users configure and customize Windows 8 via the operating system’s own built-in options and settings. There are two very good reasons for this:
- The customizations are easy to implement, there is no need to install 3rd party tools which are a waste of disk space and resources.
- By adopting a DYI approach, users will learn a lot more about their new operating system, how it works and where everything is.
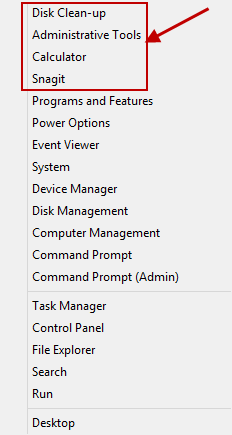
However, as often the case, there is an exception to the rule. In this instance it applies to the menu often referred to as the “Quick Access” menu, which can be displayed either by right clicking in the bottom left hand corner of the screen or by simultaneously pressing the Windows and X keys (hence Win+X menu).
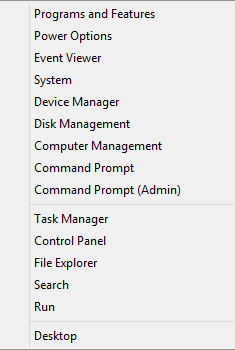
This is a very useful menu but it would be a lot more useful if we could edit and customize it to suit our requirements. As far as I know, there is no built-in method to do that. Enter Win+X Menu Editor for Windows 8, a tiny freeware which provides easy options to:
- add new items.
- remove any item.
- change display name of any item.
- reorder items.
This one particularly caught my eye because it is a tiny 456KB (zip) download and is also portable. Plus, it does not modify any system files:
Win+X Menu Editor serves to provide you a simple and useful way to edit Win+X menu without system files modification in Windows 8. It keeps your system integrity untouched.
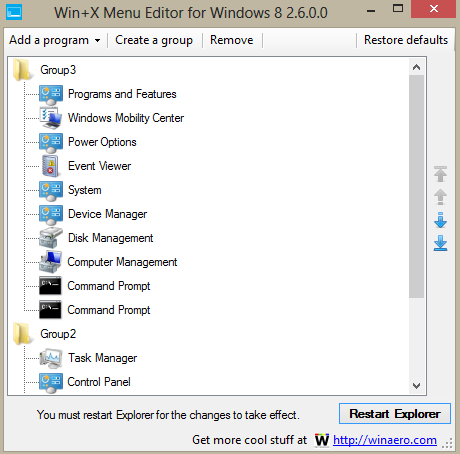
So let’s take a look at Win+X Menu Editor for Windows 8:
The extracted folder contains two executables, one for x86 (32-bit) systems and another for x64 (64-bit) systems. Running the program is a simple matter of double clicking whichever executable is applicable to your system:
Clicking on Add a program displays a drop down menu where you can make several choices:
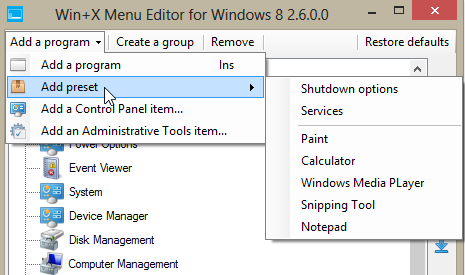
- Add a program: Browse to a program’s folder, select the executable, rename it (if you wish), Click OK. Done!
- Add preset: Click to open the sub-menu (as per the above screenshot). Click on whatever you want to add. Done!
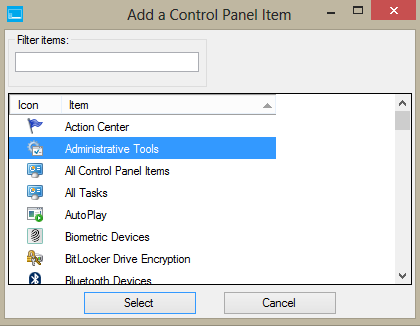
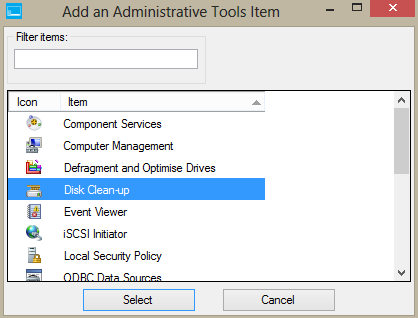
- Add a Control Panel item: Scroll through, locate and highlight the desired item. Click Select. Done!
- Add an Administrative Tools item: Same as Add a Control Panel item.
Removing items from the menu is a simple matter of highlighting the unwanted item and then clicking Remove.
**NOTE: After making any changes you will need to click on the Restart Explorer button for them to take effect.
This great little program also allows you to re-order menu items and create your own groups.
As I said, I wouldn’t normally recommend 3rd party tools but… small, portable, free, works as advertised, and performs a chore which would otherwise be unavailable… Win+X Menu Editor for Windows 8 is a definite exception!
As usual a well written and informative article. However, I see where this is in your “FREEWARE” category but was not in your “WINDOWS 8” category; is your system set up so it can only be in 1 category?
Thanks,
Dan
We can allocate as many categories as we like Dan, no limitations. Although, we do try to minimize allocations to the most relative categories. In this case, I happen to agree with you, should have also been included in the Win8 category, an oversight on my part.
Now done, thanks.
Cheers… Jim
Always happy to keep you guys on your toes – once again, a very informative article!
🙂
Dan