
Have you seen videos where you watch a seed grow into a flower? That’s a time-lapse video. I will show you how to do a simple time-lapse video using what’s built into Windows.
Open the camera app. Either find it in the Start menu or type camera in search.
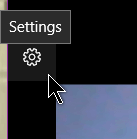
Click on the settings gear, top left-hand corner.
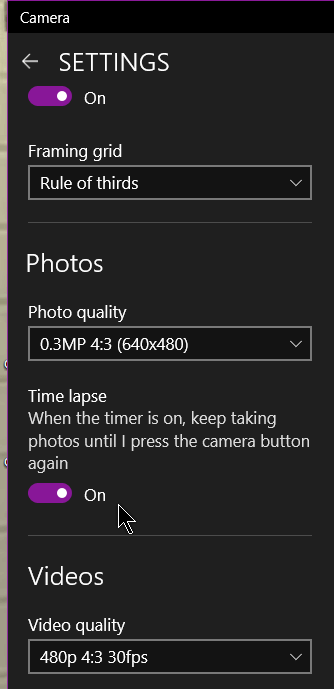
Click on the switch to turn on Time-lapse. Then click the button to take a picture and it will keep taking pictures, depending on the time interval you set, until you click it again.
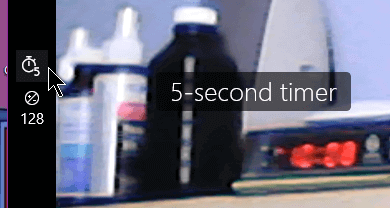
Now close out settings (click on the arrow in front of the word Settings) and down the middle, left-hand side of the screen you’ll see a stopwatch icon. When you place your mouse over it, it says Photo timer. Keep clicking on it to set the timer for how long before each photo is taken. It only gives you four options: 2 seconds, 5 seconds, 10 seconds, and off.
The symbol under that with the number (128) is the level of brightness. You can adjust that by clicking on it then using the slider to set it.
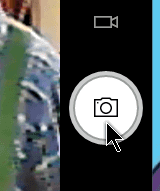
Now when you click on the Take photo button, the app will take a picture every few seconds, depending on what you have set up, until you press it a second time.
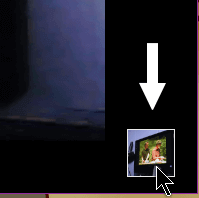
Now click on the Camera roll in the lower right-hand corner.
At this point, the pictures are now in your Pictures\Camera Roll folder.
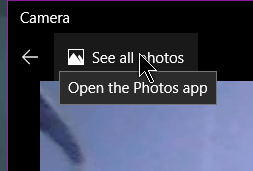
Now click on See all photos and this opens the Photos app.
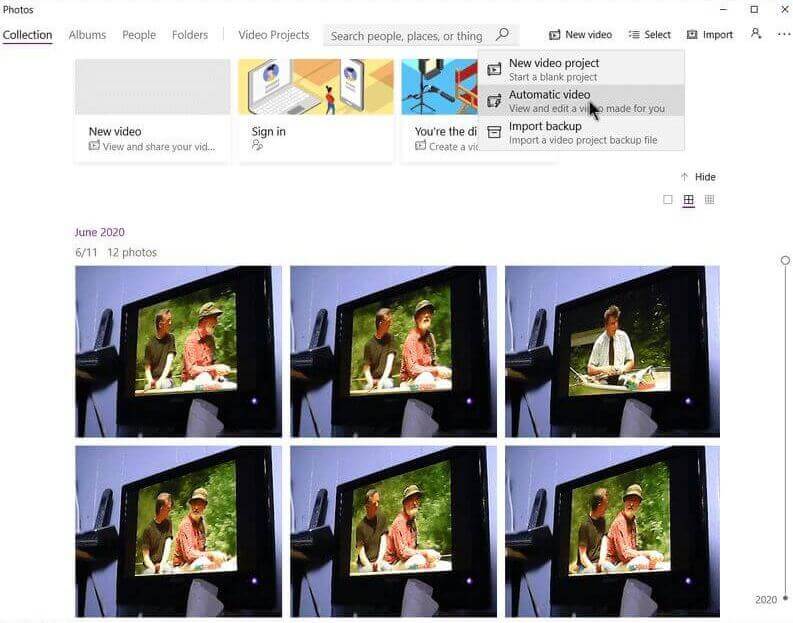
When the Photos app opens click on New video. Then Automatic video.
In the Create new video window check the little box in the top right-hand corner of every thumbnail of the pictures you want to be added.
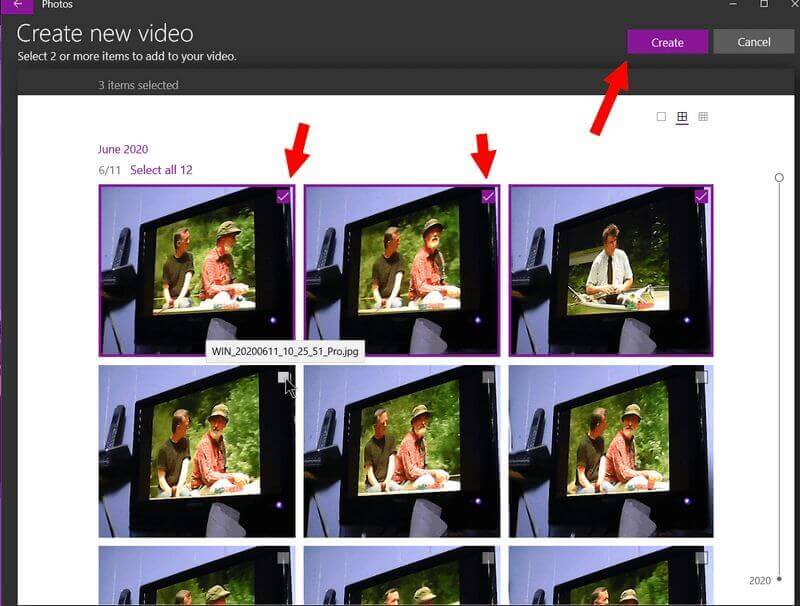
The gray Create button only becomes active when you start selecting the pictures. When your pictures are picked, click on Create.
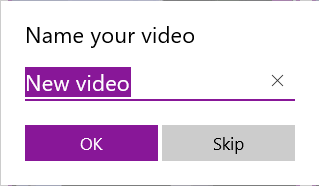
It will ask you to name your video. So, name your video.
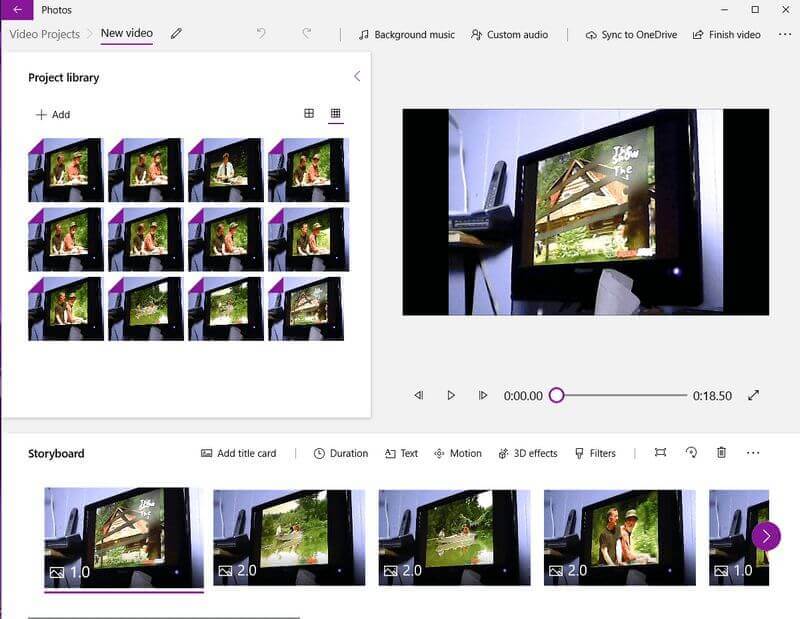
To keep it simple at this point you can just click on Finish video. This takes you to a preview window. Clicking on the round purple buttons changes the video premade layout. Or you can edit it manually by clicking on the Edit video button.

This takes you to a video editor with a few more options. Play around with these options. It’s your movie. Go nuts. The pictures are still in the pictures\camera roll folder if you want to start over from scratch.
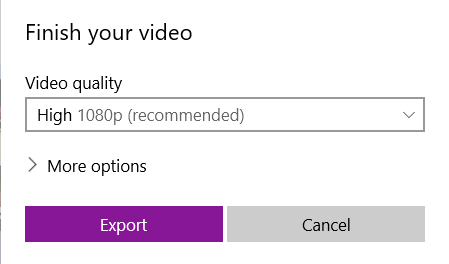
When you click to finish the video, it will ask you to choose a resolution. I left it on High 1080p (recommended) and then click on Export. Choose the folder you want to save it in and give it a name and click on Export again.
—
I like the “Red/Green Show” also.
Or if you have an iPhone or iPad, just open the camera, slide the selector from Photo to Time Lapse and press the red button. Time Lapse video automatically created.