Pictures vs “Mystery Man” Avatars
Just recently I decided that I would like to associate the Contacts on my cellphone with pictures, hopefully their faces. Yes, the silhouette is nice, but it makes it a little hard to quickly identify who is calling.
Like most men, I’m a visual person and having a face or image that I can glance at when the phone rings is helpful. Plus, reading the name is way too much work.
Since I’m a big Facebook user (sounds like a drug I’m hooked on ;-)) the best option is to have my contact’s Facebook profile pictures be their contact picture, too, or at least something that reminds me of them. Back in the day, my phone would automatically connect the name with their profile pic.
(Memory bubble – Those were the days) Since then, Facebook made some updates and now my Android phone doesn’t have this ability anymore. Like losing your superpowers, it was a sad day for everyone. For awhile, I decided not to do anything about it– until today.
Off I went on a Research Mission to find a way to give my contacts a face. Yes, this is the exact map I used to locate this info :).
On this mission, I found out there are a couple of ways to do this, but the one I will focus on is the manual way. Don’t worry, I will share the time-saving (lazy) way later in this article.
I prefer the manual way over the time-saving way because I like having control. Now let me layout the steps on how you can accomplish this.
Let the games begin!
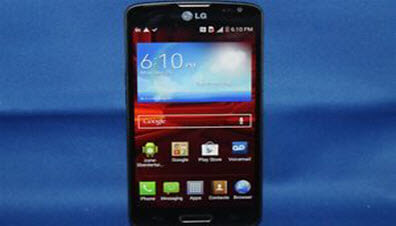
I use LG Volt and Samsung Galaxy Android Phones. The following images are from my LG Volt.
The Manual Way
Step 1: First, find the Facebook app on your Android phone. If you don’t have the app, you will need to download it.
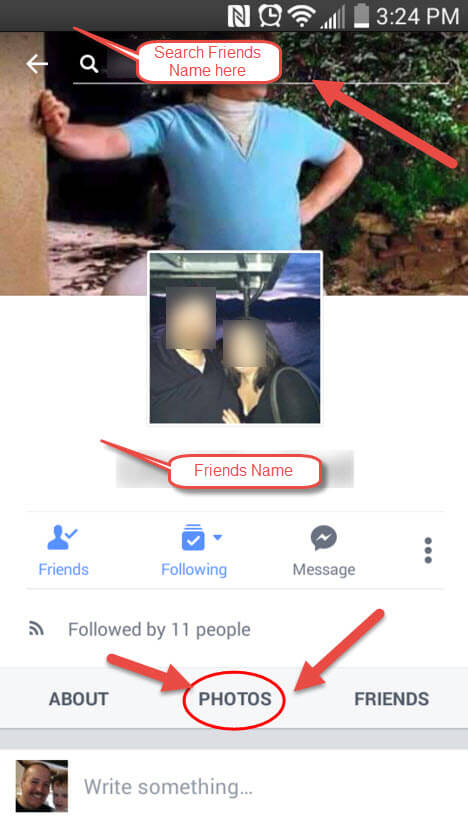
Step 2: Once on Facebook, go to the contact/friend of whom you want a picture. I used my friend Chad and made sure to keep his identity safe (you know, the witness protection thing). Once you’re on their page, click on the “Photos” option. This will take you to all their photos.
Step 3: Browse through their pictures like a stalker (you know this is what a stalker does). Once you find the picture you want, tap on it. You can do this with their profile pic, but I find this type of picture more fun.
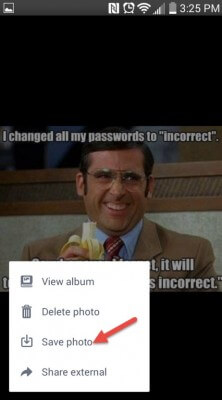
Step 4: Next, at the bottom of your phone, you should have the Three-Lines Button (Menu Button) commonly called the Hamburger. Tap it. This will bring up a menu. Select “Save Photo”.
Before Facebook’s update, you would have had an option to set it as a Contact Picture, but not anymore.
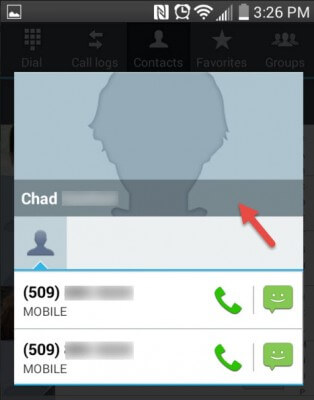
Step 5: The next step is to go to the home screen of your phone and tap on the “Contacts” icon at the bottom of the screen.
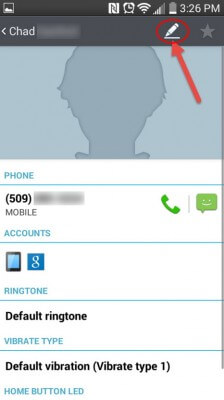
Step 6: Now, find that Contact to whom you would like to attach the picture. Tap on the name, then tap on the silhouette at the top.
Step 7: A screen should pop up with a little pencil at the top. Tap the “Pencil”.
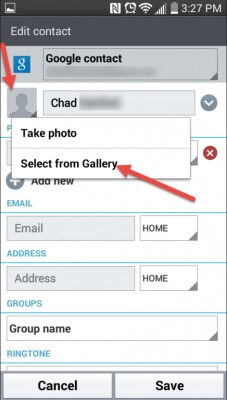
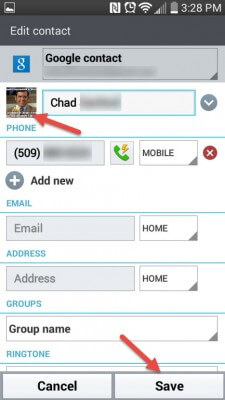
Step 8: Tap on the place where the face should be. This will bring up a menu. You will want to choose “Select from Gallery”. This will bring up all your pictures.
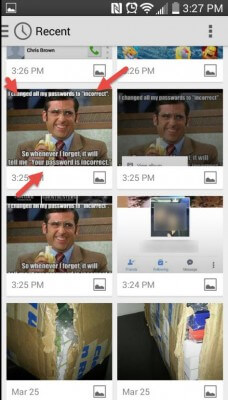
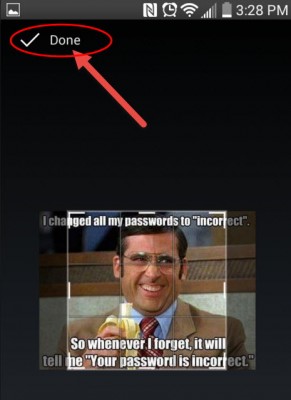
Step 9: Tap on the picture you got from Facebook and saved to your phone. It will pull up a photo editor where you can crop the picture any way you like. After cropping, tap “Done” at the top.
Step 10: Just hit save and the picture is now that person’s profile pic. DONE!
Not so hard was it?
Some of you might have noticed that you can pick any picture you have on your phone and not just the one you downloaded from Facebook. I say, do whatever makes it easy for you to identify the caller. This process is close to the same on most Android phones.
Since we have learned the manual way of doing this, let’s take a quick peak at the time-saving way.
The Time-Saving Way
There are many apps out there that you can use to have Facebook automatically synchronize the pictures with your Contacts. Some of the ones I found that seem to work well are:
- Contacts+
- Sync.me
Here is a link to a list of some syncing apps that you can check out. Just for your information, except for Sync.me, I have not tried these out myself, so proceed with caution. This method is not something I really like to use, but it will save you some time. If you know of a better way of doing this, please tell us.
What do you think?
—
