 The Envelope feature in Word is pretty intuitive and fairly easy to use so that you can create really professional looking envelopes that rival the ones you get at the Stationers.
Word makes it so easy in fact, that it takes the liberty of assuming where your return address and addressee information should be placed. But suppose you want your envelope to look a bit different? Suppose you would like your return address in a different area?
Well as in keeping with everything else in Word, the Envelopes and Label tool is based on a style that has been predefined. The style for the return address is very intuitively called Envelope Return. Once you click on either the Print or Add buttons in the Envelopes and labels dialog box, this style is used for the return address area.
This particular style is designed to use a frame and the frame is defined to appear at a certain location on your envelope. To change where your return address will appear, you need to change where the frame is set to appear.
Follow the steps below to learn how:
Create a new document based on the Normal template by using the File tab.
- Click the Home tab of your Ribbon.
- Click the small icon at the bottom of the right side of the Styles group to display the Styles task pane.
- Click Options at the bottom of the pane to open the Style Pane Options dialog.
- Using the Select Styles to Show drop-down list, select All Styles.
- Click OK to close the Style Pane Options dialog box.
- Scroll through the list of styles until you reach the Envelope Return style.
- Hover your mouse over the style name and click on the drop-down arrow that appears at the right-hand side of the style. A drop-down menu will display.
- Click on Modify to open the dialog box.

- Click on the Format button and select Frame to display the dialog box.
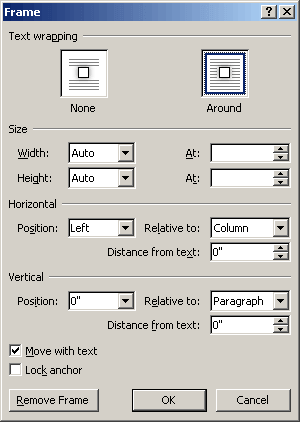
- Adjust the information in the Horizontal and Vertical areas of your dialog box to reflect the position you would like. You can also set Relative to Equal to Page and then key in the values in the Position controls.
- Click on OK to close the Frame dialog box.
- Be certain the New Documents Based On this Template button is selected at the bottom of the Modify Style box.
- Click on OK.
- Close the Styles task pane.
Now, once you save your document or close Word, you will be prompted and asked if you want to save your changes to the template. Make certain you do this! Your envelopes, when created in a document using this template, should now have your return address exactly where you specified it to be.
—