


How to add a MacOS-type QuickLook file preview to Windows.
Overview
Anyone who has used a Mac is familiar with a handy feature called QuickLook. On a Mac, you can preview a file by pressing on the spacebar. Videos will start playing, documents will be shown, and images will just pop up. It’s a lot faster than opening the file. However, this feature is not in Windows. There have been several alternatives to get this feature into Windows: WinQuickLook, Seer, and even Peek which was recently added in version 0.70 of the Windows PowerToys. But the best solution I have found is QuickLook.
Installing
QuickLook is a free open-source project licensed under GPL-3.0. It is available as a Microsoft Store package as well as being available on GitHub. At GitHub, it is available as an MSI version as well as a portable version. I recommend using one of the GitHub versions since the Microsoft Store distribution does not allow previewing files in the Open and Save File dialog windows. I installed the portable version from GitHub.
Out of the box, QuickLook works in the Desktop, File Explorer, Open & Save File dialogs, Everything (requires Everything to be installed as a service and not be run as an admin), as well as some file managers. It can be added to other file managers if the file manager allows setting up an external viewer.
Using QuickLook
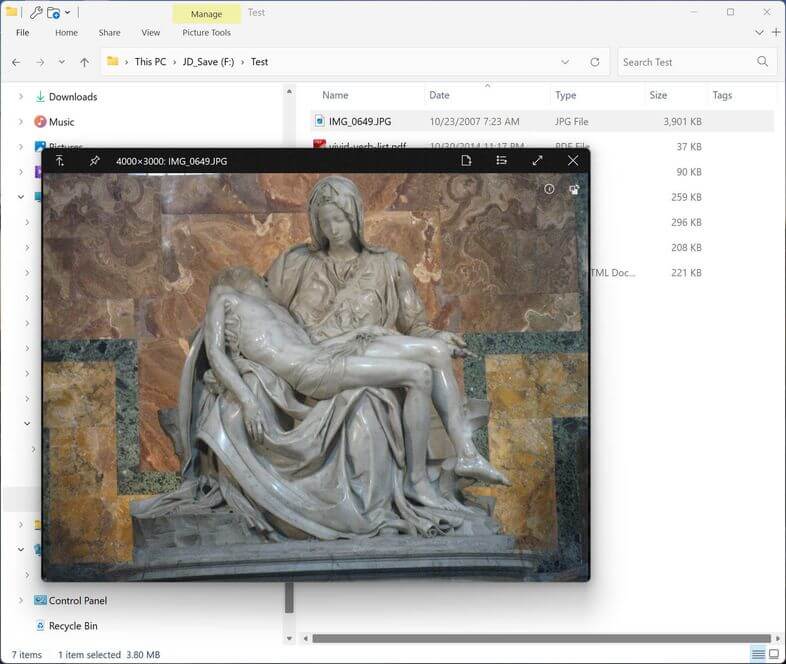
In File Explorer, when you select a file and press the spacebar, the file opens in a QuickLook preview window. Once the window opens, you can press the Up and Down arrows to quickly preview the previous or next file, which is a nice time-saver.
The QuickLook window has two useful buttons in the upper left corner.
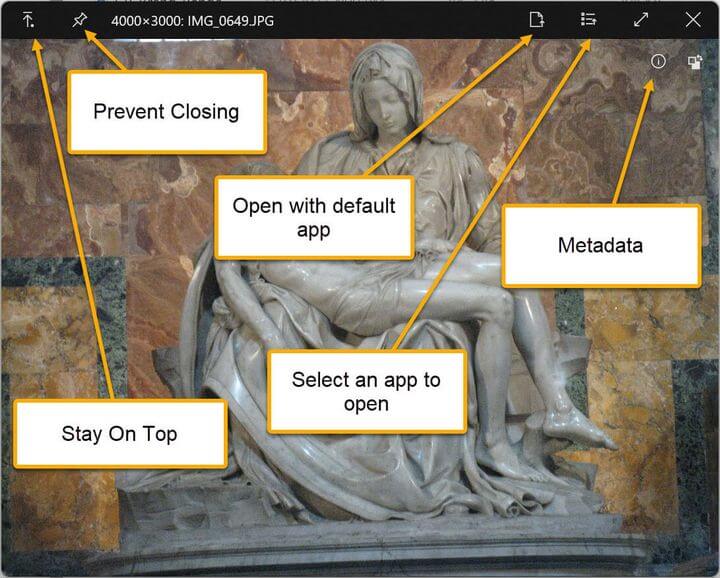
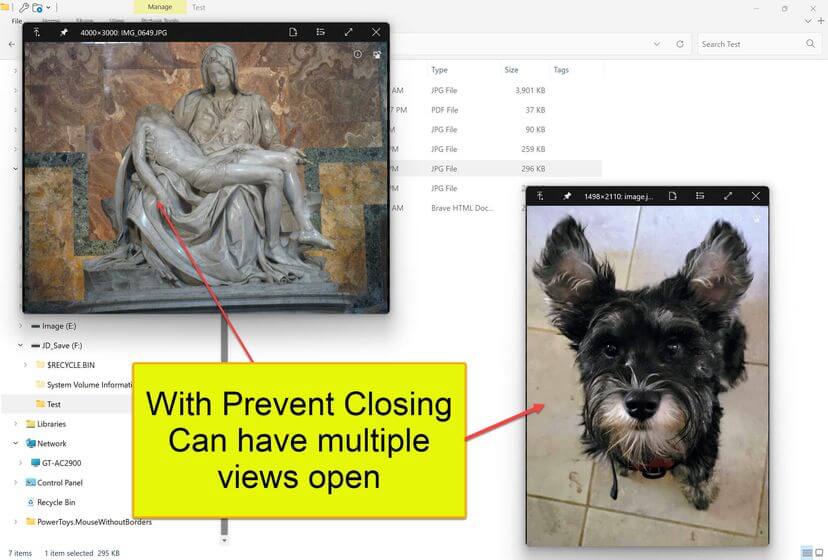
The first is the Stay On Top button that keeps the preview window visible even if you run another program. The second is the Prevent Closing button. This button allows more than one preview window to remain on the screen at the same time.
In the upper right corner, there are a few buttons. One button will open the file with the default application for the file type. Another button allows you to select a non-default application to open the file. For image files, there is a button to display metadata. There is also a full-screen view button.
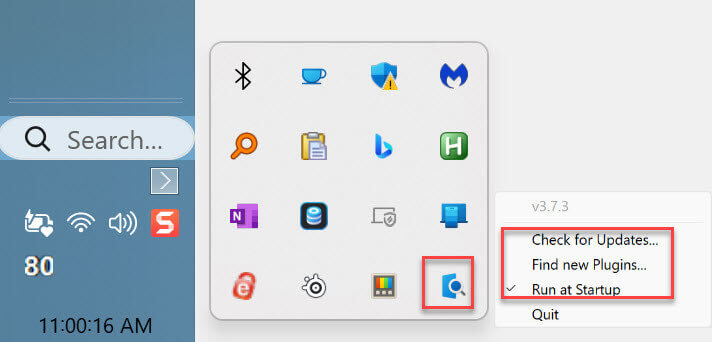
Using the system tray icon, you can set QuickLook to run at Windows startup, check for updates, and check for plugins.
File Types
Out of the box, QuickLook supports many file types:
- Most image formats including PNG, APNG, JPG, BMP, GIF, PSD, and RAW
- Most compressed archives formats including ZIP, RAR, TAR, GZ, and 7z
- Most audio and video formats including MP4, MKV, M2TS, OGG, MP3, M4A and AI
- Comma-separated values (CSV) files
- Email, HTML, and Markdown files: EML, MSG, HTM, HTML, MD, and MARKDOWN
- Most text files (determined by file content)
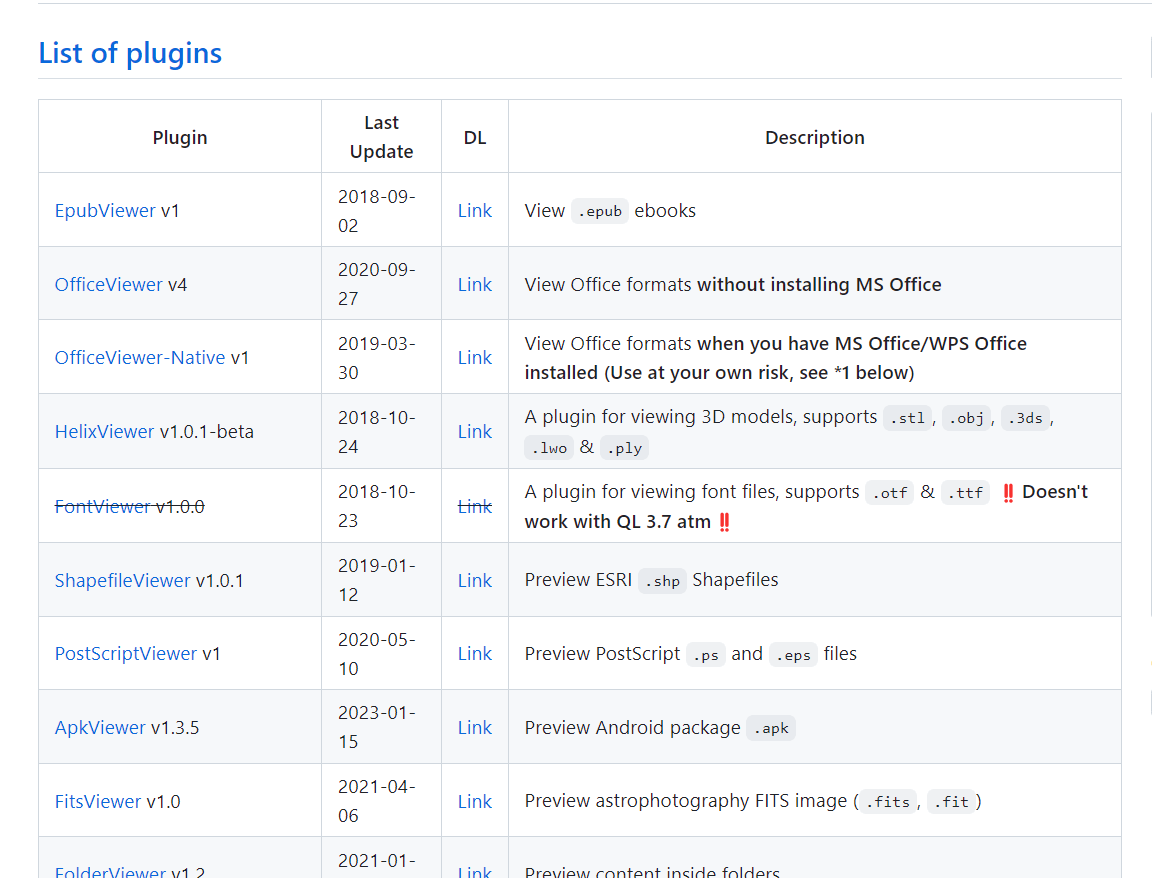
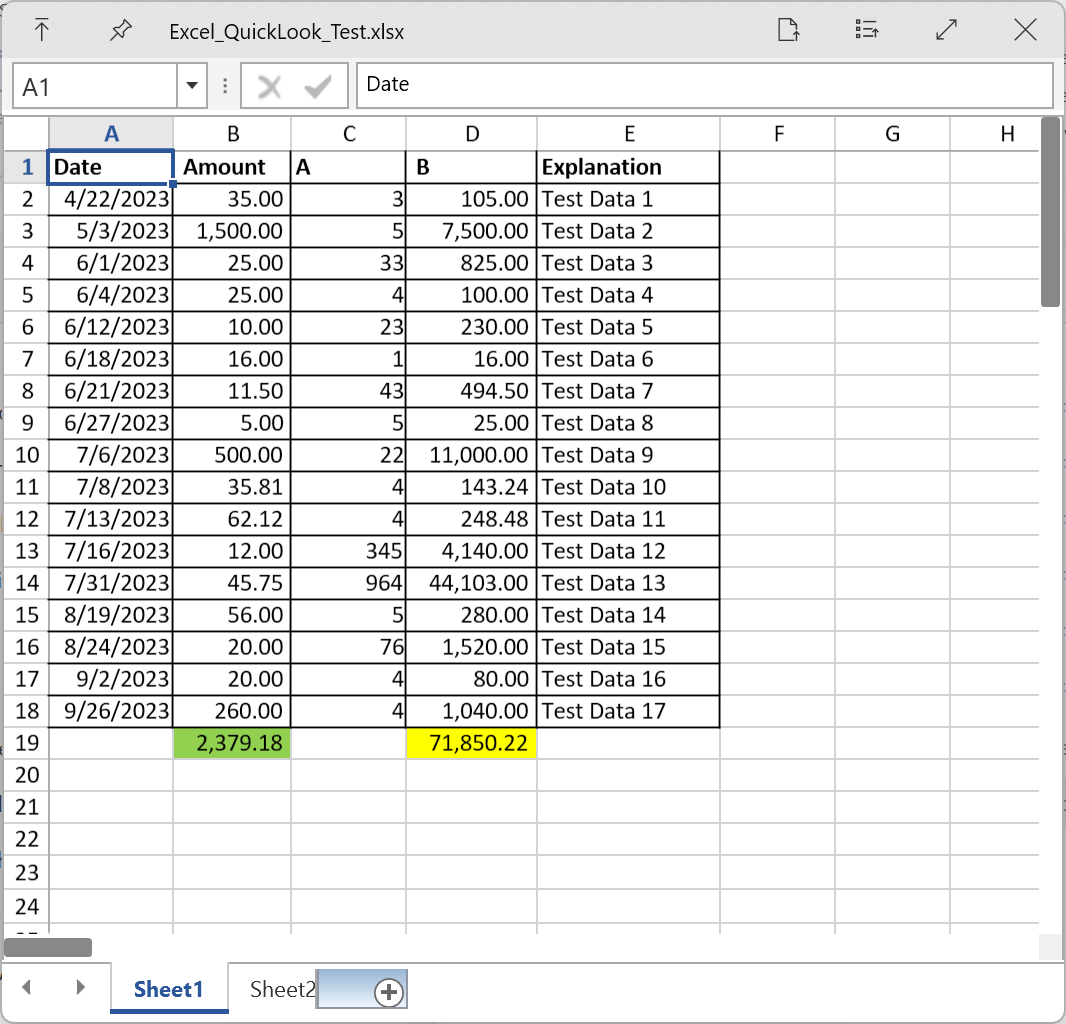
Other file types can be added using plugins (some examples are ebooks, torrents, PostScript, and Shapefile files). I added a plugin to display MS Office formats.
Bottom Line
QuickLook is a handy program that adds a MacOS file preview functionality to Windows. It is free, open-source, and portable. It runs natively in the Windows Desktop and File Explorer and can be added to other file managers.
—


I want this! I want the GitHub version. But I’m lost on that website. I’ve tried several things, including searching for “download quicklook from github”. That took me to a QuickLook for
Windows page that looked like the right one, but when I clicked on any link on that page, I landed on a confusing list a yard long* that had nothing that looked like the installer I need. Could you drop some breadcrumbs to help us GitHub neophytes find the actual download?
*Confusing list here: https://github.com/QL-Win/QuickLook/tree/master.
Hi GrannyGeek,
Yes, it seems every GitHub page is just a little different. Use that URL you have, page down to the Download/Installation section. Click on the “GitHub Release” link. As I type this, the current release is 3.7.3. Page down under that release to the “Assets” section. Now choose either the MSI or ZIP (portable) version.
Thanks, John, for those extra instructions. Now have a new tool to get to know and use, Mindblower!
Hi Mindblower, your welcome. Let us know what your thoughts are after you get to know and use it.
For whatever it might be worth to anyone, I tried changing the install location to the C:\Program Files folder. That spun out and told me I needed Administrator privileges. After spending half an hour digging around, I confirmed that I was logged on with those privileges, so I tried installing again in the default location and that finished in less than a single breath. I LOVE this app! My ancient version of Office 2013 had quit cooperating with the Preview Panel option. I’m breathing a huge sigh of relief to have something even better now. THANK YOU John Durso for bringing this to our attention.
Hi GrannyGeek,
Your welcome, I’m glad that you are enjoying the program and solved your installation issue.
John. Still find myself forgetting to use this program. Guess I am used to what I have and accustomed to using those programs. But this might be a valuable tool to others, so thanks for keeping us updated, Mindblower!
Hey Mindblower,
Yes, brain memory is probably the hardest thing to change :).