 Signing in to Windows is like giving a two year old a bath – it needs to be done, but no one is happy about it! In the past we may have skipped entering a password or performed super secret settings trickery so we didn’t have to enter the password at every login. Today is a new day and entering a password at login is fast becoming a necessary evil, which brings about the usual problems – such as forgotten passwords and passwords written on sticky notes – we’ve been dealing with since the stone age. Use your imagination and envision a cave man sitting at in front of his Rockpaq computer while chiseling his password onto a stone tablet. It happened! I promise!
Microsoft has made great strides toward simplifying the sign-in process with Windows 10 while maintaining the added security a password provides, and I’m sure many of you with sticky notes on your monitor will appreciate it. In addition to the normal password we all know and love – that was sarcasm in case you missed it – we now have the option to use PIN numbers, photos, fingerprints, and even cameras to log into Windows 10.
Let’s have a look at the options and I’ll go into more detail for the more popular Windows 10 sign-in options.
Windows 10 Account Settings
To view the settings available to sign into Windows 10 we must first open the Account Settings panel
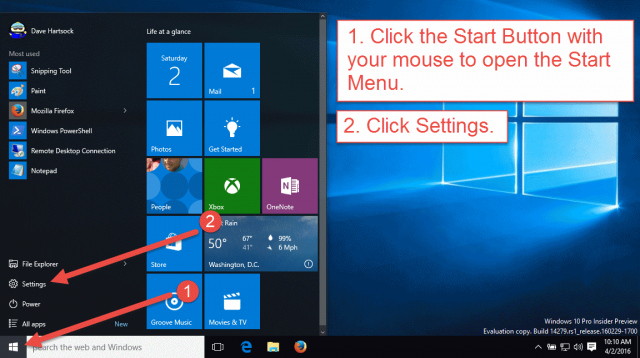
- To access Windows 10’s sign-in options you must open the Settings panel. Click on the Start Button (Windows icon) in the lower left corner to open the Start Menu.
- Click Settings in the Start Menu to open the Settings panel.
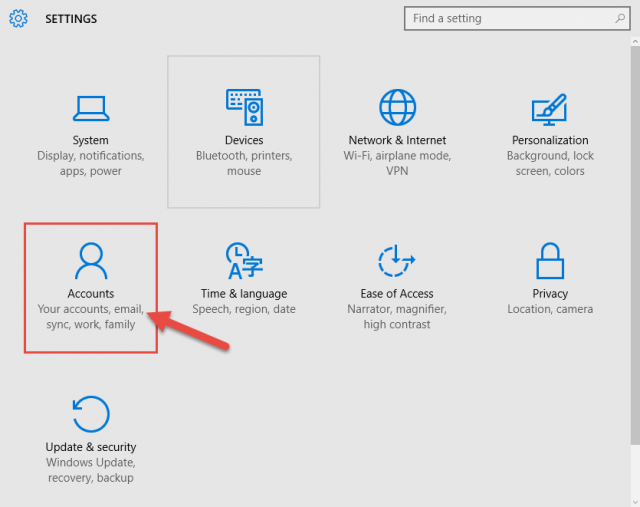
- Click on Accounts in the Settings panel.
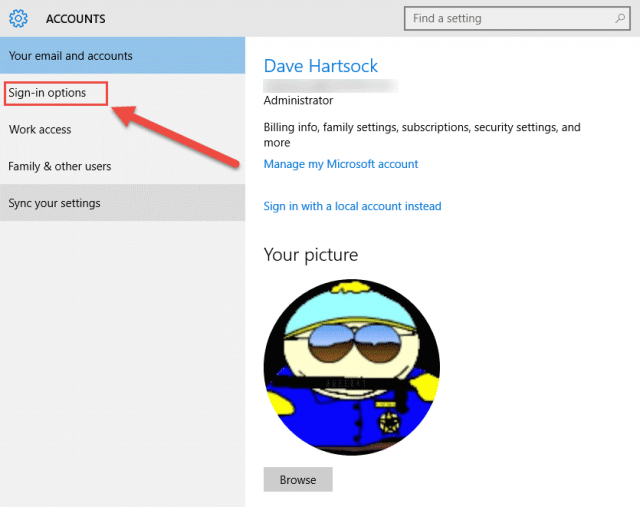
- Click Sign-in options in the Accounts panel.
Windows 10 Sign-in Options
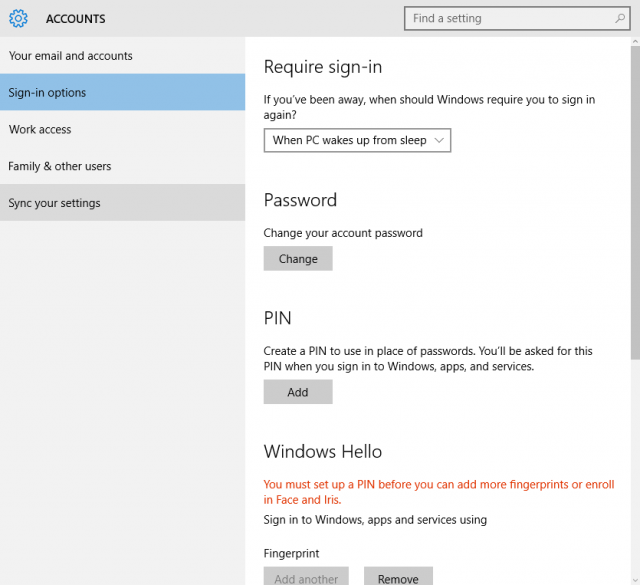
As you can see below there are quite a few options on Windows 10 related to signing in. Passwords, PINs, and Hello? Hello? What’s a Hello? Let’s have a look at each option in the Sign-in options pane and see what they do.
Require sign-in
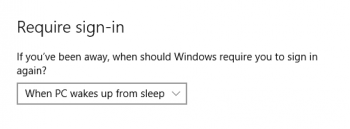 It’s a given that you will have to authenticate yourself when you initially boot your computer, but most Windows installations default to sleep mode after some period of inactivity. This setting controls what happens when your computer wakes from sleep. The options are Never and When PC wakes up from sleep. If you choose Never you will not have to re-authenticate when the computer wakes. If you choose When PC wakes from sleep you will need to authenticate yourself each time, which is my personal preference.
Password
 This appears straightforward at first – Hey it changes your password, right? If you are using a Microsoft account to sign into Windows 10 this will change your Microsoft account password, which will change the password you will need to supply if logging into your outlook.com email or any other Microsoft accounts that require your outlook.com credentials. If you are not using a Microsoft account to log into Windows 10 this will change the password on the local computer.
PIN
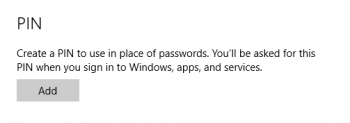 The third option to use a PIN number, which will be unique to the device – your computer in this case. You may be familiar with a PIN number if you have a smart phone. A PIN is basically a password lite and since it is unique to one computer it may offer a slight security advantage for those using their Microsoft account to sign-in on Windows 10. At the very least it will (hopefully) be easier to remember the PIN – just don’t forget your real password!
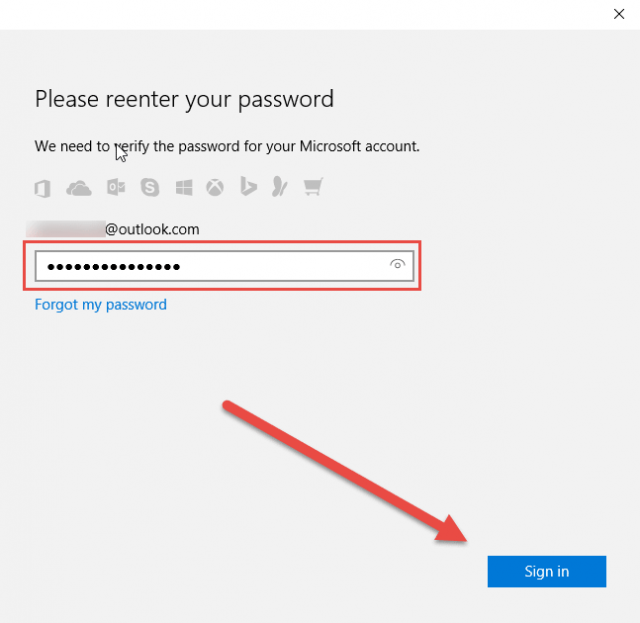
Click on Add, which will open a new window asking you to verify the password of your Microsoft account. Enter your password in the provided box and click Sign in.
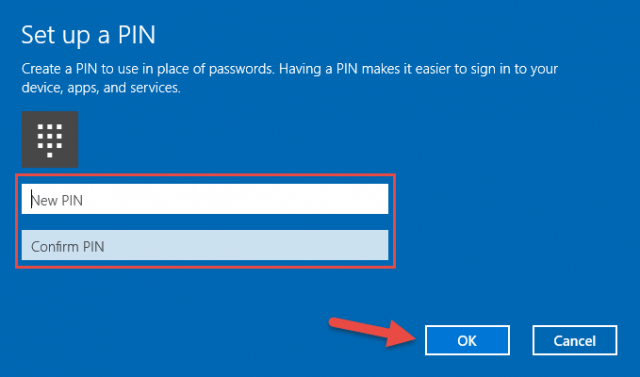
If you’ve entered the password correctly you will be presented with the following screen. Choose a 6 to 8 digit PIN and enter it in the provided boxes. Click OK to accept your new PIN.
When you boot your computer you will now be able to use a simple PIN instead of complicated password.
Windows Hello
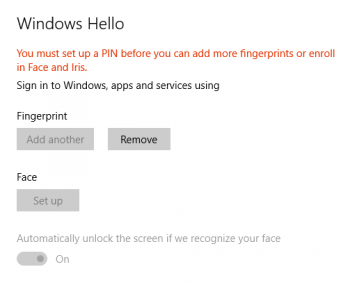 Hello is a special addition to the sign-in options introduced in Windows 10 that has special requirements and may not be available on computers not meeting those requirements. Microsoft describes Hello as “a more personal way to sign in to your Windows 10 devices with just a look or a touch. You’ll get enterprise-grade security without having to type in a password”.
Windows Hello does bring a more organic and flowing relationship to computer security by allowing a user to authenticate themselves using fingerprints or facial recognition. To use Hello your computer must have either a fingerprint reader or an Intel RealSense camera, which is a small package containing three cameras using infrared and laser technologies to perceive depth.
If you do not have either of these devices attached to your computer Windows Hello will not be available and will appear grayed out.
Picture Password
 The final option is Picture password, which allows you to sign-in to a computer using a picture and gestures of your choosing. Windows 10 will display the picture and you must perform the gestures you create when setting up Picture password.
Perform the gestures correctly and you are immediately logged in. Pretty simple and I’m sure many will find this an easy way to log into their computer.
To create a Picture password click the Add button under Picture password on the Sign-in options pane.
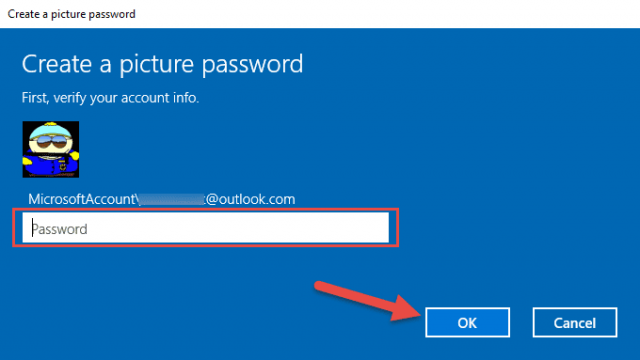
You will then be required to authenticate your password for your Microsoft account, or your local account if you used one. Enter your password and click OK.
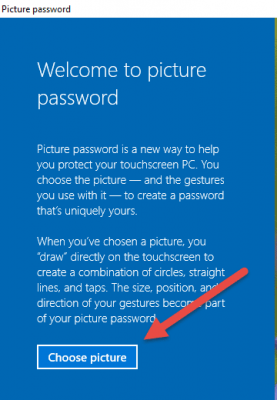
Next you need to pick a picture by clicking the Choose Picture button.
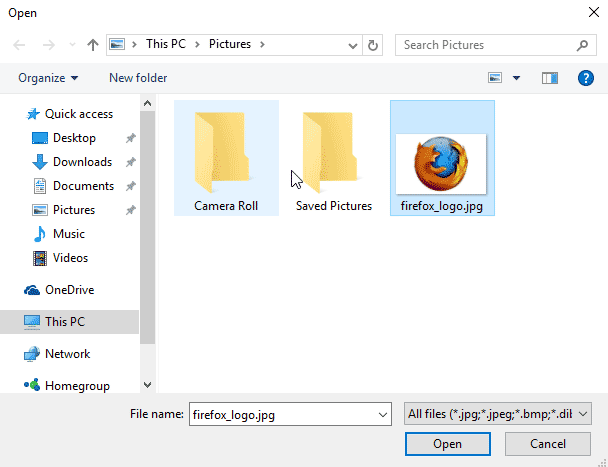
An Explorer window will open. Navigate to a picture of your choice, click the picture and click Open.
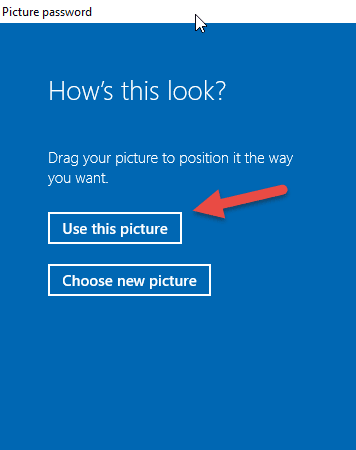
Your image will appear in the window. If the image is too large to display as a whole you may drag the picture around so a more pleasing area is displayed. After you are satisfied with everything click Use this picture to proceed.
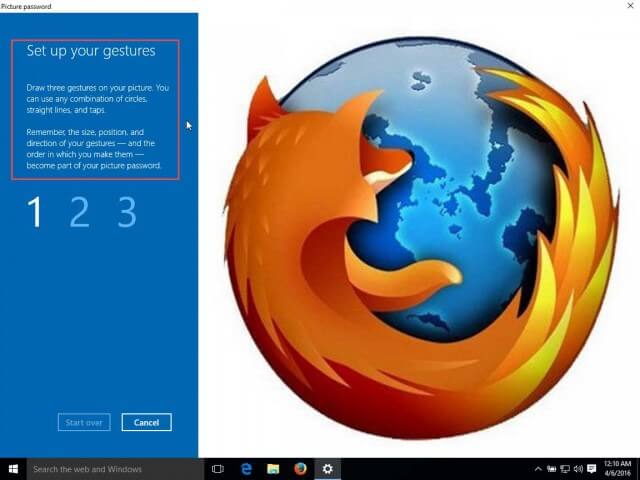
At this point you need to create the gestures you will use to login. You can use circles, lines and clicks and there must be 3. A good example would to click on the nose, arm, and tail, but you could use any combination you like at any positions on the image.
Once you’ve completed your 3 gestures you will be asked to confirm them by repeating them one more time. After your Picture password gestures are confirmed the buttons at the bottom will change to Finish. Click Finish to continue.
You are now ready to impress your friends as you login using Picture password!
The next time you reboot or the computer wakes from sleep you will be presented with your picture. All you need to do is complete your three gestures to login.
Conclusion
As you can see securing your computer is so much easier than just a few short years ago with options to use passwords, PINs, pictures, fingerprints, and even your face available. Hopefully one of these choices will make your life easier and convince others to actually lock their PCs down a little further!

Hi Dave
Along with the sign-in options I do wish you would have elaborated on the difference between the W10 Local Account and the Microsoft Account.
The Microsoft Account does give one more options, especially if one wants to use the Microsoft Store.
It seems that when I upgrade a PC to W10 that no one has a Microsoft Account or even a valid email. So I setup a Local Account and leave the password blank, from their on it is up to the PC user to change their sign-in options.