Windows 10 offers its users many little-known system tweaks designed to improve performance. One of the many ways to do this is to improve the graphics priority given to programs on an individual basis and today’s Quick Tips article will show you how.
Graphics Settings
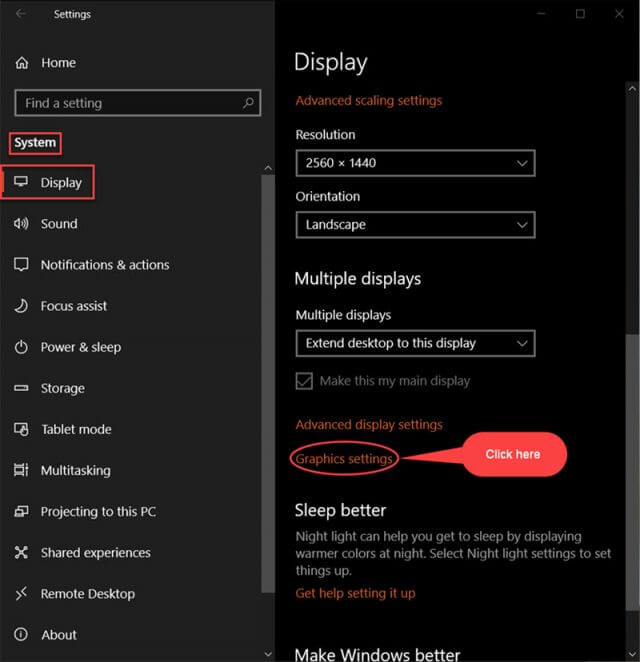
- Use the Windows Key + I to open the Settings App
- Choose System
- Choose Display
That should bring you here:
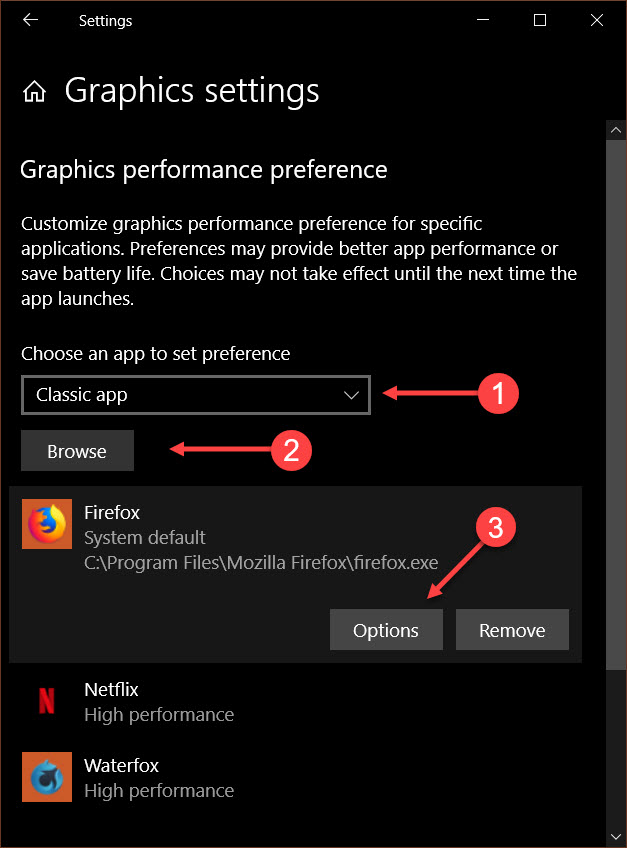
In the right-hand panel, choose Graphics settings to bring you to this next screen:
In the drop-down menu, there are two choices: Classic and Universal. Classic refers to regular desktop programs, and Universal refers to Universal Windows Programs (UWPs) you might have installed from the Microsoft Store. If you choose Classic, you will be offered a Browse button as shown in the above image. Click it to browse to the executable file for the program you want. (In this case, Firefox was chosen.)
If you choose Universal, you will see a list of the UWPs installed on your computer that Windows is aware of. In either case, once you have made your choice and added the program/utility to the list, an Options button will become available when you click on the specific program.
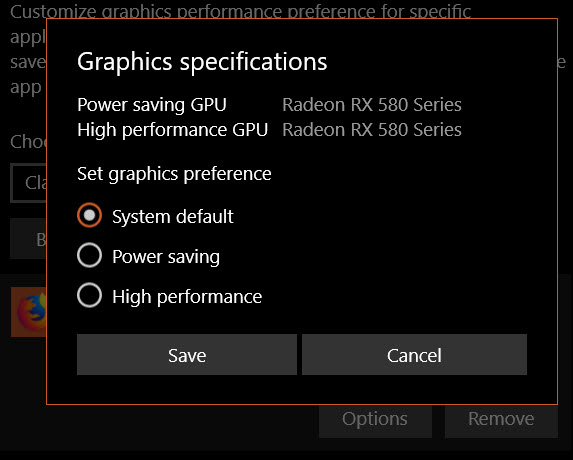
Clicking the Options button will show you a screen similar to this one:
As you can see, there are three options here. Tick the Radio button for the preference you want, then click Save.
Bonus Tip – Radio Buttons vs Checkboxes
- Radio buttons are grouped together in what is known as a Panel. Only one Radio button can be chosen at a time. Selecting a Radio button negates the others
- Checkboxes are also grouped in Panels, but zero, one, or multiple Checkboxes within that panel may be ticked
- Panels may or may not be visible to the User. Sometimes they are surrounded by a faint rectangle or beveled edge and other times they are not. This is strictly based on a choice by the programmer
Now you know.
As always, if you have any helpful suggestions, comments or questions, please share them with us,
Richard
—


Looking forward to your newsletter