Data Usage History
Windows has always stored information about nearly everything that happens on your system and your usage of the internet is no different. Sometimes it can be a handy thing to know which programs and utilities are eating up your precious bandwidth and this week’s Quick Tips article will show you how.
History Overview
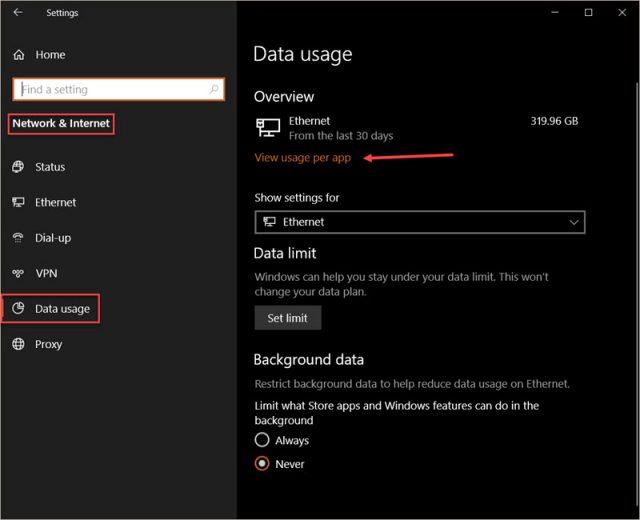
Follow these steps to see the Data History Overview for the past 30 days:
- Use the Windows Key + I shortcut to open Settings
- Click on the Network & Internet icon
- In the window that opens, choose Data usage in the left panel
That should bring you to a screen similar to this one:
As shown in the above image your full internet usage for the past 30 days is shown. The drop-down menu will let you choose between Ethernet and Wi-fi usage. To see a list of individual programs, click on the link labeled View usage per app.
Individual Program Usage History
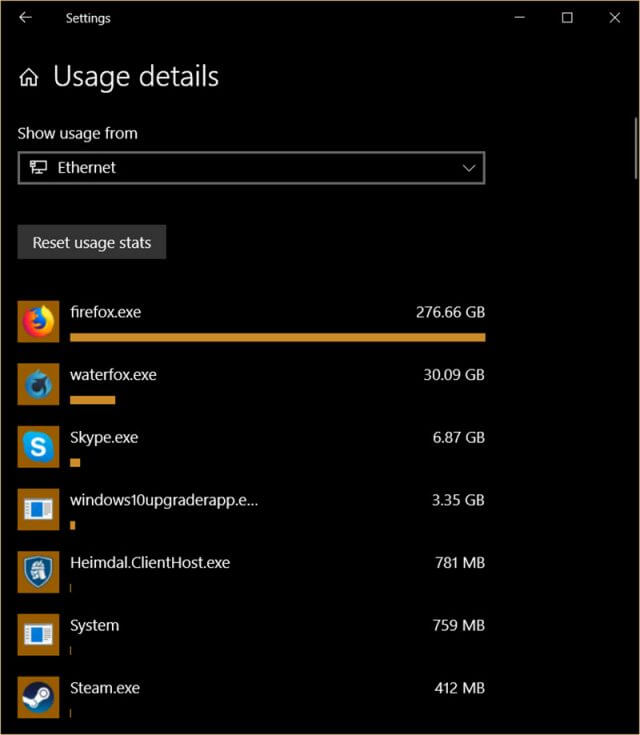
That should bring up a screen like this one:
I use Waterfox for browsing and Firefox for watching movies– this explains the huge difference in bandwidth usage. By arming yourself with even this limited amount of information you can sometimes see the guilty culprit that is chowing down on your bandwidth. This will be important to those of you who have usage caps imposed by your ISP.
As always, if you have any helpful suggestions, comments or questions, please share them with us,
Richard
—


Hi Richard,
That is a great tip to ‘spread around’.
I use it often to amaze myself which program uses the most data.
Many thanks,
Jonno
Thanks, Richard,
Lots of useful information.
Just to add,
If you hover the mouse over the program using the data, it will also give you the path to that program which is helpful if you want to dig a bit deeper.
Great tip, Norbert! Thanks!!