If you’ve missed our past articles on Windows Home Server 2011 you can catch up by reading the previous articles covering installation of Windows Home Server 2011, installing the Connector software, the Dashboard Home tab, the Dashboard Users tab, and the Dashboard Computers and Backup tab. If you’ve been considering adding Windows Home Server to your home network you can find Windows Home Server 2011
for under $60.
Windows Home Server 2011 Dashboard: Server Folders and Hard Drives tab
The Dashboard is your one stop shop for functions and settings for Windows Home Server 2011. It is available from the server itself and since most home servers will live their lives in out of the way places the Dashboard is also available from each client computer that has the WHS Connecter installed.
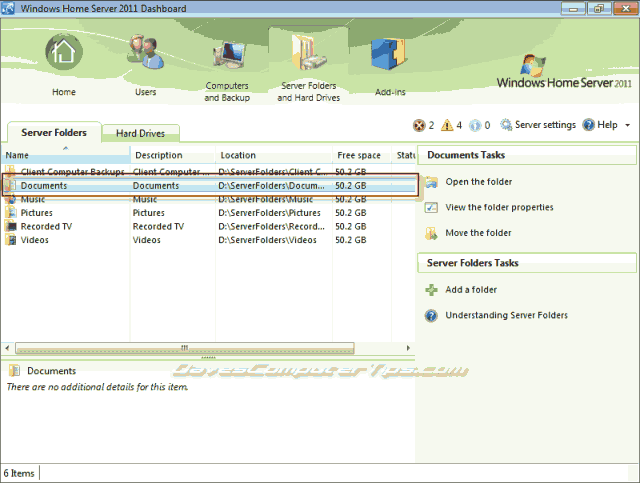
Open the Dashboard and click on the Server Folders and Hard Drives tab. You should see the following screen. Just as with the other tabs we’re previously covered the screen is broken down into 2 main sections with information presented in the left pane and available actions presented in the right. The options listed in the right pane are default actions and change based upon selections in the left pane.

The left pane shows the name of the folder, a brief description, the location (path) to the folder, how much storage space is available for the folder, and any status messages. Selecting a folder in the left pane will change the right page and it will show all options available based on your choice.
Server Folders and Hard Drives – Open the folder
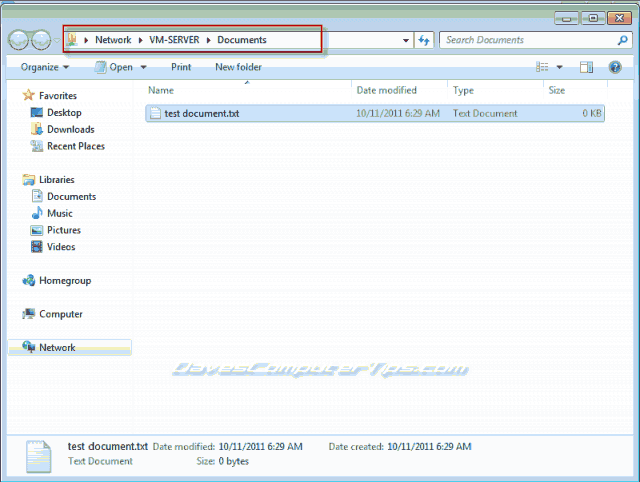
Clicking Open the folder is pretty self explanatory, and will open an explorer window showing the contents of the selected folder.
Server Folders and Hard Drives – View the folder properties
Clicking View the folder properties opens a windows showing the name and description of the selected folder. If you wish to change the folder description simply enter your new description in the text box and click OK.

Clicking the Sharing tab of the properties window will show you the current settings for the selected folder for each user you’ve created on your server. Here is where you change the sharing permissions just for the selected folder on a user by user basis.

The options are:
- Read/Write – The user may read, write, run, create, and delete files located in this folder.
- Read – The user can only read or run the files located in this folder.
- No access – The user has no access to files. They will not appear to the user.
If you wish to alter a user’s permissions for the folder simple select the drop down menu beside the user and choose the appropriate choice. Once you are done making changes click OK, which will cause your changes to take affect, close the window, and return you to the Server Folders tab.
Server Folders and Hard Drives – Move the folder
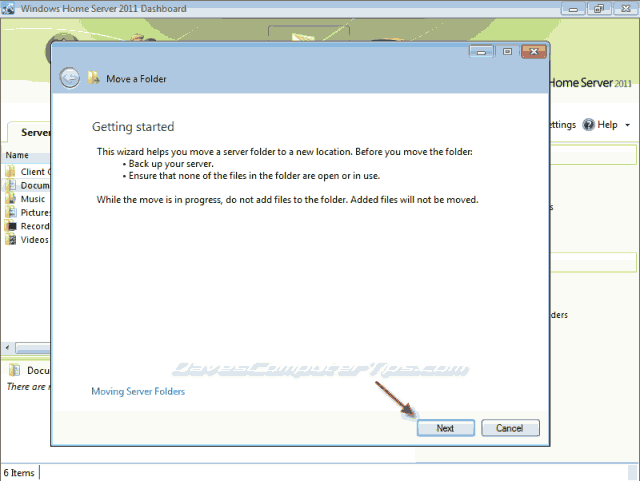
As the amount of data you store on the server grows you may notice that available storage is becoming smaller. The best solution is to add additional an internal or external drive to your home server. WHS has a built in method to move a folder to another drive along with all associated settings for that folder. It greatly simplifies increasing your server’s storage capacity. Clicking Move the folder will open the following window with a wizard to guide you through the process. Read the warnings – it’s always a good idea to have a backup – and click Next.
You’ll be shown the folders name, description, current location, and size along with locations where the folder can be moved and the available storage size at those locations. Select the location where you want to move the folder and click Move folder.

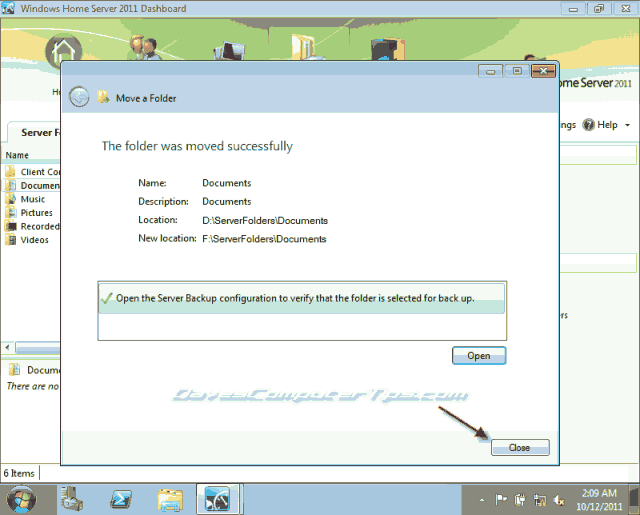
WHS will create the folder location and move your files from their current location to the new location. be patient as this could take some time depending on number and size of the files contained in the folder. After WHS is finished you’ll see the following window asking you to open the server back configuration and verify that the new folder is included in your server backup. If you aren’t worried about the data in the folder being backed up you can skip this step, but for those who want to know their data is safe click Open.

The Customize Server Backup wizard will open. Click Next to start the wizard.

You’ll be presented with two choices: Change Server Backup settings and Disable Server Backup. Choosing Disable Server Backup will close the wizard and return you to the Move a folder wizard. Choosing Change Server Backup settings will open a new window to guide you through changing the backup settings.

If you chose Change Server Backup settings the following window will appear showing the available backup locations – This is the same process we discussed in the Dashboard: Home tab post. If more than one location exists choose the appropriate location by placing a check mark in the box beside your choice and click Next.

Enter something descriptive in the text box to remind you later what purpose the drive has and click Next.

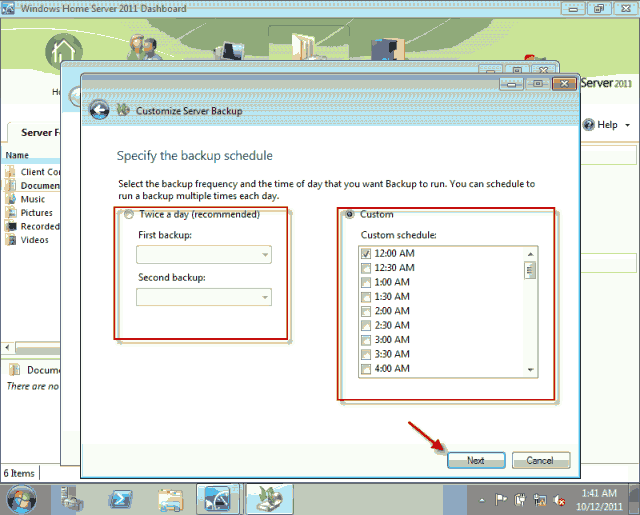
Here you’re able to pick the number of backups created per day and the times those backups are made – if you’ve previously setup server backup the setting are retained and displayed by default. The left pane allows twice daily backups with times of your choosing and the right pane allows a custom schedule were you can choose any number of backups and times. Make any changes and click Next to proceed to the following step.
This example began with a move of the Documents folder from D: to F: and the Documents folder was included when server backup was initially configured. When the window opens to allow you to choose what you want backed up you’ll notice that any choices you made earlier (if) when you setup the server are retained and WHS has maintained the Documents backup setting even though it is now on a different drive. Pretty slick! Carefully review the items to include in the server backup and make any changes you deem necessary. Click Next to proceed.
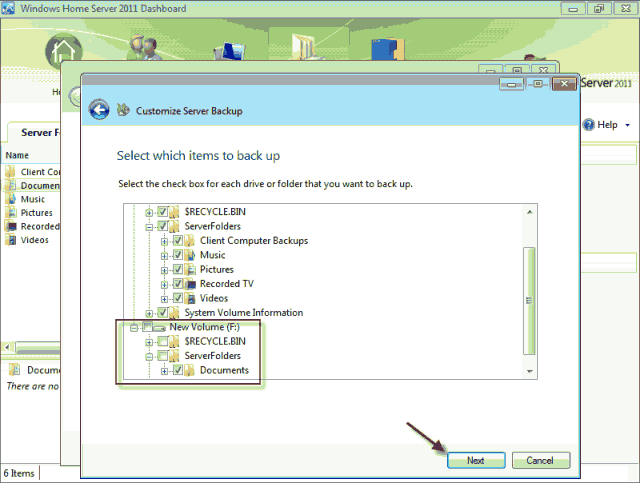
You’ll be presented with a summary of the server backup settings you’ve chosen. Review the screen carefully and click Apply settings to commit the settings.

Success! Click Close to return to the Move a folder wizard.

Click Close to to close the Move a folder wizard and return to the Server Folders and Hard Drives tab.
Server Folders and Hard Drives – Add a folder
The folders on the server are the central point of storing and sharing files. By default WHS 2011 contains the following folders:
- Client Computer Backups – location where backups for the client computers are stored.
- Music – location where user music is stored.
- Pictures – location where user pictures are stored.
- Recorded TV – location where TV shows recorded by Windows Media Center can be stored.
- Videos – location where user videos are stored.
You can add any number of additional folders depending on your needs. A good example would be if you wanted to have pictures that you share with family and friends along with pictures you wish to remain private or limit sharing to only particular users. To satisfy this requirement you could create a new folder named Shared Pictures and because WHS allows you to control sharing on a per user basis you could allow sharing with everyone for the new folder while limiting who has access to your normal Pictures folder.
Open the wizard by clicking Add a folder under Server Folder Tasks. Enter the Name of your new folder and a thorough description that will remind you what the contents of the folder are. WHS will automatically fill in the path based on the Name you choose. If you would like to manually assign a different location you may do so by clicking the browse button. Once you have all of the fields entered click Next to continue.

The next window allows you to change the permissions for the new folder. The first two options are self explanatory and the third allows you to set access permissions on a per user basis.
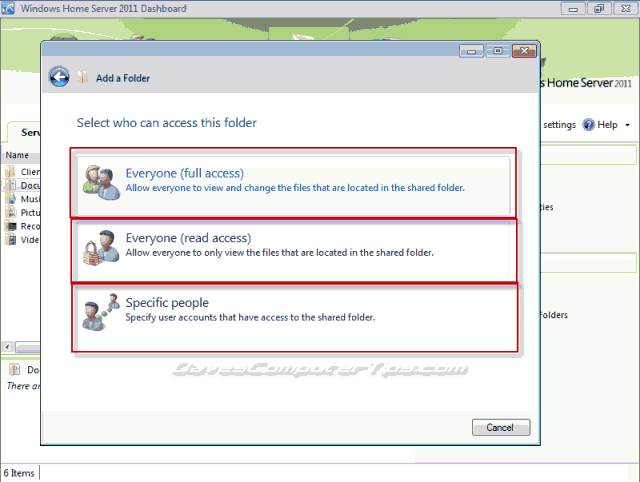
Success! You are again offered the option to review the server backup configuration, which is exactly as explained above. Once you are satisfied click Close to return to the Server Folders and Hard Drives tab.

The new folder now appears in the Server Folders list of the left pane in the Server Folders and Hard Drives tab.

Hard Drives
You may have noticed that the Server Folders and Hard Drives tab is broken down into two sub tabs. The second tab is Hard Drives and clicking the tab will show you to following screen. Again the left pane lists the hard drives installed while the right pane displays options available and updates the options available depending on any selections made in the left pane.

Selecting a drive in the left pane shows the option of View the hard drive properties. Click View the hard drive properties to open the following window. On the General tab you’ll find useful utilities that allow you to delete any unnecessary files from the drive to gain storage space and the ability to run a CheckDisk on the drive to find and repair damaged sectors. Clicking OK will close the window.

The Shadow Copies tab allows you to enable(default) or disable shadow copies on the drive and (if enabled) the next scheduled time that shadow copies will be created. Shadow copies are useful as they allow you to access previous versions of files – I recommend that you leave this enabled. Clicking OK will close the window.

Selecting a drive in the left pane that has previously been designated as a backup drive will change the displayed options to include Remove the hard drive from Server Backup. This is useful if you wish to add the drive to the server’s main storage pool, but will erase any backups saved to the drive.
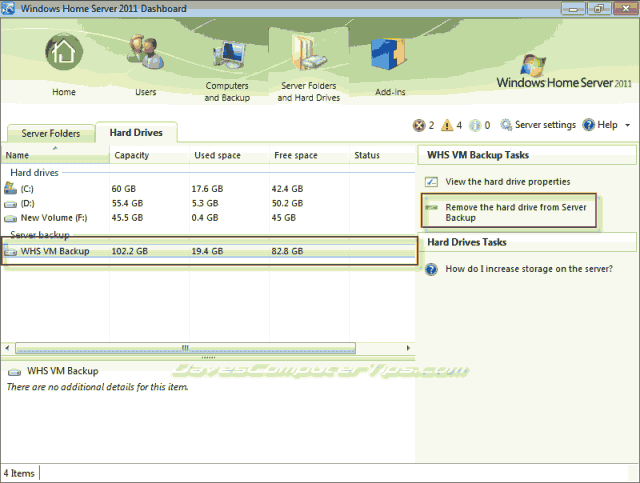
Clicking Remove the hard drive from Server Backup will (again) open the Customize Server Backup wizard. If you are sure you wish to remove the drive from server backups click Next – otherwise click Cancel. This is the same wizard described in detail above, so I won’t rehash it.

So, now you know everything there is to know about the Server Folders and Hard Drives tab of the Windows Home Server 2011 Dashboard. Have a celebratory beverage and pat yourself on the back – you deserve it!

why not using freenas? What are the limitation of this “server” thing?
FreeNAS does not support printer sharing
Dave,
What about adding additional storage space? Say if you had a standalone, external NAS that was only storing video files/movies, but you would like it to be included in you ‘Server Folders’ listing?
What steps are needed? Would you have to format the drive before you add it to the server?
Thanks!