If you’ve upgraded your PC to Windows 10, you may have noticed a folder in the root of C drive (your system drive) called “Windows.old”:
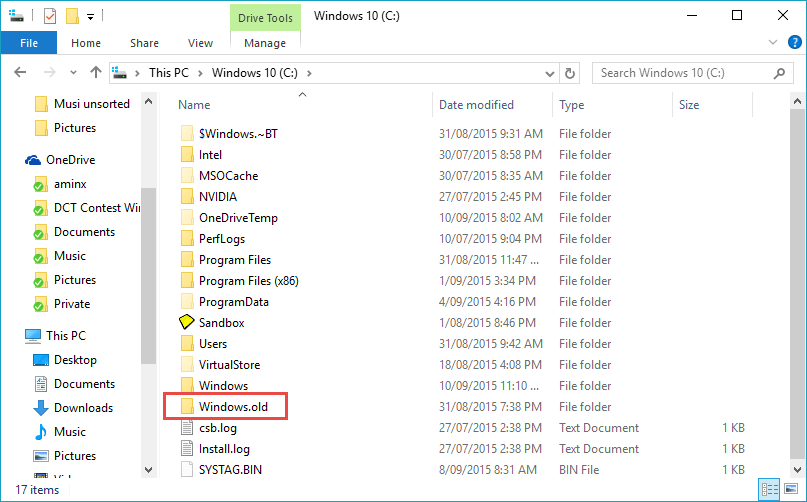
This folder contains files and data relating to your old installation, the operating system you upgraded from, and is what Windows utilizes to perform the “rollback” operation. As such, this Windows.old folder is quite large, 17+GB in my case, so could be hogging a lot of precious space on your hard drive.
Two important notes:
- If you’re even thinking that you might want to rollback from Windows 10 to your previous Windows version, do not delete this folder!
- Unless you’re seriously strapped for hard drive space, you don’t really need to do anything. Windows 10 will automatically delete the folder 1 month after you performed the upgrade.
That said, if you have no intention of rolling back and don’t want to wait, you can delete the folder straight away, but not in the way you might think. If you simply right click the folder and select “Delete”, you’re liable to run into all sorts of those pesky permissions issues – you don’t have permission to this and do that, yackety-yak, blah-blah.
Here’s the correct way to delete the Windows.old folder:
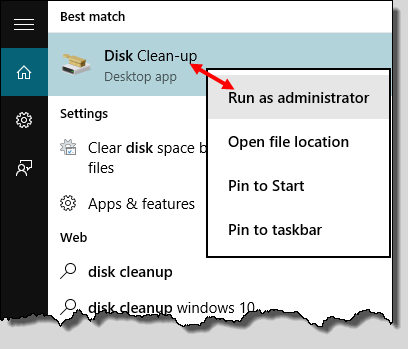
- Open the Start menu and type “disk cleanup”, then right click the top item and select Run as administrator
- In the next window, click OK and wait for the scan to complete
- Now scroll down until you see “Previous Windows installation(s)” and check the adjacent box:
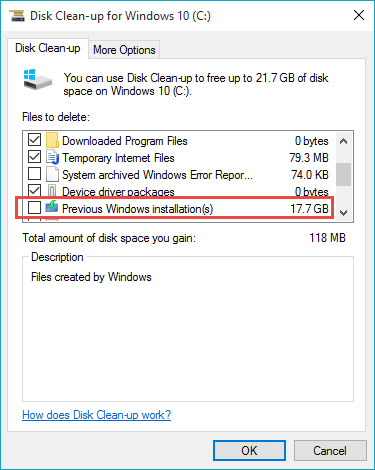
- Lastly, click OK to start the cleanup process.
I must admit, I haven’t bothered deleting the Windows.old folder myself. Firstly because I wanted to make sure Windows 10 was running issue free before eliminating the option to roll back, and secondly because I have plenty of free space on my hard drive so can afford to wait until Windows deletes it for me.
What about you, are you hanging on to Windows.old just in case, or are you going to send it to oblivion right away?
I suppose that if you’re tight on space, but want to test out 10, you could always copy Windows.old out to an external drive & then delete it from C?
Should be able to bring it back afterwards if you then decided to rollback?
Or, is going through disk cleanup to remove it going to also remove other files associated with that folder (within registry, etc)?
In that case, you’d back it up & just outright delete Window.old. Then bring back the folder if you regret 10 within that month (& in order to do the delete as you’ve described).
As I said in the article; if you try to delete the windows.old folder the traditional way, you’ll run into all sorts of permissions issues.
Sure, if you have the patience plus the know-how, these can be overcome, but it would be a time consuming hassle for most users.
I’m approaching this for ALL users- assuming you are not excluding those a tad above the n00b?
Now’s a fine time to tell me! After I did it the wrong way! ; )
Thanks Jim.
Actually, I imaged Win7, added an SSD to my box, loaded the image onto the SSD, upgraded to Windows 10 and set up dual boot with EasyBCD.
I also copied Windows.old to my backup drive (in case I wanted it back), then deleted Windows.old the hard way, er, mostly deleted it; the folder remains (I don’t have permission). I guess I could restore Windows.old and try Disk Clean-up!