An older couple was having problems with their computer. It initially seemed like it was having an issue keeping its settings. For example, I would set up Chrome for them, and then it was gone. Without going into too much detail, I gradually realized what was going on.
This is on an “HP Envy 23,” a desktop all-in-one with Windows 10. They said they have had it for 14 years now. I believe it originally had Windows 8 or 8.1.
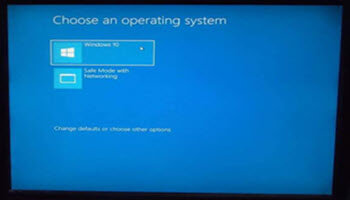
When they first turned on their computer they would go to a screen that said “Choose an operating system”. I set this up on my computer to give you some idea of how it looked.
But their second choice was to “Reset the system”. I believe that they clicked on the reset option one too many times.
To Bypass Screen
I decided to remove the temptation of this screen so it would go directly into Windows.
Type “advanced system settings” in search. No quotes. Click on it when it appears in the menu. Click on the “Advanced” tab if you are not already on it. In the “Startup and Recovery” section click on “Settings”.

On the next screen, uncheck “Time to display list of operating systems”. Then “OK”.
Extra tip: Before clicking OK you might want to uncheck “Automatically restart”. If you ever have a BSOD this would stop the computer from restarting automatically so you could read the error message to help troubleshoot.
After a restart, the computer booted directly to the Windows logon screen.
If You Want To Delete An Entry – Proceed With Caution
In search type “msconfig”. Click on the “Boot” tab.
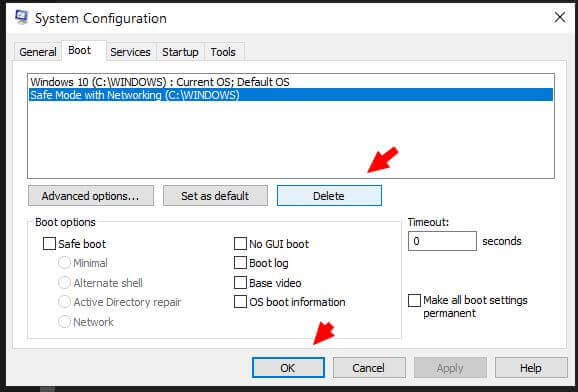
Highlight the entry you want removed. I’m going to remove the “Safe Mode with Networking (C:\WINDOWS)” entry.
Click on “Delete”.
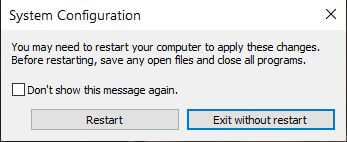
In the next box to open click on “Restart”.
To Add Entries
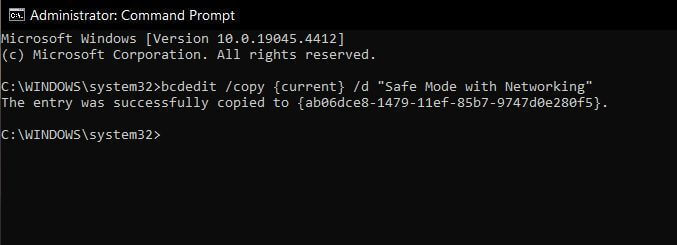
To add an entry, open the command prompt with Administrative Privileges. Type “cmd” in search and click “Run as administrator”.
Then type one of the following lines depending on what you want to add. Then click Enter. Restart your computer to see the results.
bcdedit /copy {current} /d “Windows 10 Safe Mode”
bcdedit /copy {current} /d “Safe Mode with Networking”
bcdedit /copy {current} /d “Safe Mode with Command Prompt”
So that’s some of the basics of working with this screen. This solved the missing setup problem.
—