![]() I work on a lot of legal documents for clients and I love using this tip when I do. But, you can use this tip regardless of what kind of documents you work on.
I work on a lot of legal documents for clients and I love using this tip when I do. But, you can use this tip regardless of what kind of documents you work on.
Legal Assistants and Paralegals always complain to me that they create a pleading for their attorney on one day and insert the date it was signed and/or filed with the Court and then the attorney doesn’t get around to signing it until a week or so later. So they have to either insert blank lines for the date of make sure they change the dates before the attorney signs the document.
Wouldn’t it be great if you could make your document do its own updating??
I am sure that most of you know how to insert a self-updating current date in a letter, but what you may not know is that you can insert other system-based dates in your documents as well (i.e., date the document was created, last date it was printed or date it was last saved).
In most documents that need a date there is some verbiage such as On this (Ordinal) day of (Month), (Year) this document was mailed/signed, etc.
Follow the steps below to learn how to have your document update its dates:
The first step in the example above is the Ordinal date. Ordinal means the day of the month expressed as an ordinal number.
- To do this, click on the Insert tab of your Ribbon.
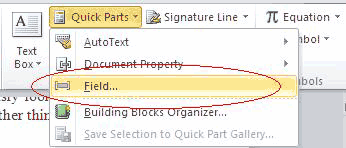
- In the Text group, click on Quick Parts and select Field:
- Once you are in the Field dialog box, pick one of the field names such as SaveDate and click on one of the date formats (it is not important which one you choose) as you will see below.
It is not important because you are going to isolate the day of the month thus:

- Now, you need to click Field Codes in the lower-left-hand corner to so that you can format the day of the month as an ordinal number. To do that you will need to insert what is known as a “switch.” Just key in \*ordinal after the d.
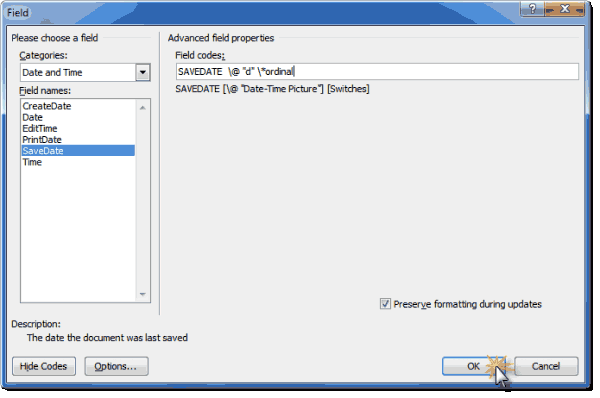
We have now taken care of the day of the month.
- Once you have keyed in the phrase “day of” in your document,you can insert a self-updating month and year:
- Go back to Quick Parts | Field.
- Using the same date field you selected earlier, just remove the day reference from the date and insert a comma between the month and year.

You now have a phrase that will automatically update.
You can now save this phrase to your Quick Parts Gallery:
- Select your phrase and go back to Quick Parts and select Save Selection to Quick Part Gallery.