In the first two parts of this series of articles, we’ve explained how to choose and test Linux distros (Part 1) and have taken you through the process of installing Linux Mint Cinnamon Edition (Part 2). In this final installment, I’ll be showing you around Mint Cinnamon and explaining several GUI elements, settings, and options.
Navigating Around Mint Cinnamon
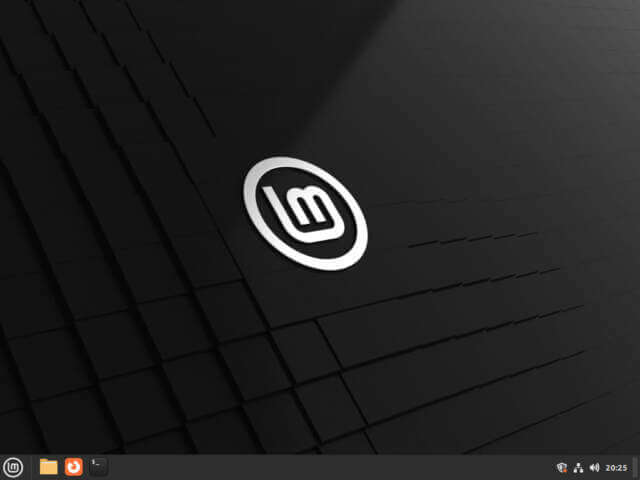
Navigating around Mint Cinnamon is both intuitive and simple. The following screenshot is of the default desktop:
As you can see, it is quite plain, with no desktop icons at all. Don’t worry though, the desktop background can be customized via a good selection of built-in options, and everything you need to access is included in the comprehensive Start menu.
Down the left-hand column from top to bottom: Firefox browser shortcut, Software Manager, System Settings, Terminal, File Manager, Lock Screen, Logout, Restart or Shutdown. When you mouse over each of those icons a description of the shortcut will appear in the bottom right-hand corner of the Start menu.
The center column provides shortcuts to a variety of software in categories and the right-hand column provides a list of shortcuts to all programs. A right-click on the Start button displays a menu including editing and configuration options.
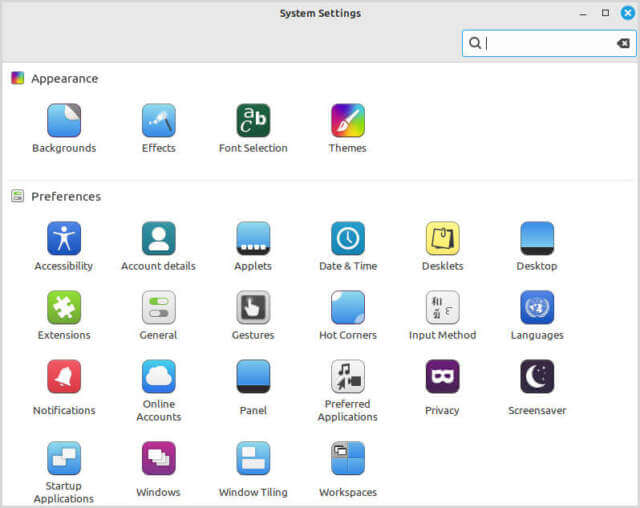
To customize the desktop background and other settings, click the System Settings shortcut (third icon down in the left-hand column):
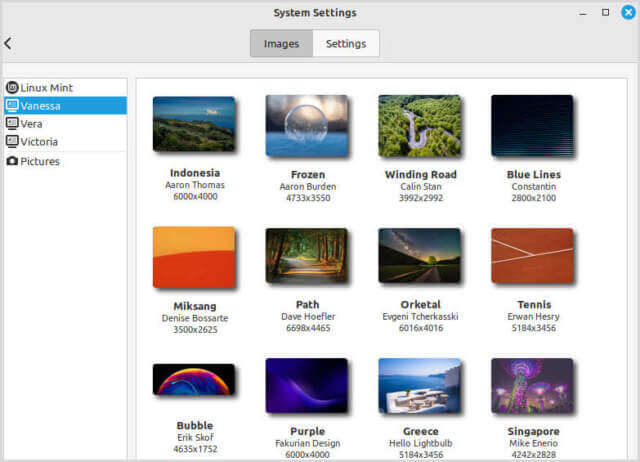
From here, click Backgrounds (under Appearance) to choose a desktop background from a wide selection – here is a small sample:
From System Settings, you can also customize effects, fonts, and themes, and set various “preferences”.
Cinnamon Mint comes with a selection of software already installed, including Firefox browser, LibreOffice, Thunderbird Mail, basic image viewer, and screenshot tools.
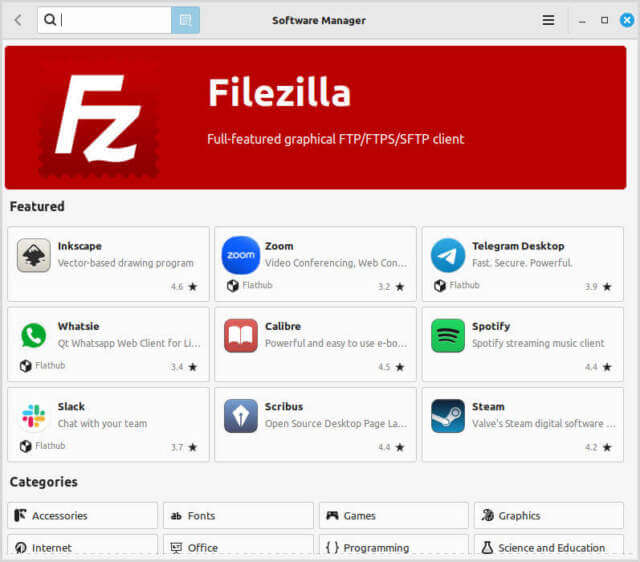
Clicking the Software Manager shortcut (second icon from the top in the left-hand column of the Start menu) will open up a large list of popular software ready to install, including titles such as Audacity, VirtualBox (a good way to run Windows inside Linux), Shutter (screenshot capture tool), VLC Media Player, Qbittorrent, Steam, and Bitwarden Password Manager.
Mint’s Software Manager (AKA the Repository) is comprehensive and if you can’t find what you’re looking for in the list, use the search feature – type the name of the software into the search dialogue box – and I’d be surprised if whatever you’re looking for isn’t available.
Mint’s Taskbar (AKA Panel) is also pretty basic but works in much the same manner as the Windows Taskbar:
Left-hand side (from left to right): Start button, File Manager, Firefox, Terminal – Right-hand side (from left to right): System Reports (including updates and setting up the system restore utility), Internet connection, Volume, Time and Date (date requires a mouseover).
Each time you open (run) a program its icon will appear in the Taskbar. Left-click the icon to minimize the program’s window, right-click the icon to display a context menu that includes an option to Pin a shortcut to the Panel (AKA Taskbar).
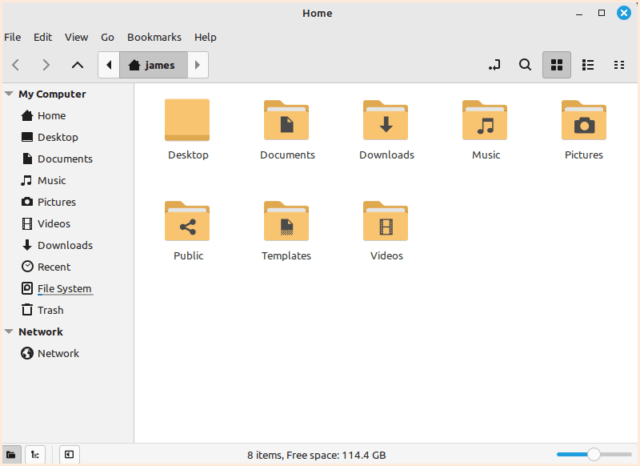
Mint’s File Manager is also very similar to Windows File Explorer and is pretty much self-explanatory:
BOTTOM LINE:
I admit that I struggled a bit to present all the above information in a coherent/logical order. Still, I hope it will help somewhat with your understanding of working with Mint Cinnamon, and I’m pretty sure you’ll agree that it is all quite intuitive and Windows-like.
If you have any questions, please feel free to ask away via the comments.
- Getting Started With Linux – Part 1
- Getting Started With Linux: Installation – Part 2
- Linux Mint Cinnamon: A Beginner’s Guide – Part 3 ⬅ You are here
—



I actually have Linux Mint on my HP laptop. Haven’t used it since I installed it. My problem is I have my Asus Windows 10 system set up to my satisfaction and I don’t want to give it up yet. Maybe when Windows 10 goes the way of the Dodo. 🙂 I previously had Win11 on this laptop but it was as slow as molasses running uphill on a cold day. 🙂
Linux Mint is fine and works well, but for older PC’s Gentoo can be even better, if it is built in the right way. Cannot find a forum login so I posted this over on itsfoss. It is a Dell Inspiron 530, that my son, let me have to play with. Here is the link if you want to take a look-see!!!
https://itsfoss.community/t/my-next-gentoo-project/11443/18
I have a Windows 11 preinstalled computer. Wish to use it as a Linux only bootable unit with all traces of Windows (system and data) removed, Mindblower!
Hey MB,
Is that a question? Are you seeking advice on the best way to do that?
Yes Jim, Mindblower!
Hey MB,
Wiping a drive is simple, wiping a SYSTEM drive not so simple. The best method would be to connect the drive you want to wipe to a working PC, either externally (via SATA to USB adapter) or internally. From there you can use any of several disk wiping tools (including CCleaner) to get the job done.
The only method I’m aware of to wipe a drive from outside Windows is to download DBAN (Darik’s Boot and Nuke) which comes as an ISO. Burn the ISO to disc, boot from the DBAN disc, and wipe the drive. HOWEVER, DBAN has not been updated for a long time and I’m pretty sure it does not support SSDs.
Hope that helps
Burn gparted iso to CD-R or use Ventoy and it will do the job. You better store a system image away, just in case.
Thank you Jim and Daniel. The problem I have with this preinstalled 11, purchased from Amazon, is I cannot alter the installation without the missing drives without that cd. Thought the installation cd’s were a think of the past as I had no problems with the Windows 10 preinstalled computer. I do have a clone copy and full backups, of the original installed unit so that is not an issue.
I would like to make use of this computer solely to explore Linux, but am not in any rush. Have other projects currently taking up the bulk of my spare time. Will keep you guys posted and thank you for the assistance, Mindblower!
I REALLY LIKE LINUX MINT on my two older Computers. The only problem is using my Samsung Laser printer c410w tried lot of ways no luck I know the printer is ok any ideas ????
Hey Dave,
Not sure what you might have tried already but you’ll need to install the correct driver. Here are a few links that might help:
https://drivers.softpedia.com/get/PRINTER/Samsung/Samsung-Xpress-C410W-Printer-Print-Driver-10006-for-Linux.shtml
http://www.samsungsetup.com/ts/manual/Samsung%20C410%20Series/English/manual/BABBIBJC.htm
https://www.reddit.com/r/pop_os/comments/m0xcul/install_printer_samsung_xpress_c410w/?rdt=59882