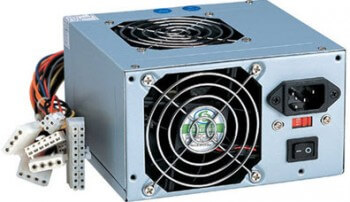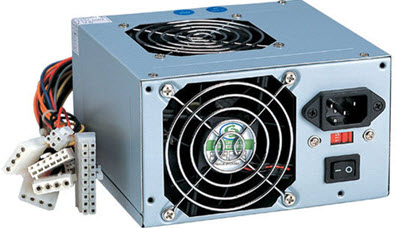
The Humble Power Supply Unit Explained
A PSU’s basic function is to convert the higher voltage alternating current (AC) available at the wall socket to a much lower voltage direct current (DC) required by the various PC components – very similar in functionality to the AC adapters which come with most lower power devices, such as smartphones. Depending on country of residence, AC power source can be either 120v or 240v, and typical DC output is 3.3v, 5v, and 12v.
Traditionally, PSUs have almost always been positioned at the top of the case to take advantage of the natural rise of hot air which is then expelled out the rear of the PSU via its exhaust fan. However, today’s trend is moving more and more toward base-mounted PSUs. The reasoning being that the components inside the PSU are also susceptible to heat, so base-mounted PSUs will benefit greatly from the cooler air being drawn through. Many of the newer cases are specifically designed to accommodate this system, inluding provisions for base mounting the PSU.
In the image under; on the left you’ll see a typical top-mounted PSU (probably very similar to the tower you have), and a newer type case ready for a base-mounted PSU on the right:
Shape & Size
The shape and general physical size of a component is called the form factor. Items which share a common form factor are generally interchangeable – such is the case with most PSUs. Over time, there have been at least six different standard power supplies for personal computers. More recently, the industry has settled on using ATX-based power supplies. ATX is an industry specification that means the power supply has the physical characteristics to fit a standard ATX case and the electrical characteristics to work with an ATX motherboard.
Basic Connectors
In recent years the numbers of pins on several connectors have been increased to accommodate newer more powerful technology. In the list that follows, I’ve done my best to cover basic connectors for both older and newer systems:
PC Main power connector (aka P1 or ATX connector): This is the connector which goes to the motherboard to provide it with power. On older motherboards, this was a 20-pin connector, these days it has been increased to 24-pin. In the following image you’ll see a standard P1 24-pin connector on the left with a split 24-pin connector on the right which can be used to power older as well as newer motherboards.
ATX12V 4-pin power connector (aka P4): A second connector that goes to the motherboard (in addition to the main 24-pin connector) to supply dedicated power for the processor. This used to be the standard connector, however, most high-end motherboards and processors now require a 12V 8-pin connector to provide additional power. Some PSUs use the split system (2 x 4-pin connectors) to accommodate both older and newer motherboards:
SATA power connectors: 15-pin connectors for components which use SATA power plugs – this includes HDDs, SSDs, and DVD/CD drives.
6 or 8-Pin PCI Connector: Most modern computer power supplies include 6 or 8-pin connectors which are generally used for PCI Express graphics cards, an eight-pin connector will likely be seen on newer model power supplies. Again, some PSUs come with a split design to support both newer and older motherboards. The following image shows a 6-pin PCI connector on the left with a split 8-pin connector on the right:
4-Pin Female Molex: Most PSUs come with at least one of these auxiliary connectors for additional power if required:
When needed, these are generally coupled with a 4-Pin male molex connector/adapter; for example to connect an additional hard drive:
PSU Cabling: Fixed vs Modular
Most PSUs come with fixed cabling, however, there are modular PSUs available that come with a variety of detached cables which you can selectively connect to the PSU and then to your PC components. The advantages with the modular design are flexibility and doing away with unnecessary permanent cabling thereby reducing clutter and improving airflow. However, the modular design is generally available only in higher end PSUs and is quite a bit more expensive than the fixed cabling models.
Fixed cabling isn’t normally an issue as these PSUs are generally designed to suit most standard configurations. In a replacement situation, you may get into trouble with cable lengths for the odd PC manufacturer who tends to produce some rather radical builds, Dell springs to mind. However, this is rare and generally quite easily overcome via extension cables.
Single Rail vs Multiple Rail
Which is best? This is a somewhat complex topic which has been keenly debated over the years. To get into the nitty gritty here would be to defeat the purpose of the exercise. Suffice to say that the consensus today is, when it comes to your average home PC, essentially neither is better than the other. So, other than for very powerful PCs full of expensive high-end components, I wouldn’t bother with multiple rail. A single rail PSU will more than suffice for the majority of users.
If you’re interested to learn more about single rail vs multiple rail, here are links to a couple of articles on the subject:
- http://www.overclock.net/t/761202/single-rail-vs-multi-rail-explained
- http://www.thinkcomputers.org/settling-the-debate-multi-rail-vs-single-rail-power-supplies/
DIY PSU Replacement
If you’re confident enough to have a go at replacing the PSU yourself, here are a number of points you should bear in mind:
One of the main considerations when purchasing a PSU is to stick with a reputable/known brand. The market is awash with generic brands, many of which are substandard and will often overstate their maximum wattage, sometimes by as much as 100%. Whereas reputable manufacturers will almost always comply with regulations and certification requirements, plus offer solid warranties. Always treat high wattage claims at comparatively low prices as suspicious.
Of course, it’s also wise to make sure the PSU has enough connectors to power all your computer components. That said, even basic PSUs generally come with adequate connections for most average configurations. For example; if you check out the specs for this middle of the road Corsair VS450 — 450 Watt Power Supply, you’ll see that it includes:
- 1 x P1 (ATX connector)
- 1 x EPS connector
- 4 x 4-Pin Female Molex Peripheral connectors
- 2 x PCI connectors
- 4 x SATA connectors
More than enough to power your average entry to mid level home PC.
Efficiency Ratings are Important!
A power supply’s efficiency rating is important because higher-efficiency units tend to be built with better components, waste less power, and generate less heat—all of which contribute to a quieter experience. 80 percent appears to be the benchmark, a power supply with an efficiency rating of 80 percent provides 80 percent of its rated wattage as power to your system, while losing the other 20 percent as heat.
Look for units with “80 Plus” certification. 80 Plus-certified units are confirmed to be at least 80 percent efficient; and the 80 Plus standard includes additional tiers for even more efficient units, including 80 Plus Bronze, Silver, Gold, Platinum, and Titanium certifications. However, power supplies at the higher certification levels tend to command much higher prices. Average users with average requirements can stick to the simple 80 Plus or 80 Plus Bronze level, unless of course, you happen across a particularly attractive deal on a Silver or Gold rated PSU.
Just out of interest, check out this high-end Corsair 1500-watt PSU which includes 80 Plus Titanium certification, modular design, plus multiple rail: CORSAIR AX1500i Power Supply – yes, they can get pretty expensive.
It’s All About the Wattage
Manufacturers usually list their power supplies’ output in watts. Obviously, it’s important to choose a PSU with sufficient wattage to power all your components. There are several online power supply calculators available where you can input your components and receive a recommended total power supply wattage. Here are links to two: http://outervision.com/power-supply-calculator and http://powersupplycalculator.net/
Rule of thumb; it’s better to go for a higher wattage PSU rather than absolute minimum to allow for power loss through heat and wiggle room for possible expansion. For example, if the combined maximum power of your system’s components is 300 watts, I would suggest a 450-watt PSU as minimum. Ideally, the PSU’s wattage should be around 40% above existing system requirements.
Bottom Line
Replacing the PSU is not as complex as it might first appear when you open the case and see all those wires running everywhere. The power-supply cables use standardized connectors that make it pretty much impossible to connect the wrong ones. Just remember to keep the cabling nice and tidy, using plastic ties or similar, so they are not impeding airflow.
These then, in précis, are some of the most important factors when looking to purchase a PSU:
- Stick with reputable brands: in no particular order; Corsair, Seasonic, and Antec are three manufacturers with solid reputations for producing high-quality power supplies.
- Check the efficiency rating: look for a minimum 80 Plus certification
- Check the wattage: make sure the wattage is sufficient for you system’s requirements
- Check the connectors: make sure they are adequate and suitable for the age of your computer/motherboard.
- Do your homework: once you’ve selected a particular model, search for reviews online to help confirm your choice.
*FOOTNOTE: This article is discussing basic PSU requirements for average home users. Gaming enthusiasts and their high-end machines are another story altogether.


Just installed a 1000W EVGA PSU in my gaming PC tp power my two Graphics Cards. This thing came Crossfire ready so the GPU’s can be wired with separate wiring. The only thing I had to think about was the 24 pin harness for the Motherboard, the PSU end had a 24 pin + 6Pin and the Motherboard and had a 24 Pin end, beats me why it had to wired that way.
and another fine article Jim. Checks with my knowledge. 🙂
Jim what would be the average price range for a home computer power supply unit? I understand that if I go to cheep, that is what I get. Which may turn out to be useless. But I also do not want to over pay for a good PSU.
I have had to replace a ton of the OEM installed power supplies in PC’s that have come my way to be repaired. I used a Antec 450 watt unit for some but depending on your PC use a 650 watt unit would be even better. I would go with nothing less than gold certified.