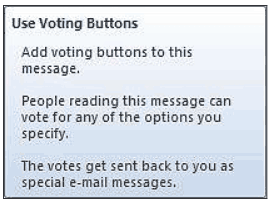
You can use the Voting Buttons in Outlook to get responses from a group. This is a very handy feature when obtaining feedback regarding meetings, appointments, dinner engagements, and even menus! The possibilities are infinite! Outlook even tallies the votes so that you can access them easily.
Follow the steps below to learn how:
- Create a new E-mail Message.
- In the Tracking group, select the Options tab.
- Using the drop-down menu, Select Use Voting Buttons.
- Choose the voting buttons you would like to use from the four options provided (i.e., Approve; Reject, Yes, No, or Maybe.
- If you choose Custom Choices, key in your Voting choices separated by a semicolon.
- Click Close on the Message Options dialog box.
- Be certain your message is formatted the way you would like, including the question or statement that is to be voted on and includes the recipients for the message.
- Click Send.
Now that you have done that, let’s go over how you vote once you receive a message. Follow the steps below to learn how:
- The recipients of your message will notice a Vote option in the Respond group on the Message tab of their Ribbon.
- Note that this will only work when using the Outlook client only.
After clicking Vote different options will be displayed from which they can choose.
- After they have selected their voting option, a confirmation prompt will appear showing their selection and giving them the choice of sending their response or editing their response, prior to sending.
Now, how do you get a tally of your votes??
Follow the steps below to learn how:
The responses will show up as new items in your Inbox as the recipients vote, very similar to seeing Accept and Decline responses for meeting requests.
You could tally the votes yourself, but, if you sent the message out to a very large number of recipients it could be quite time consuming and why not let Outlook do the work for you?
You can still look at the running tally of responses by clicking on the blue message bar in any of the response e-mails and selecting View Voting Responses, which will launch a new window where you will see the total number of votes as well as a list of individual responses, dates and times.
You will see the reply totals followed by a list of the individual votes. You will also see the people who did not vote.
Be advised that if your recipients send comments in addition to, or instead of using voting buttons, these comments will be stored as a normal e-mail in your Inbox. They will not appear in the Tracking page of the original message. This is when a recipient is using a Mac or Outlook Web Access instead of the Outlook client found on a PC.
And to be even nerdier, you can also copy and paste the details into an Excel Worksheet!


Carol I wanted to let you know I love sharing your articles with my clients (at least using the info to help them). You know these softwares so well and it is great having the “how to” to share with them. Plus you make me look good when I can tell them just do this in the program. 🙂