Follow this guide to learn how to use the new split screen feature in Windows 11.
Split screen isn’t new, with the “Snap” feature first introduced in Windows 7. However, Windows 11 takes split screen a step further with a selection of layouts in a flyout menu while retaining the classic ‘snap’ feature you’re probably familiar with.
- You also might like: Using Windows Multiple Desktops ‘Plus’ and How To Use Multiple Desktops
How To Access Split Screen Options
To see all split screen options navigate to Settings > System and click Mult-tasking in the main panel:
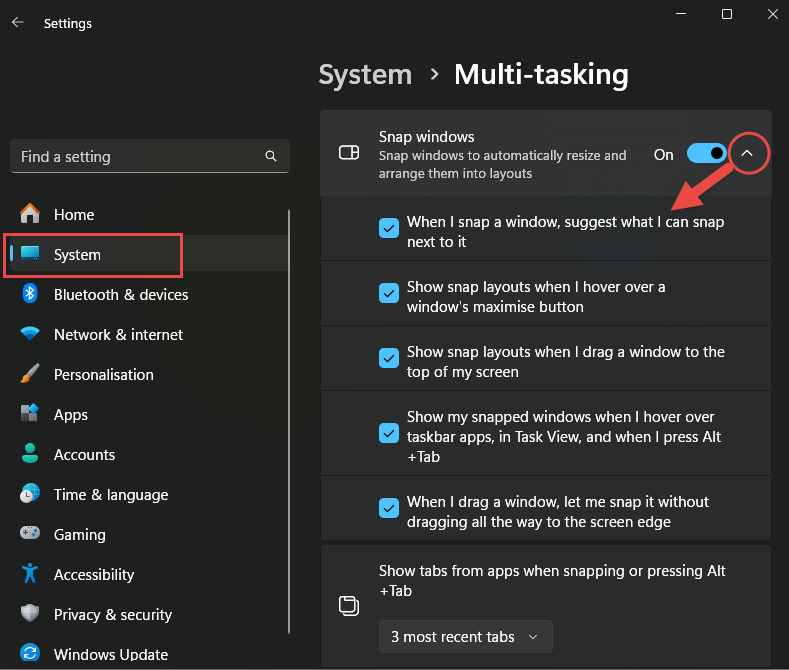
All options are enabled by default and, considering they will not impact performance, I would suggest leaving them enabled.
To apply the third option down: Show snap layouts when I drag a window to the top of my screen
- NOTE: You need to keep the left mouse button held down throughout this process
- Place your mouse cursor at the top of a window, hold down the left mouse button, and drag the window to the top of the screen
- A flyout will now appear showing all available layouts
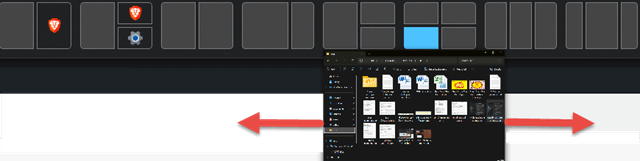
- Keeping the left mouse button held down
- Drag the window down, just below the flyout, until the window becomes a thumbnail
- Now move the thumbnail left and right until the desired layout is highlighted in blue
- When your selection turns blue release the left mouse button
That method might seem a tad convoluted and, in my opinion, it is. The positioning and timing is also a tad tricky. In my experience, the second option down – Show snap layouts when I hover over a window’s maximize button – is a much simpler method.
To apply the: Show snap layouts when I hover over a window’s maximise button option
- Simply hover the mouse cursor over a window’s maximize button and the flyout will appear
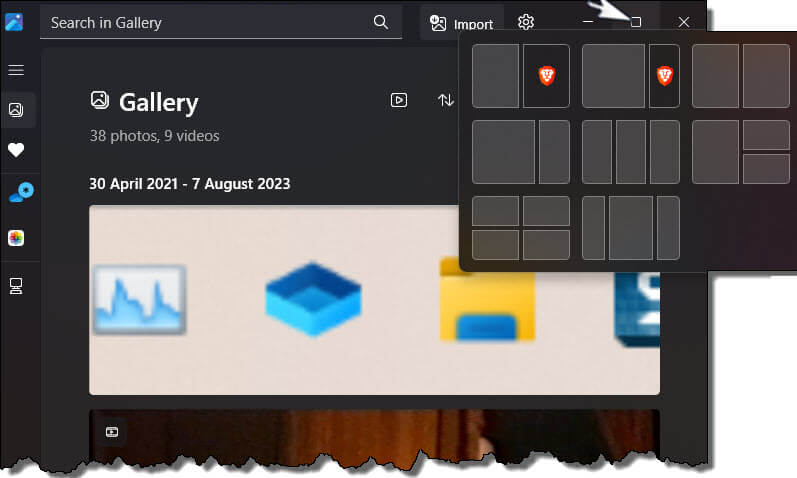
- Move your mouse cursor to the desired layout until it’s highlighted in blue
- When the desired layout is highlighted in blue, click the left mouse button
If you have multiple windows open (say four windows) follow the steps above for only one open window and select the four-window layout from the flyout. You should now see that window open in whichever section you chose with the other three windows minimised in an adjacent section:
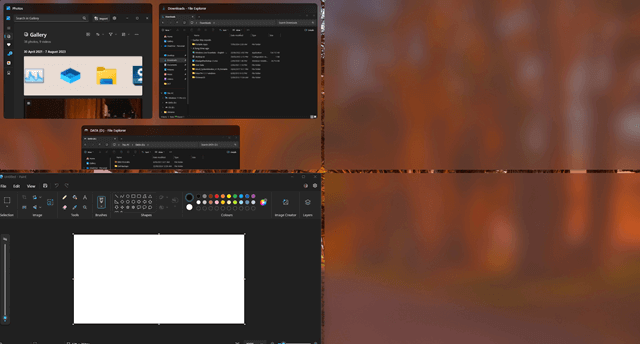
Click anywhere within one of those minimized windows and it will fill that section, with the remaining two windows now minimized in another adjacent section. Repeat until all four sections are occupied.
BOTTOM LINE:
The instructions for the Show snap layouts when I hover over a window’s maximise button method might seem a tad complicated but, trust me, it really is very simple once you get the hang of it. Whether it’s as simple as ‘snapping’ the open windows into their desired positions is certainly debatable.
One criticism is that, as far as I am aware, once the windows have been positioned there is no way to move them around – to exchange a window in one section with a window in an adjacent section, for example.
Have you tried Windows 11’s new snap options? Let us know your experiences in the comments.
—