Facebook has updated their look and many people have been finding it hard to find the features they used before. We all like things to stay the same but many companies (especially social media) like to change things up– for some reason they think it is better. With that being said, I was recently asked where the Activity Log was located and how to use it. While I was proficient using Activity Log using Facebook classic, the new version is a little different. I will be showing you where the Activity Log is located and how to use it. Time to learn how to use this feature with Facebook’s new look. Open those accounts and let us get started.
How To Use New Facebook Activity Log
I will be showing you all this on the website since that is where they changed everything.
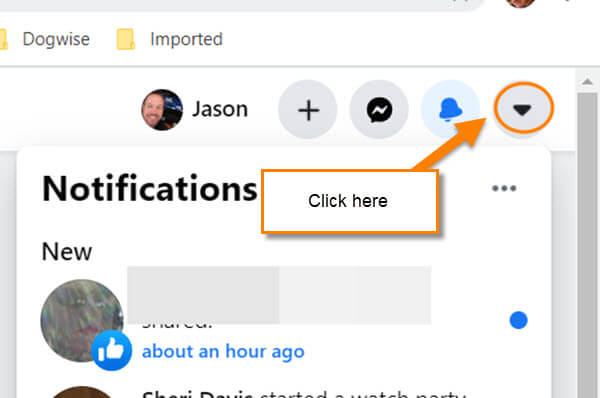
Step 1: Once you are logged in, head to the top right and click the down arrow (menu link).
Step 2: On this menu, you will need to click on Settings & Privacy.

Step 3: In the next part of the menu, you will need to click on Activity Log.

Step 4: We are now on the Activity Log page. Here you will be able to see what activities you have been up to on Facebook. I guess it is time to show you how this works. I will show you some steps here to get you started, then you can jump in and play around. The first one I would like to go over is the Timeline Review. Click on Timeline Review on the left menu.
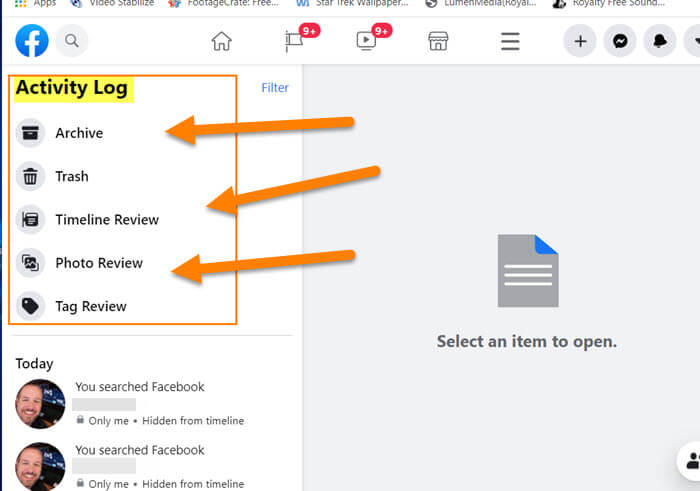
Step 5: Here you should notice a familiar menu to the left. This is the Filters menu and right now we are set on the Timeline Review. On this screen, you will see your review in the center. Scroll down to see more posts if you like. On this screen to the top right of the page, you can click the Gear (settings) icon.

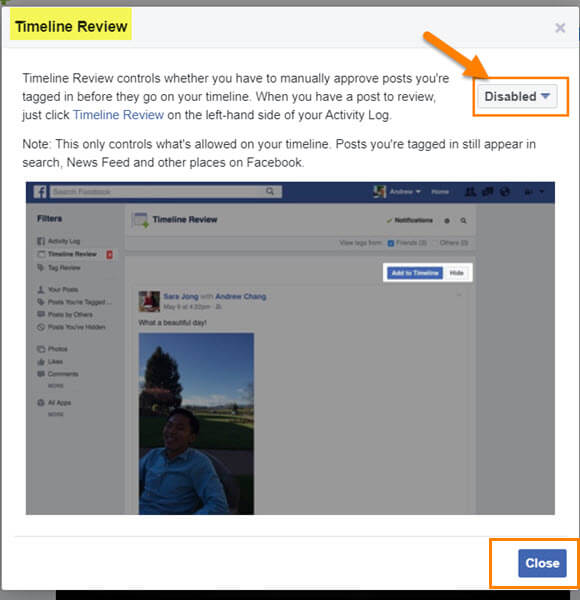
We will now be on the timeline review settings screen. Here you can disable or enable the Timeline review. To change it from disable to enable click on the down arrow option on the right.
From Facebook: “Timeline Review controls whether you have to manually approve posts you’re tagged in before they go on your timeline. Note: This only controls what’s allowed on your timeline. Posts you’re tagged in still appear in search, News Feed and other places on Facebook.”
That is how the Timeline review settings work. Since we are done here, click the close button on the bottom right.
Step 6: Next, I want to show you how to adjust the Notifications settings. To do this, click on the Notifications option to the left of the gear (settings) icon. This will allow you to change who you are notified about when tagged in a post:
- Anyone
- Friends of Friends
- Friends
The Anyone option is the default so you can change that here. It’s time to go back to the main Activity Screen. To do that, look to the far left menu and click on the top option, Activity Log.

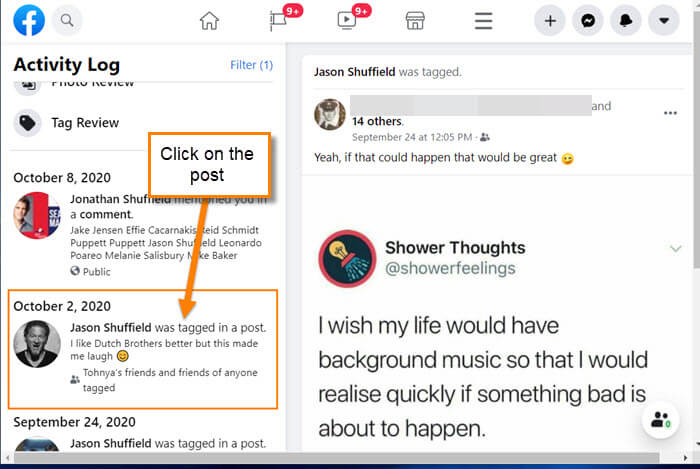
Step 7: On the main screen, you will notice the center of the screen says Select an item to open. What they mean is to look to the left side under the menu options. Then click on one of the posts and this will now appear in the middle of the screen.
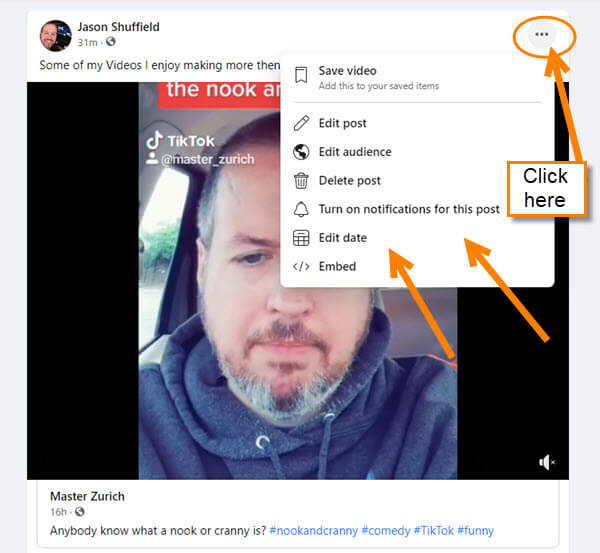
Step 8: Once the post appears in the middle of the screen you can click on the menu link on the top right of that post to edit it. This is the three dots. Depending on the post you will be given some choices. Since the one I’m showing you is a video post from me, these are the options I get:
- Save Video
- Edit Post
- Edit Audience
- Delete Post
- Turn on Notifications for this post
- Edit date
- Embed
Choose wisely.
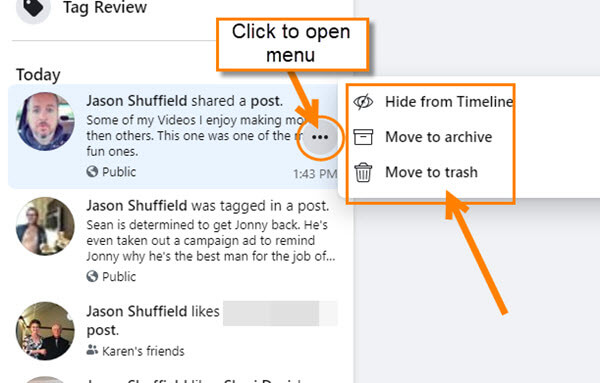
Step 9: Now, look back to the left area with all the posts. Here they will also give you a menu link when you are hovering over the post. Click the three dots. This will show you a menu with some options like on the main post. The options are different depending on the type of post (Tagged, Video, or Personal post). Again, choose wisely.
Step 10: There are many things you can do here but this should get you started. Look to the left menu and start exploring. I find that the hands-on approach is the best way to learn.

Now you know how to find it and start using the Facebook Activity Log. Happy Exploring!
—