Why You Need File History
 When talking about the average lifespan of a computer, there are two basic things to consider: first is the effectiveness of using a computer after 3- 5 years of upgrades to software and the OS, combined with the advancement and availability of better technology. The second is the physical life of the computer as moving parts break down, like HDs, CD/DVDs, problems with aging motherboards, memory and processors. Add an additional two or three years for a desktop. Any physical improvements made may increase that average. Installing more memory, newer hard drives, etc, will help extend your PC’s life but sooner or later the crash will happen.
When answering repair calls one of the things I come across most frequently is when older computers finally do crash, users no longer have access to their data, at least not without the help of a professional. Even then, it can be expensive to retrieve data from a crashed Hard Drive (HD).
Regular Windows Backups
I can’t stress enough the importance of creating not only a cloned image of your system but to also continually backup your data to an external source, even if it is to the cloud. Sadly, for reasons that elude me, most people just don’t do it. Perhaps it is the perceived complexity of doing it or just good old- fashioned procrastination. In any case, the number of clients who have lost personal data is much higher than it should be.
File History To The Rescue
Fortunately, there is a simple and very effective feature that was introduced in Windows 8 that does not require any special skills. It will continually back up important files as often as you wish and keep them for as long as you wish. Best of all, this feature is already installed in your Operating System (OS) waiting to be used. That feature is called “File History”.
I believe Microsoft is dropping the ball by not making this feature enabled by default. But now that you are aware of its existence, let’s not drop the ball ourselves.
Using File History
The first thing you need is an external storage device. If you have a desktop with more than one hard drive, you may use the second as the storage device. It is also possible (but not recommended) to use File History on the same drive as your OS.
For most of us, a simple USB flash drive is the answer. I recommend using a minimum of 16GB. Almost everyone has one laying around, but if you have to purchase one, a 64GB costs less than $10 and a 256GB costs around $35 (US). 4GB is usually given away free as a promotion.
File History is capable of continually backing up files so duplication can use up storage. As a benchmark, a 64GB USB drive is capable of holding over 30,0000 photos as well as several hundred documents. If you already have a drive, select it at this time.
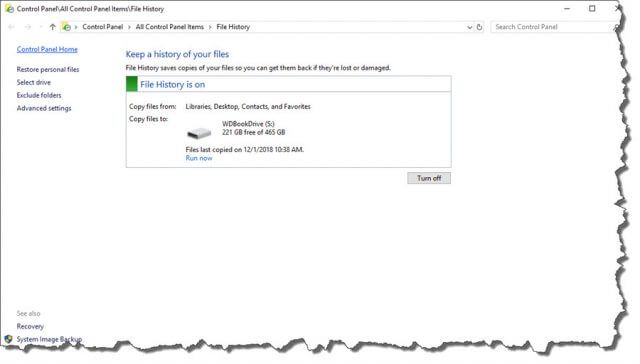
Once you have a place to put your files, you need to open the File History feature in Windows 10.
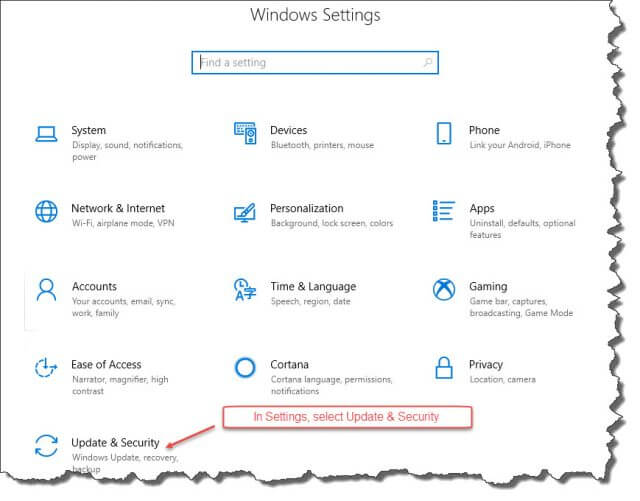
Click on the Windows logo or press the Windows key on your keyboard, then click on the Settings Icon.
Choose Update & Security
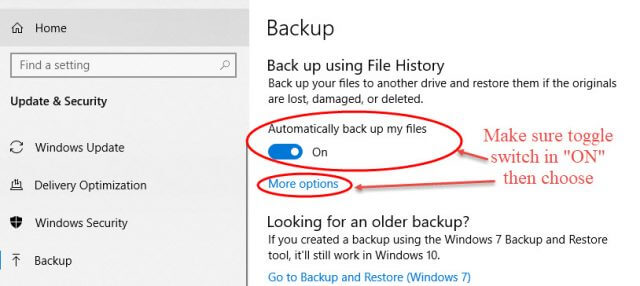
Choose Backup and in the right panel, you will see Back up using File History.
Switch the toggle “Automatically back up my files” to the “ON” position.
Next, click on “More options”.
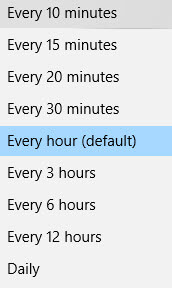
This will open a new window that will allow you to choose how often you wish personal files to be backed up– Every 10 minutes to Daily.
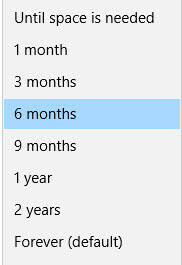
You must also decide how long you wish to keep your backups. You can choose “Until space is needed”, Months, or even Forever.
If you do have a small 4GB or 8GB flash drive, you might want to choose “Until space is needed”. This option will overwrite older files and keep your current files fresh. Also, you can use the “Stop Using drive” option and simply replace it with another 4GB drive.
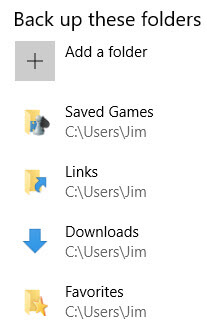
Finally, you need to select the folders and file types you wish to save on a regular basis. You can even exclude certain folders.
At the bottom of the screen, you can also choose the Advanced Settings option to review the entire process.
Restoring Your File History Files
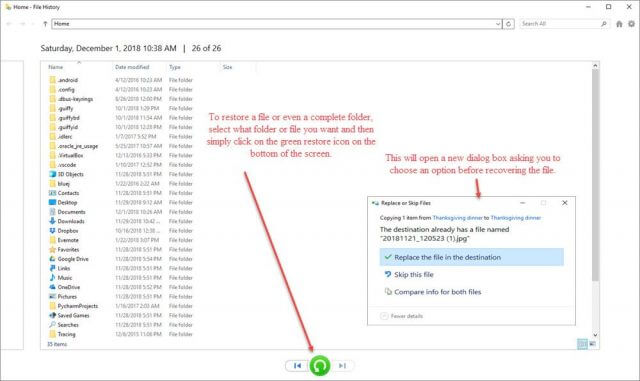
Restoring your backed up files is easy. Just select “Restore files from a current backup”. Select the files you wish restored and a dialog box will appear asking if you want to replace the file in the “original” destination, skip this file, or compare both files.
Summary
Backing up an entire OS, including your personal files, should be done at least once and then, if possible, at regular intervals. It can take time to back up an entire system, but File History takes seconds and does not include your involvement after the initial setup. Let’s face it, programs and other data on your computer are all replaceable, but not your personal files, so don’t wait. Protect your files from loss.
—


I have not been able to use File History to backup to the network drive since Win 10. Had Win 10 Home, then did a clean install to Win 10 Pro, Never worked on either one. It starts to do the backup, makes the configuration and data directories, but the data directory is empty. Any suggestions?
Hi, Dick, I assume you have tried these but double check these haven’t changed,
The first thing you need to do is make sure your network discovery is turned on. Next you want to make sure you have set your sharing options correctly.
Turn on network discovery and file sharing for all private and public networks as long as it is a home computer you should have not problems. If it is a laptop you might want to Turn off netword discovery for Public networks. Please let me know if this helps, if not, we can move this to the forum and I can work with and try something else.
Hi Jim. Double checked the network discovery and file sharing settings and they are on. My network device is a WD My Book Live if that matters. Thanks for the help.
Dick, I actually save my file history on a WD My Book as well. I had a problem about 6 months ago with it not accepting the history files and had to download the WD drivers ,firmware and utilities. The link below is a direct link to WD. There are several utilities including diagnostics that might get you up and running.
https://support.wdc.com/downloads.aspx?DL
The diagnostics passed and the firmware update said it was the latest firmware.
This is the firmware on the My Book.
Description:My Book Live Firmware
Version:MyBookLive 02.43.10-048 : Core F/W
Last Update:Tue 23 Jun 2015 06:48:50 AM CDT