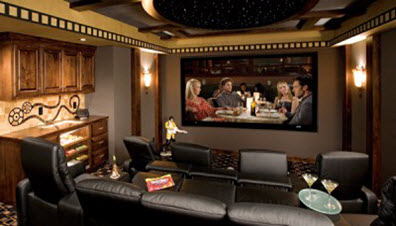
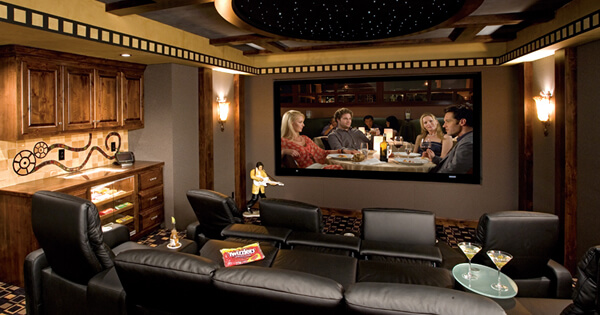
Take a good look at this picture if you will and imagine that as your living room. Yeah, me too; I’m imagining it and my eyes hurt.
Actually, Home Cinema for most of us mere mortals is a euphemism for a PC sitting under the telly (SMART TVs excepted of course), with a mouse and maybe a keyboard attached and in my case, trying to keep the whole setup as discreet as possible.
Over the years I’ve played with numerous configurations of Home Cinema, initially for watching DVDs, but how things have changed since 2008 when we bought our first LCD TV, a tiny 23″ Phillips. That TV was graced with DVI and VGA ports and somehow I managed to hook it up to a Compaq Slimline Pentium III with mixed results. In fact it was a frustrating experience to say the least, so fast forward to the 2010 Football World Cup when we threw caution to the wind and invested in an LG 32″ LCD Full HD TV with HDMI moving us up a notch or two. Initially I hooked the TV up to my gaming machine in the next room through a 3 metre cable as the GPU had an HDMI port and Bingo! we were in business, enjoying the delights of near HD films, limited only by a very dodgy 3Mb ADSL internet service, but DVDs played superbly.
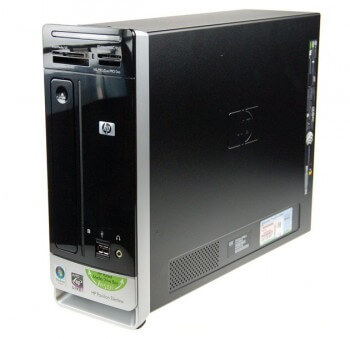
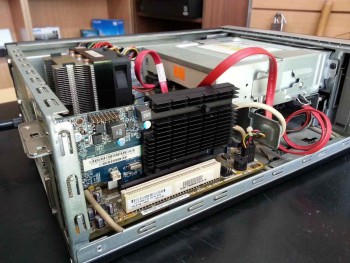
HP Pavilion Slimline
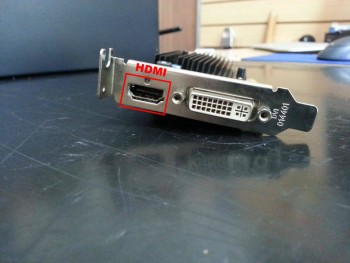
Some months later I acquired, by sheer luck I have to say, an HP Pavilion Slimline PC through a part exchange with a customer ( he also threw in a very good photography backpack which I still use today) and I was delighted to see it equipped with an Athlon x64 4800+, DVD and 2Gb RAM. But that didn’t quite solve my immediate requirement for a discreet system, so I shelled out for a Low Profile Radeon 4550 GPU with 512Mb and an HDMI port which I could then connect direct to the TV.
Low profile GPU
Since 2011, this little machine has served us incredibly well and topping up the memory to 4gb made a huge difference for watching films in full 1080p HD. However, being such a small case with very limited cooling options (at one point I even strapped a small fan to the GPU) I would often find the CPU temperature hovering in the 80c (176f) range in spite of my fervent efforts to keep it cool and often, the CPU fan was so loud that we could barely hear the soundtrack, yet re-seating the CPU with new thermal paste made a tiny difference, but not much. In fact, during the very hot summer months I would remove the side panel completely.
Choosing the components for a new living room PC
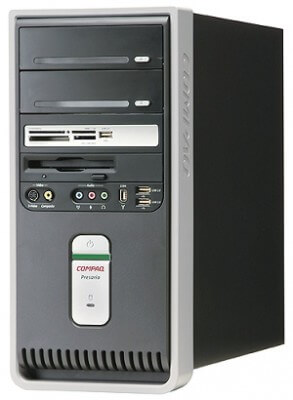
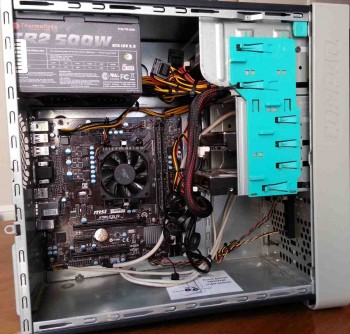
With over five years of faultless service from the Slimline, I had to face up to some stark facts; the motherboard, an ASUS OEM Mini ITX (M2N61-AR Acacia) would be difficult to replace, not to mention the proprietary power supply, should anything go wrong. In fact, I’ve successfully replaced both items for customers in the past, but as time goes by, the parts have become very difficult to find and the moment had arrived for an upgrade and of course to sell the Slimline whilst it was still running at 100%. Fortunately I had many of the components lying around in the shop already, including a pristine Compaq Presario case, a new Thermaltake 500W power supply and plenty of DDR3 memory sticks which I could swap around with other machines, so all I needed to find were the motherboard and CPU. Why another HP/Compaq case though? The simple answer is because of its build quality and aesthetics, not to mention that the Presario range of cases uses the mid-size ATX form factor, thus accepting most commonly available components up to micro-ATX motherboards. I really didn’t want to get stuck with proprietary mini ITX again.
Let’s upgrade to an APU
 Since cost was a major factor, not to mention availability of components in Argentina, I decided to go for an AMD APU (accelerated processing unit), which is a CPU with a built in GPU, in this case an A4 6300 dual core 3.7 Ghz.
Since I’m a gamer and therefore a leading light of the PC Master Race, I’ve often scoffed at the notion of installing an APU, but in this case my criteria were totally different. I simply wanted to get 1080p video output from a CPU that wouldn’t break a sweat, without the need for an additional GPU (discrete graphics card), so with that in mind I checked out the A4 6300 APU, read numerous reviews which were overwhelmingly positive and got it ordered.
It’s worth noting that this APU uses a Radeon HD 8370D integrated graphics chip, which in turn utilises system RAM on a dynamic basis IE, on demand.
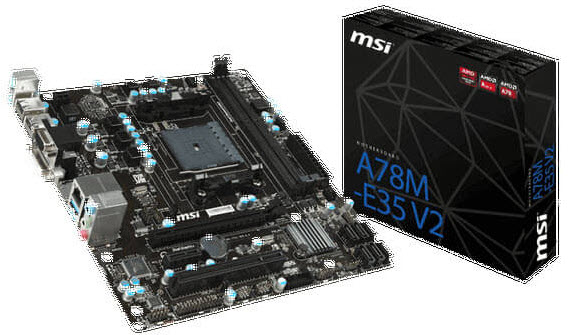
Motherboard with HDMI
I spend a lot of time building new systems for customers thankfully and over the years one marvels at the advances in tech design, particularly with motherboards, so it became pretty clear I needed one with built in HDMI, if possible USB3 and it needed to be micro ATX form factor. In the end I chose an MSI A78M-E35 V2 (don’t you just love motherboard naming conventions?) being economical and fitting the bill perfectly, having all the required ports. I also noticed that this motherboard has a USB3 internal header in case I wanted to add a USB 3 front panel. Naturally it also comes with the usual audio, LAN, USB2 and other ports, not to mention a PCIE slot should I decide go crazy and add a graphics card one day.
Memory RAM and hard drive requirements
Being on a tight budget of around US$150 for new components, this sadly didn’t allow room for an SSD. I mention this, because on this build, storage capacity was never going to be a priority due to the nature of how we watch video nowadays. With the advent of Netflix and other streaming services, not to mention USB 3 pendrives, I probably could have got away with a simple 128Gb SSD for several years to come and I’ll probably do just that when funds and Argentine imports allow me to. In the end, I fitted a 160Gb hard drive I had spare (and another with a library of older films) and two 4Gb DDR3 memory sticks I ‘borrowed’ from my other machines, giving me 8Gb of memory, which is more than ample for a media setup like this.
Mouse and keyboard
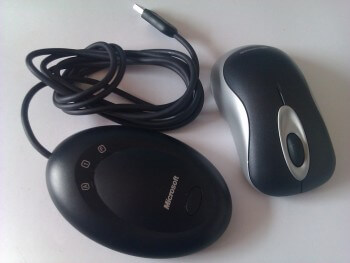 A bone of contention this one, I must say, especially since over the recent years I’ve become accustomed to the ‘beg, steal or borrow’ philosophy, resulting in the use of a Microsoft Wireless Mouse 2000 which has a line of sight range of no more than about a yard. This can be frustrating at times, particularly as the USB receiver needs to be always facing the mouse at the right angle, but it will do for now until I can get my hands on a Bluetooth mouse.
In my setup a keyboard is pretty much redundant because I don’t use the machine for surfing the Web (do we still say that?). I keep one in the fancy Home Cinema cabinet just as a backup or for boot purposes, but otherwise use Windows’ on-screen keyboard for the odd search or password inputs.
Software
For the moment I’m running the system with Windows 7 x64, Service Pack 1 with a minimum of installed software such as:
- Google Chrome 64 bit
- VLC Media Player
- 7 Zip
- Libre Office
- HWMonitor
- Microsoft Security Essentials
Following the Service Pack 1 installation, I turned off automatic updates simply because the constant nagging is irritating and the machine has just one single purpose.
Conclusion
To date, the system is working flawlessly and practically silently, with no degradation of 1080p video whatsoever. CPU temps are around 32c most of the time and, as predicted, it’s not even sweating. The internet connection is wired direct to the modem/router over a 50Mbps service and watching Netflix is responsive and practically lag free. A noticeable improvement is when running a film off a USB 3 flash drive. It’s quick; what more can I say?
If I were to improve the new system, which I will surely do, I’d remove one of the spinners (mechanical hard drives) and install an SSD, without doubt. As previously mentioned, I’d also replace the wireless mouse with one that has a greater range, such as a Bluetooth mouse.
All in all, a very economical and worthwhile upgrade and one that will serve us for at least a few years to come.

Very good Marc!!!! Sounds like a project I might consider, if I can ever find the reason to update this old Hitachi TV I have that just keeps playing and playing, even after 20 years. LOL.