
For whatever reason, some folks have documents that are full of hidden text. Then comes the time when they want to make that text un-hidden. What to do? Well, the short answer is to use Find and Replace.
Follow the steps below to learn how:
- Press Ctrl+Home to go to the start of your document. You do not actually have to do this, but I find it makes it easier to find and replace.
- Press Ctrl+H to display the Replace tab of the Find and Replace dialog box.
- Click the More button, if it is available.

- Be certain there is nothing in the Find What box, and that your cursor is in the box.
- If you see the No Formatting button, click it.
- Click the Format button and select Font to display the dialog box
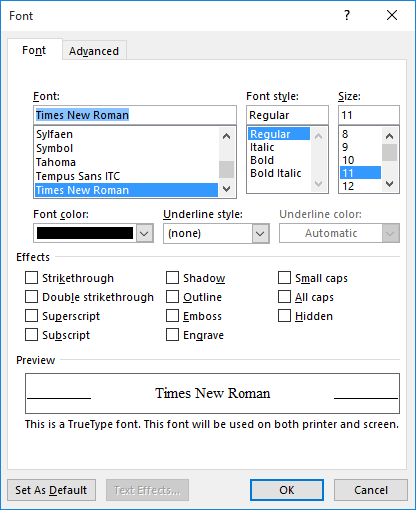
- Click the Hidden checkbox. A checkmark should appear in the checkbox.
- Click OK. The Find Font dialog box will disappear, and the word Hidden will appear under the Find What box.
- Be certain there is nothing in the Replace With box, and that our cursor is in the box.
- Click the Format button and select Font to display the Replace Font dialog box.
- Click the Hidden checkbox two times. The checkbox should be empty.
- Click OK. The Replace Font dialog box will disappear, and the words Not Hidden will appear under the Replace With box.
- Click Replace All.
This should find all text in your document that has the Hidden attribute. It then will turn off the attribute, so that your text is not hidden any longer.
—