I know there are a lot of folks who are not aware of it, but there is a very cool feature for the online version of Word that is an audio transcription. This is very helpful for lots of folks, especially now, with offices being closed and people working at home with no administrative assistance. This feature can definitely make life easier! What it does is convert audio directly to text (i.e., recorded or uploaded from a file). It will even separate the text based on the speaker.
Follow the steps below to learn how:
You are able to have Word transcribe any audio that you record directly in Word – all you have to do is sign in to Microsoft 365 and open Word, and have a microphone.
- On the Home tab of your Ribbon, click the arrow next to Dictate.
- Select Transcribe.
- Next, you will have to give Microsoft permission to use your microphone.
- The Transcribe pane will now open on the right-hand side of your screen.
- Select Start recording.
- Once you have done this, a timer will start. You should now start speaking. You will not see the transcription occur as you are speaking and that is done by design, so do not be alarmed.
- Once you have finished speaking, click Pause.
- Click Save and Transcribe Now.
- It could take a couple of minutes for Word to finish transcribing your recording and uploading it to OneDrive— this is normal.
- Once you have done this, you will see your transcription appear in the same pane you recorded it. Each section will have a time stamp, and the recorder’s name, as well as the transcribed text.
- Yes, there can be multiple speakers. If Word detects multiple speakers, you will see Speaker 1, Speaker 2, etc. If Word does not detect multiple speakers you will only see Speaker.
- There is, of course, a caveat– you may note that your transcript is not perfectly showing what you actually said when you were recording. However, this very easily remedied as you can edit any section of your transcription by simply hovering your mouse over the incorrect area and then selecting the Pen icon.
- You can now edit your transcription found in this area. If the need arises or you care to, you can also while there, edit the name of the speaker recording the text by selecting Change All Speaker.
- Also, if need be, you can use the playback controls to go back to your audio recording. This might be necessary should your transcript be overly long and/or you cannot remember who said what if you have more than one speaker. Some of the edits you can make are:
- Playback speed
- Rewind
- Play/Pause
- Fast forward
- Volume
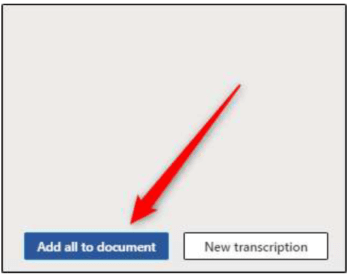
- Once you are finished with your editing, you can add it to your document by selecting Add All To Document at the bottom of the pane.

- Once you have done this, your audio recording and the content of your transcript will appear in your document!
- But suppose you have an already saved audio file that you would like to transcribe?
- You have only to upload it to Word.
- Sign in to Microsoft 365 and open Word.
- On the Home tab of your Ribbon, click the arrow next to Dictate.
- Select Transcribe from the resulting menu.
- The Transcribe pane will open on the right-hand side of your screen. From there, select Upload Audio.
The types of files you can upload are:
- WAY
- MP4
- M4A
- MP3
- File Explorer will open and you can then drill down to the location of your audio file.
- Select your file and click Open.
- Microsoft will then commence transcribing your audio file. Of course, depending on the size of your file, it could take some time.
- Once you have finished transcribing your audio file, your text will appear in the pane.
- If necessary, you can edit this audio file as you did above.
Is this perfect? Absolutely not. Having said that, if you speak as clearly as you can, this feature can save you loads of time and keystrokes, which you all know by now, I love!
—


