Physician, heal thyself
Writing how-to pieces isn’t exactly my forte and I don’t profess to be an expert in any particular field of computing, except maybe building gaming machines and shooting zombies, so passing on personal experience is a great way to relate how we interact with all those shiny things in our lives and my mobile phone experience last week is a case in point. I wouldn’t exactly say that I’m married to my Samsung Galaxy S3, but as a device that has become more of a mobile computer than a phone, it ranks pretty highly in the gadget hierarchy.
Is your phone slow as molasses?

A couple of days into our recent trek into the hinterland of Argentina, I noticed that my phone had slowed to a crawl and it seemed to be taking forever to switch between applications such as camera, maps and music, to name but a few examples. At first I thought it may have been the extreme heat but on further investigation, the bleeding obvious came to me like a whack around the head with a cricket bat. You see, similar to a PC, Android needs a minimum of memory to be free in order to run correctly, if at all, so with all my happy snapping in the valleys and canyons up north, I had quite overlooked the fact that the 2Gb SD card had filled up, resulting in valuable storage space being gobbled up at an alarming rate. Further, the 1GB of system RAM was being squeezed down to well below 100MB as a result of too many apps fighting for those valuable RAM resources. What do do?
Should you install third party apps?

By that I mean system cleaners, app killers, tune-ups and the like. It’s a moot point as many believe that installing apps simply to clean up the mess left by other apps is counterproductive, especially when much of the sweeping up can be done through Android itself. I’ve never used tune-up utilities on my PC’s and an OS is an OS no matter what isn’t it? Either way, let’s look at both routes; I’ll use my Galaxy as a guinea pig and it’s worth mentioning here that it’s rooted (on Android 4.3 Jelly Bean) which gives me full control over the device.
Do it yourself
My particular device has 1Gb RAM (operating memory) and 16Gb of storage, which can be expanded with SD cards up to 64Gb. Often, the terms memory and storage can be confusing as storage is sometimes referred to as memory. Android experts also opine that unused RAM is wasted RAM and therefore Android uses as much as it can, which is also confusing for we conventional PC users who have always understood that memory hogging will slow down a PC.

I discovered two ways to free up space, the first being to look in settings >more >application manager for programs downloaded and installed. You may find that you’ve still got apps that you simply don’t use anymore, so uninstall them by tapping the icon and hit uninstall. Further, in the above image you can swipe right to left twice and you’ll see which apps are actually running as per the image below.
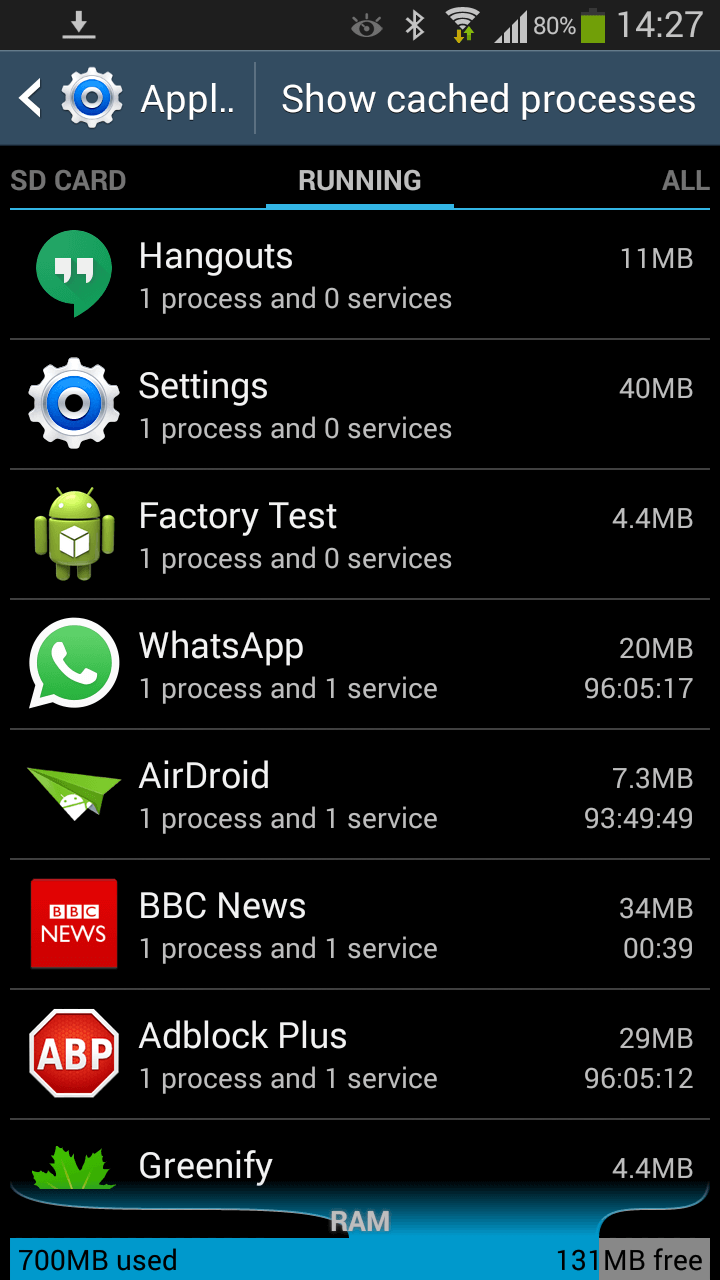
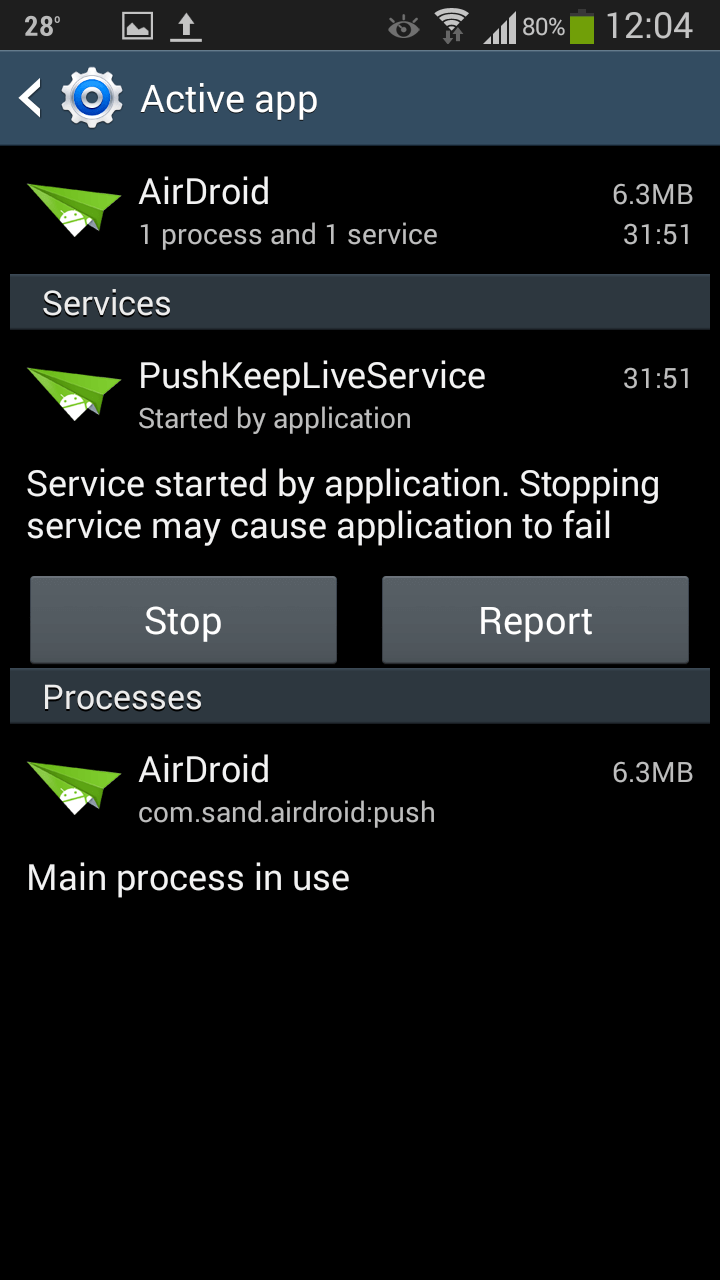
Using the above image as an example, I don’t use Hangouts and Airdroid is an app I use on demand, so they’re both safe to STOP by touching the icon and hitting STOP. This doesn’t uninstall the apps, but simply closes them down.
Another useful trick is to keep your finger pressed on the HOME button for a second or two and the apps currently open will show up as thumbnails and swiping each of them from left to right will close them down, as per the image below.

Over the years, all sorts of apps we thought were handy at the time end up cluttering the system and frankly, it’s worth just removing them. They’ll usually be available to reinstall again in the future if you wish.
Free up resources
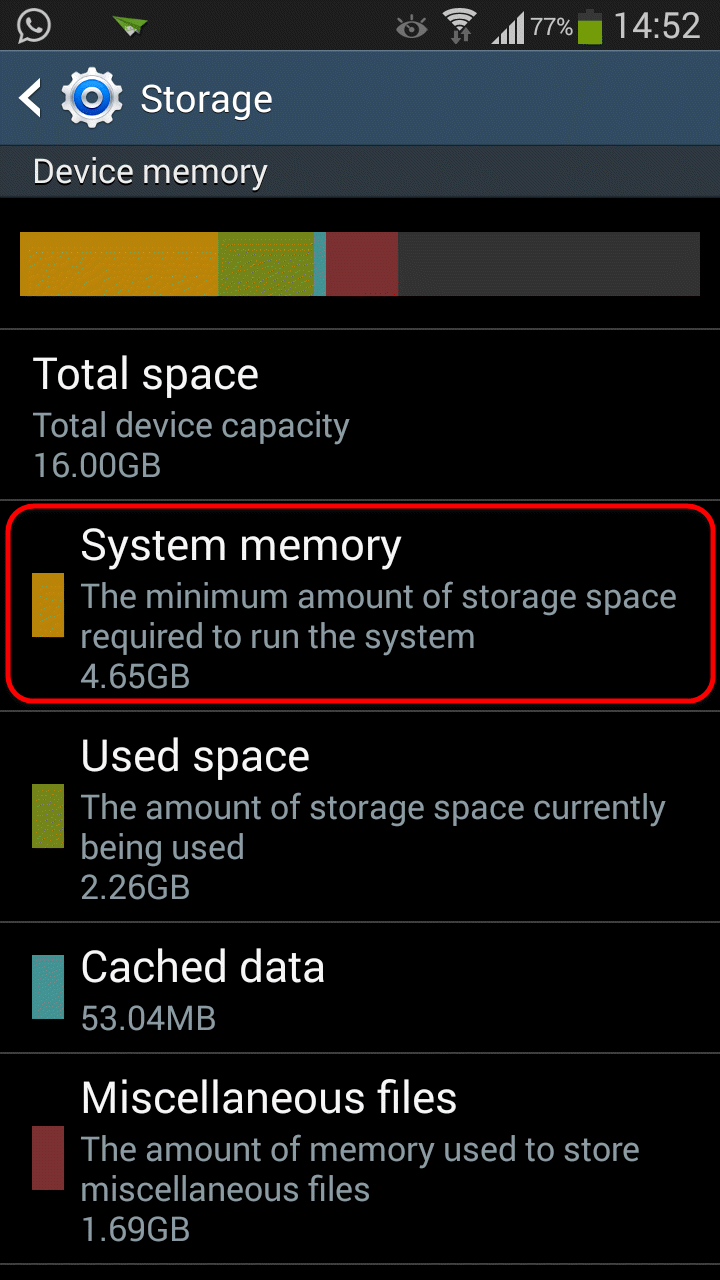
Possibly the simplest fix is to get your hands on a decent size SD card and move all your photos, videos and music over, thus freeing up valuable space. Even more effective is to use a cloud service such as Google Drive, OneDrive or Dropbox and have it sync automatically over WIFI, ensuring you’ve got the desktop app installed as well. If you want to see the pictures on your phone later, you can always fire up the app and show them to your friends online. For more of an in depth sweep, on your device go to settings > more > storage, which will bring up the image shown above which is a summary of how the system storage is being used. My app cached data was almost 2Gb and by simply hitting that and clearing it freed up a lot of useful space. The section miscellaneous files is best left alone however as it contains numerous important system files necessary for running Android.
Use a file manager
I use Airdroid to browse around my Galaxy from the desktop when the fingers get tired of all those tiny icons. The most useful features of Airdroid are downloading files from the device and getting it organised by deleting stuff you probably don’t need. I went into text messaging and deleted hundreds of useless texts I’ll never read again, simply to free up some space.
Some apps are resource hogs
Up until recently I was using a fancy live wallpaper which displayed animated thunder and lightning, rain and sunshine until I realised it was calling home every few seconds and using a big chunk of memory, so I uninstalled it. Another big resource hog is Facebook and its attendant app, Messenger, both of which I’ve hibernated as being huge resource hogs and a drain on the battery, which isn’t all that marvelous in the first place. For hibernating apps, I use Greenify which suspends apps without uninstalling them and is now available for non-rooted Android phones, although it’s said to be more effective when rooted.
The last resorts
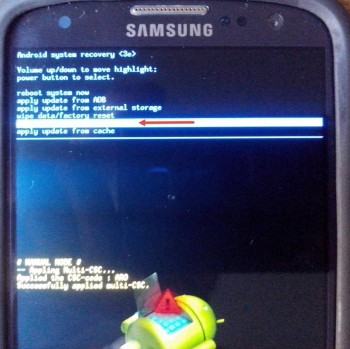
Earlier I mentioned deleting app cache data, but it’s also possible to clear the system cache which is a more involved process and, according to many users, helps to speed up the phone by clearing out old cached files which help apps to load faster, but sometimes are said to bog down the system. You do this by powering down the phone, then power back up by holding POWER, VOLUME UP and HOME simultaneously which will take you to the Android recovery screen, where you scroll down using VOLUME DOWN, select WIPE CACHE PARTITION and then restart the phone. No data will be lost using this method and please bear in mind that different versions of Android may require different steps to reach the same goal.
As you can see in the picture above, there’s also an option for a FACTORY RESET, which isn’t actually as scary as it sounds, particularly if you’ve already backed up your files and can remember all your passwords. This method puts the phone back to when it came out of the box all nice and shiny.
I’ve tried all the above methods at one time or another and more recently the tips mentioned above, without actually performing a factory reset, resulting in the phone being much more responsive with pretty much no lag whatsoever and a slightly longer battery life between charges.