


Overview
I was working on a Word document and stepped away from my computer, and when I came back hours later, I saw that my Word document had not been automatically saved. Incredibly, Word (and Excel) will only AutoSave to Microsoft OneDrive or SharePoint. Despite displaying a large AutoSave button in the upper-left corner, Microsoft has chosen to cripple Word and Excel for locally saved files to force customers to use their OneDrive service. Pretty cheesy, Microsoft!
Instead, Microsoft offers AutoRecover. AutoRecover provides a foundation for recovering a document in the event of a system crash, but it is somewhat hit or miss. I do not want to rely on AutoRecover to protect me from possible data loss. I save my files locally and I already have adequate backup procedures in place. I do not want to save my files to OneDrive.
In this article, I will go over how to save files to a local computer by default, how to change the default save location, and how to set up Word and Excel to automatically save to a local location.
How To Save Files Locally
The process of changing Word to save files to a local PC instead of Onedrive by default is very similar for both Word and Excel. I will only show you how to do it in Word.
- Launch Microsoft Word on your computer.
- Select Options from the left sidebar. If you are editing a document, select File then Options instead.
- In the Word Options window, choose Save from the sidebar.

- Check the Save to Computer by default option in the Save documents section on the right.
- Uncheck the AutoSave files stored in the Cloud by default in Word to turn off AutoSave to OneDrive
- Set the Auto Recovery settings if desired.

Word will now save files to your computer instead of OneDrive by default.
How To Change The Default Save Location
Although you can always override the save location when creating a Word or Excel file, you may want to change the default save folder. The process to change the default save location is very similar to how to save files to a local PC. Again, I will show you in Word.
- Launch Microsoft Word on your computer.
- Select Options from the left sidebar. If you are editing a document, select File then Options instead.
- Select Save in the sidebar from the Word Options window.
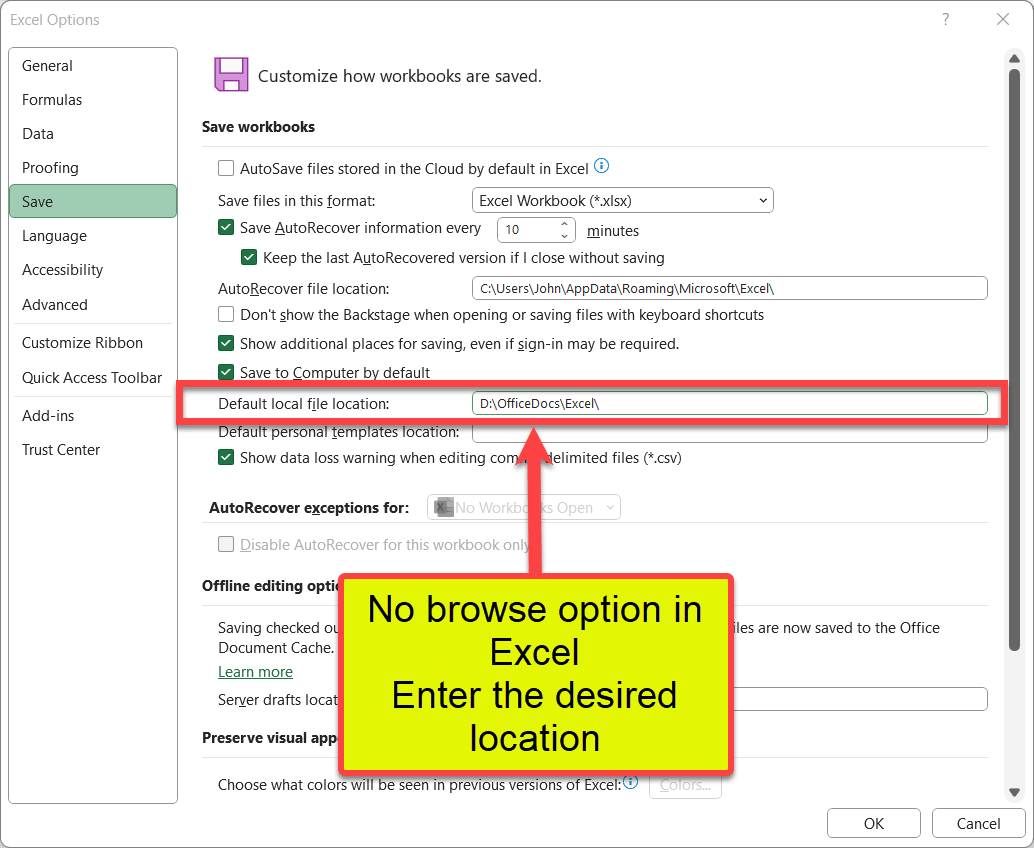
- Browse to or type the desired default location for the app into the Default local file location: field.
Note: On my system Word has a browse button but Excel does not.

By default, Word and/or Excel will now save your documents in the folder you specify.
Automatically Save Word Documents
Install Add-Ins
To automatically save files to a local location in Word and Excel, we need to use add-ins. From Graham Mayor’s website, download the Word and/or Excel autosave add-ins. There are two files in each zip file: a self-extracting .exe file and the add-in file (.dotm for Word, .xlam for Excel).
The add-in must be placed in the add-in folder.
The default location of the add-in folder for Word is:
C:\Users\[User name]\AppData\Roaming\Microsoft\Word\STARTUP
The default location of the add-in folder for Excel is:
C:\Users\[User name]\AppData\Roaming\Microsoft\Excel\Addin
Close Word or Excel, unzip the downloaded file, and do ONE of the following:
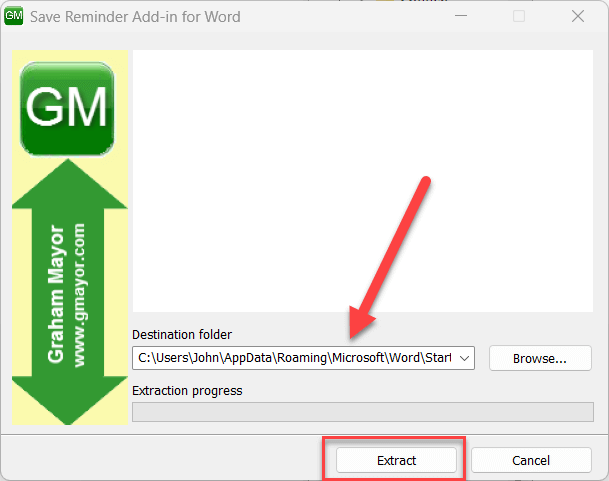
- Run the self-extracting file and let it extract the add-in to the add-in folder. (Note, it took about 20 seconds on my PC before I saw the first screen)
- Manually copy the add-in file to the add-in folder

In Excel, there is an additional step to activate the add-in:
- Launch Microsoft Excel on your computer.
- Select Options from the left sidebar.
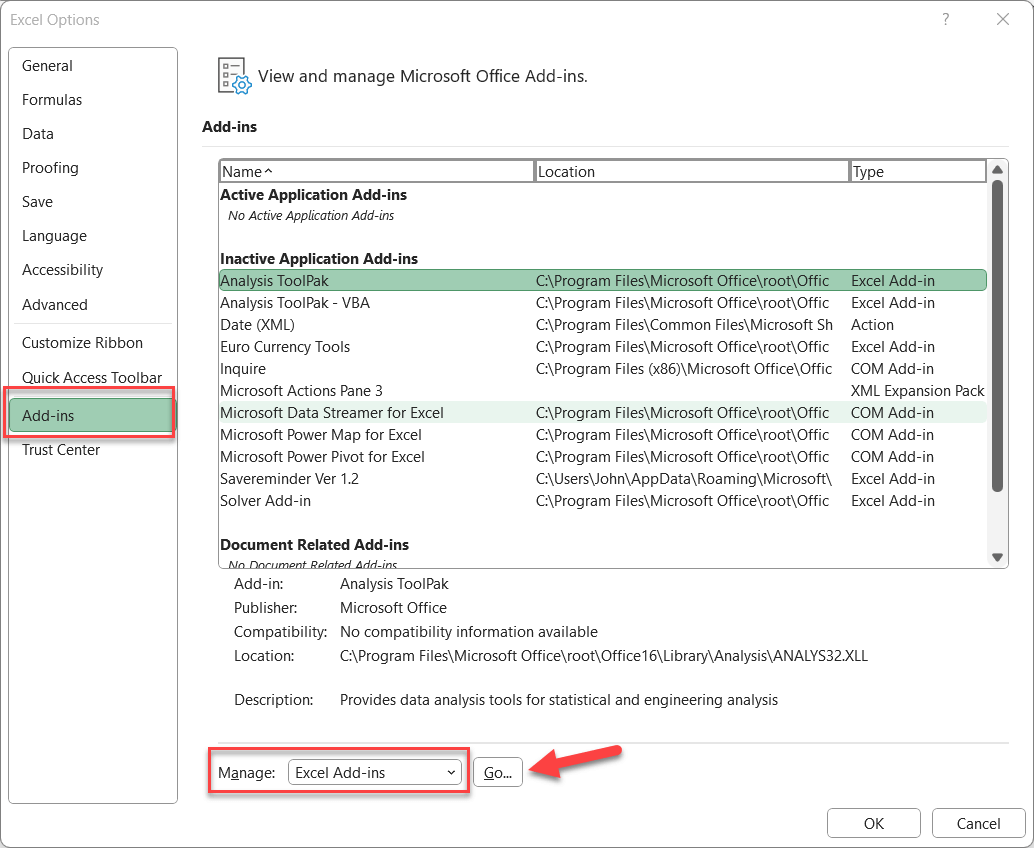
- In the Excel Options window, select Add-ins from the sidebar.
- In the Manage box, select Excel Add-ins and click Go.
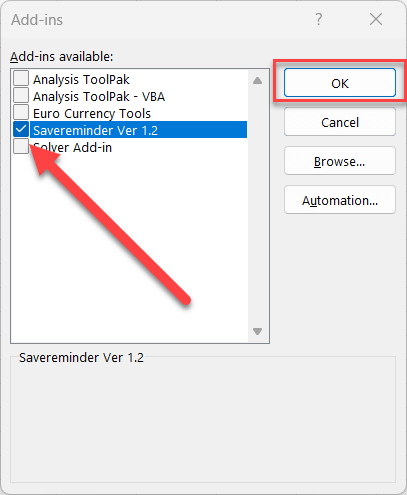
- Select the SaveReminder add-in and click OK.
Using The Add-In
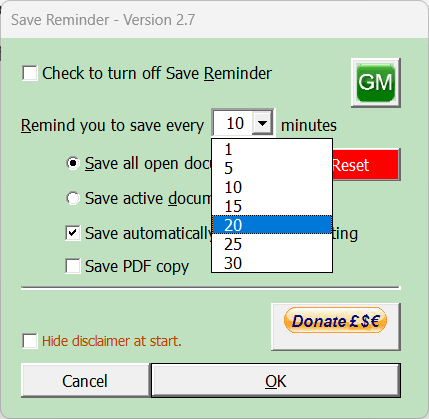
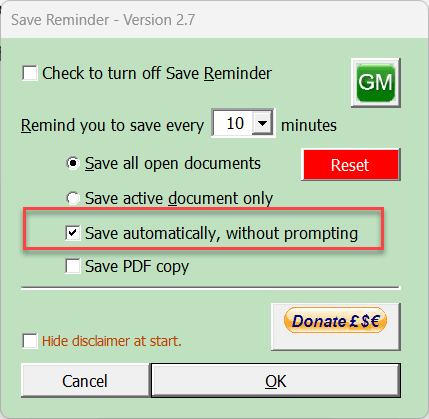
If this is the first add-in you have set up, a new Add-ins menu item will appear in the main menu bar of Word or Excel. Click Save Reminder Options, to open the settings for the add-in. You can use the drop-down button and select an interval number or type a number between 1 and 99 to determine how often the add-in should run. To set the add-in to save files automatically without notifying you, select the Save automatically, without prompting check box.

Summary
Microsoft has chosen to cripple Word and Excel by forcing customers to either use their OneDrive service or go without autosaving files. However, if you want to set up Word or Excel to autosave, an add-in can provide the missing functionality. Microsoft should allow autosaving to any file location, not just OneDrive or Sharepoint. Let me know in the comments if you have any questions.
—


Thanks…this was useful!
Hi Randy,
Thanks. Glad you found it useful.
Hi John. I don’t have the Excel option under add-ins that you have kindly indicated. Can you suggest how to add it into the list? I have the other 4 options but not the Savereminder ver 1.2. Thanks.
Should have mentioned I have Office 365 subscription.
Hi Randy,
I don’t use the Office 365 subscription so this could be wrong, but …
Did you copy the add-in to the add-in folder? When you get to that screen and there is no Savereminder add-in, it means the add-in is not in your add-in folder. Perhaps the add-in folder is different on your PC. Get to the screen above (image 11 of 14), click the Browse button. You should see the Savereminder.xlam in there. To find that folder, move your cursor up to the folder box. Click in it and it should show you the full add-in folder path. If you right-click on it you can select copy address. Now copy the add-in into that folder and try again.
Thanks John for you reply. It appears there was a failure on my part to read ALL the instructions; now have it working in Excel and Word. As usual…User Error. 🙁
Glad you got it working.
I have OneDrive & mostly happy to use it, however there is the odd file I don’t want saved on the cloud. Is there a way to leave the defaults as is but just override an individual file so it saves locally?
Hi Robynne,
I am not aware of any way to use AutoSave to Onedrive but disable it for a specific file. Note, for an Excel workbook, there is a toggle in options to disable autorecovery for a workbook –but, unfortunately, not one for Autosave. If you are willing to write code, there is a “Workbook.AutoSaveOn” property that may work for an Excel workbook.
Thanks John. Thought that would be the case, but one is ever hopeful.
Once is working, is there a way to always start word/excel by doing this by default? (everything is working, but i need to turn this on every time i launch the program)
Hi Gonz,
Did you click the “Save automatically, without prompting check box”?
Yes and it works…
The problem is when lets say i everything was ok on Monday. Next day you open the document but the autosave is not working til i activate it again…
So i was wondering if there is a way to have this set by default like everytime word is on it works like that already
Hi Gonz,
Sorry, I’m not sure why it works one day and not the other. It is working for me.
I’d suggest clicking the reset button and then reapplying the settings as described in the article. If that does not work, try sending the developer an email at support@gmayor.com.
Hi John,
A STARTUP folder does not exist at C:\Users\[User name]\AppData\Roaming\Microsoft\Word\. The Word folder has several AutoRecovery files, but no folders. I’m using Office 2021. Any ideas? Other than installation, I’ve never made any changes to the program.
WAIT! I just realized it only appears when Word is running! Sorry about that. Hope my mistake helps someone else…
Hi Mark,
Glad you figured out your problem.
I successfully installed the addin for Word and set it up. However, for the Excel addin, on the manage Excel addin step, after selecting the addin and clicking OK, the following message displays – “This file type is not supported in Protected View”. Any suggestions?
Hi Ken,
Try going to your Add-ins folder, (probably C:\Users\[User name]\AppData\Roaming\Microsoft\Excel\Addins) in a file manager, find the addin file. Right-click, select “Properties”, at the bottom of the dialog box, check to see if there a a checkbox with a “Unblock” checked. If so, unselect it and click OK.