Do this on all the computers in your network.
Set Profile Account Password
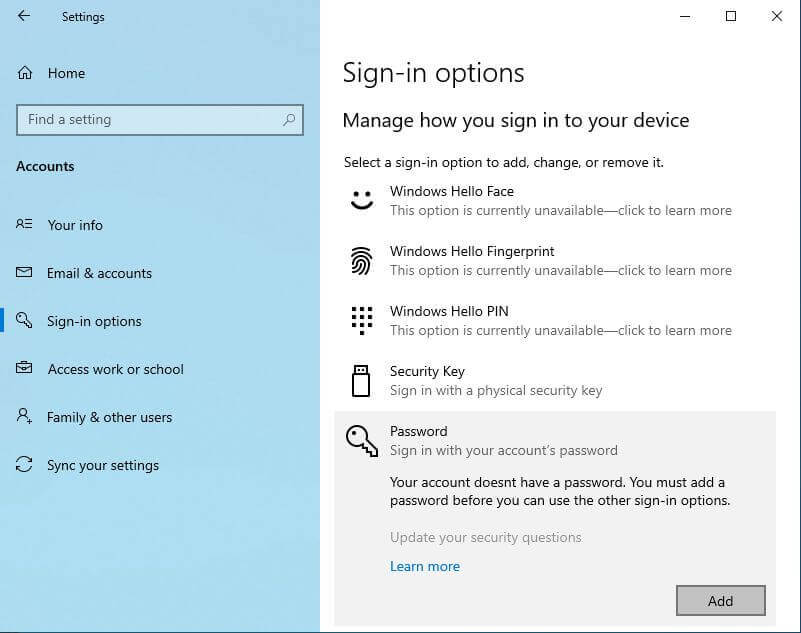
First set a password on your profile account in Windows if you don’t have one already. If you are going to be sharing files over a network, a little bit of security doesn’t hurt. You can have Windows save this data when you first access your network. It will ask for the name of the account you are trying to access and the password for that account. Check the option to save it if you desire.
Type sign-in options in your search bar and click on it in the menu. Then click on Password and then Add. Then you’ll be asked to type your new password and retype, click next and you’ll be asked to choose security questions.
If you want to create a password and bypass the security questions then use the command prompt as mentioned here:
- Please read: How To Add Change Password With Command Prompt
Enable Network Sharing
Next, you’ll need to enable Network Sharing. Type Manage advanced sharing settings in the search bar and click on it in the menu. In the window that opens, in the Private section, click on Turn on network discovery, and if available Turn on automatic setup of network connected devices.
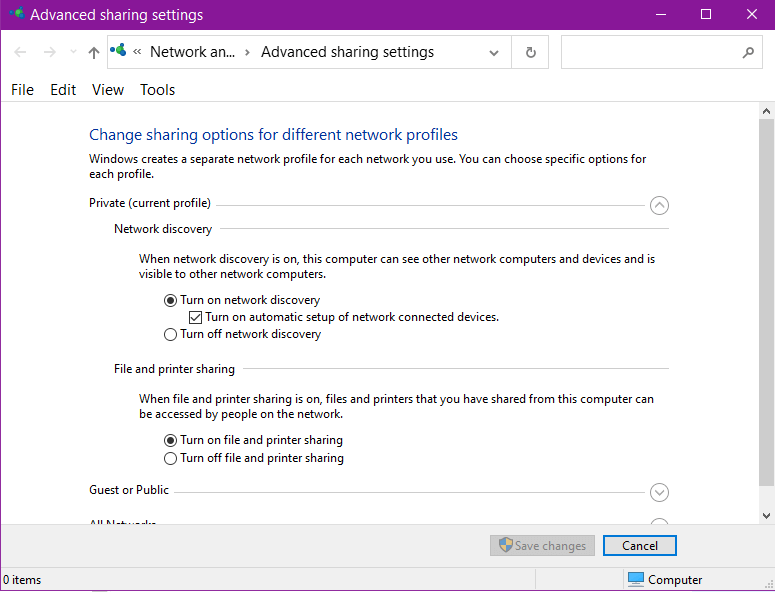
Then enable File and printer sharing by clicking on Turn on file and printer sharing.
Click on Save changes.
Name Your Computers And Network
Then you probably want to name your computers and set a name for your network. It’s a little more secure than using the default, WORKGROUP.
In the search type View advanced system settings and click on it in the menu, click on the Computer Name tab. Then the Change button. Type in a unique name to identify the computer and a Workgroup name. The Workgroup name must remain consistent on all of your computers for them to communicate with each other.
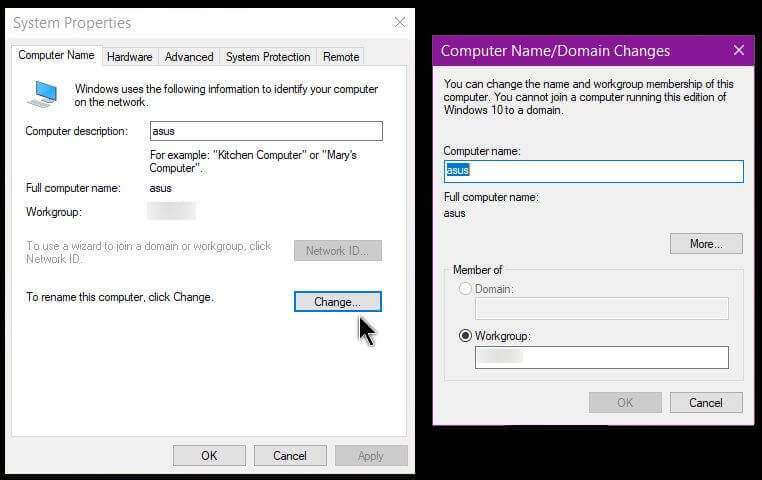
Click OK. Then Apply and OK again. You’ll get a welcome to the group message and a prompt to restart. Restart your computer. Once restarted, congratulations, your network is set up. One more thing to do is to share files and folders.
Sharing Files And Folders
You can share your entire hard drive but it’s not recommended for security reasons. So here’s how to share a file/folder. Right-click on a file or folder, in my case, folder.
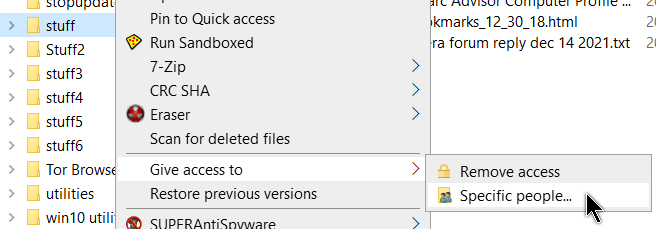
In the menu that opens, click on Give access to and then Specific people…
In the Choose people to share with box, the first line next to the Add button is usually blank, click on it and select Everyone from the list And then click on Add. Everyone will appear in the box below it.
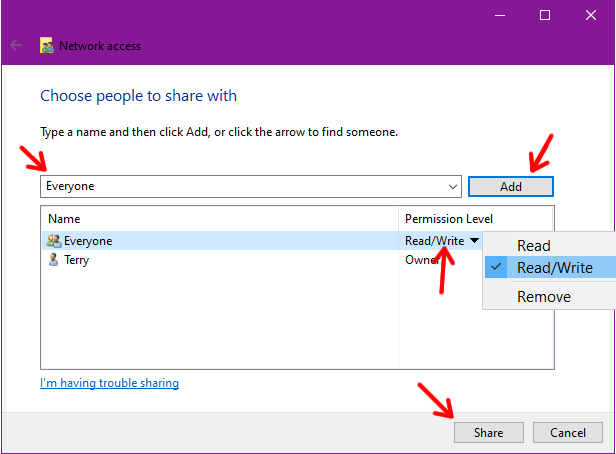
Next to it, you’ll probably see the word Read. If you want people to be able to see the files but not change them, leave it on read. Otherwise, click on the word Read to change it to Read/Write (this is always my choice). Or remove it altogether. Then click on the Share button.

So finally you will get a Your folder is shared message. Click on Done.
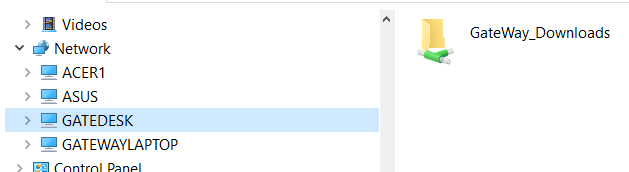
Now when you go to File Explorer and click on your Network, you should be able to access the shared folders from your network.
Troubleshooting
And yes, you will have trouble, this is Microsoft after all. 🙂 I still have problems with my network. Just a few days ago it completely vanished. My Gateway desktop comes and goes and I still can’t print through one of my laptops. Read here:
- Reset your network: How To Reset Windows 10 Network
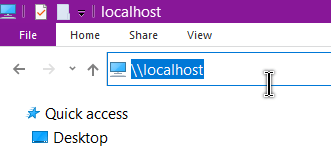
Check to see that you have files/folders set to share by typing \\localhost in the top address bar in File Explorer.
Check that these services are running:
Type services in search, Right-click each of the following services, select Properties, if they’re not running, select Start. You could also set the Startup type to Automatic or Manual. All of these services are set to manual on mine but are running:
- Function Discovery Provider Host
- Function Discovery Resource Publication (manual Triggered)
- SSDP Discovery
- UPnP Device Host
If you set Function Discovery Resource Publication to automatic you will probably end up with a new device listed — set to manual Triggered.
- Please read: Remove Microsoft Publication Service Device Host
Make sure SMB 1.0/CIFS File Sharing Support is installed.
Type Turn Windows features on or off in search. In the Windows Features box scroll down through the list and find SMB 1.0/CIFS File Sharing Support. There may be a small black square before the name, this means only certain components are installed. Click on the little plus sign before that. Make sure SMB 1.0/CIFS Client is checked. Some suggest also checking SMB 1.0/CIFS Server as well.
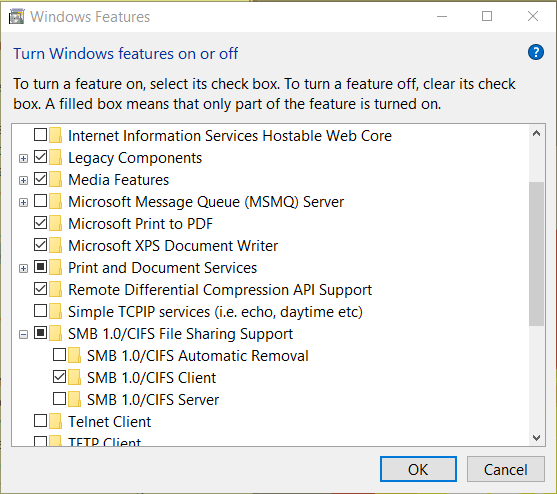
On mine, only SMB 1.0/CIFS Client is installed and this doesn’t seem to be a component of Windows 7 at all. Check the Client one, if not checked. Then click OK. Wait until finished installing. Restart system.
So that’s basically how to set up a network with some troubleshooting options. Next article, sharing a printer over a network. If you have some troubleshooting tips to add, share them in the comments.
—