So, you are using another writing program but decide to switch to LibreOffice. You want to use it as your default – that means the main program that opens when you double-click on an associated file type. Usually, during the installation, you do get a chance to set this but, in this case, you didn’t.
LibreOffice
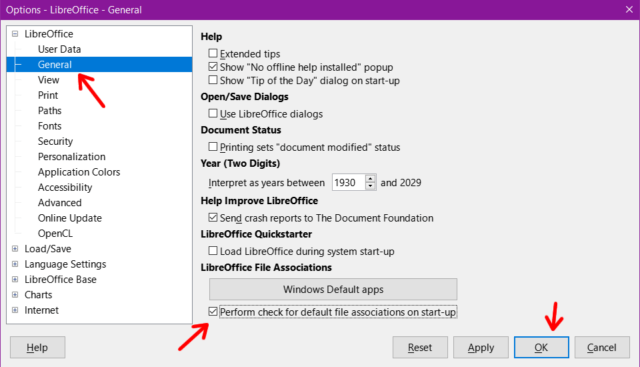
Here is how to switch over. Open LibreOffice. Click on Tools in the top menu. In the box that opens click on General on the left-hand side.
On the right-hand side scroll down to the Windows Default apps. Click on it if you want to wade through that jungle, otherwise, just check the box that says Perform check for default file association on start-up. Click OK.
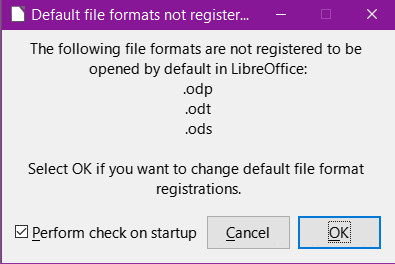
Now close LibreOffice and Reopen it. This time you’ll get a little popup box asking if you want to set .odp, .odt, .ods in LibreOffice by default. Click OK for Yes. The Perform check on startup option is your choice.
OpenOffice
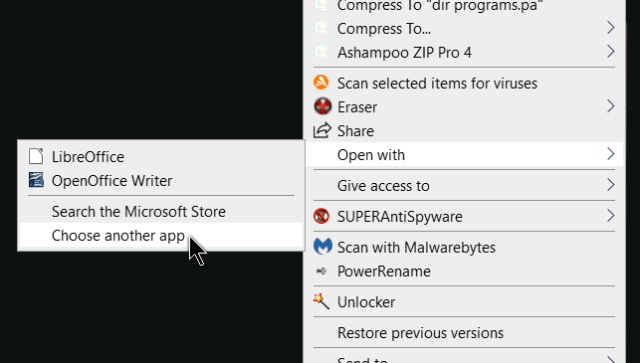
OpenOffice doesn’t seem to have these options at all. If you are switching to OpenOffice, right-click on a document.
Click on Open with from the menu, then Choose another app.
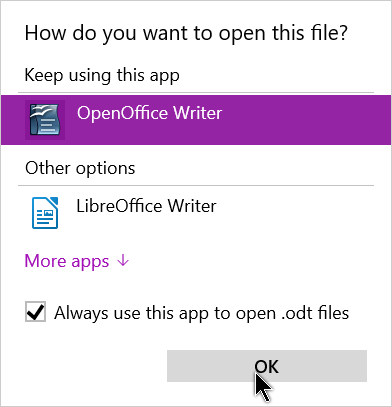
In the box that opens, click on the app of your choice and More apps if it’s not listed, and be sure to check Always use this app to open .odt files.
You could use this right-click method to set LibreOffice as well. Just FYI: This right-click method could be used to set the associated program for almost every other file type.
—


This does not work on Windows 11.
I’m not surprised. One of the grudges against Win11 was that Microsoft made it harder to switch from their default applications.