
Last week we jumped off the Facebook topic to talk about TikTok. If you missed that article you can find it here:
How To Check Your TikTok Account Status
This week we are going to head back to Facebook. Yes, I found another interesting feature that I want to share with my readers. While I’m researching what I’m going to cover every week, I found a setting that could help you. As you may know, when viewing posts on this platform many posts are set to Public. You also may know you can set your posts to Friends Only, but did you know you can make any posts default every time to your desired setting? You can! And I want to show you how this works. Before we jump into this make sure to catch up on the other articles I have written on this subject:
- How To Change Facebook Video Notifications
- How To Change Facebook Chat Settings
- How To Unblock People On Facebook
- How To Block People On Facebook
- How To Unfollow Facebook Pages/People
Guess it is time to begin today’s lesson.
How To Set Facebook Default Audience
This will be shown on the website and then on the mobile app.
On Website
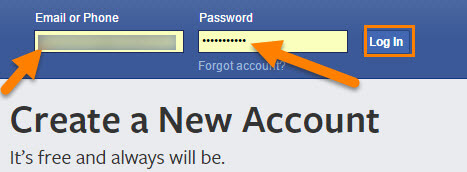
Step 1: Head over to the website and log in to your Facebook account.
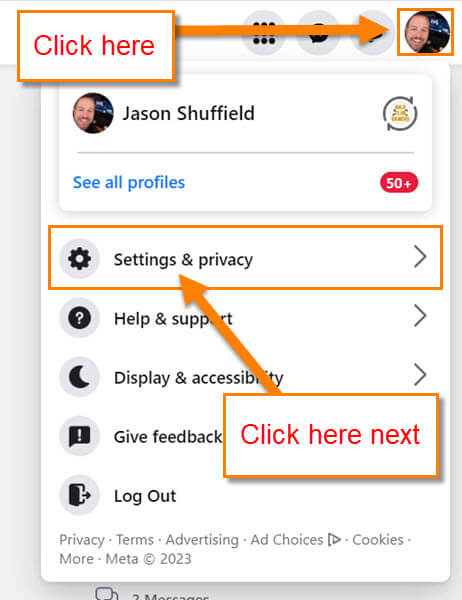
Step 2: On the Home screen look to the top right. Click on your Profile Image and a menu will appear. On the menu find the Settings & privacy link. Click it.
Step 3: On this menu click on Settings.

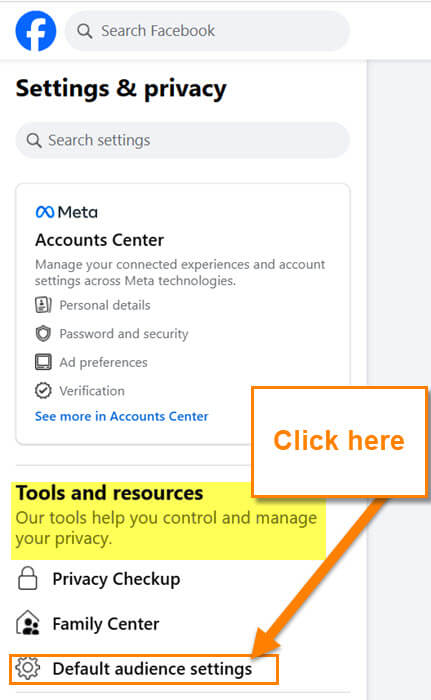
Step 4: Now that we are on the Settings menu look to the left menu. Under the Tools and resources section find Default audience settings. Click it.
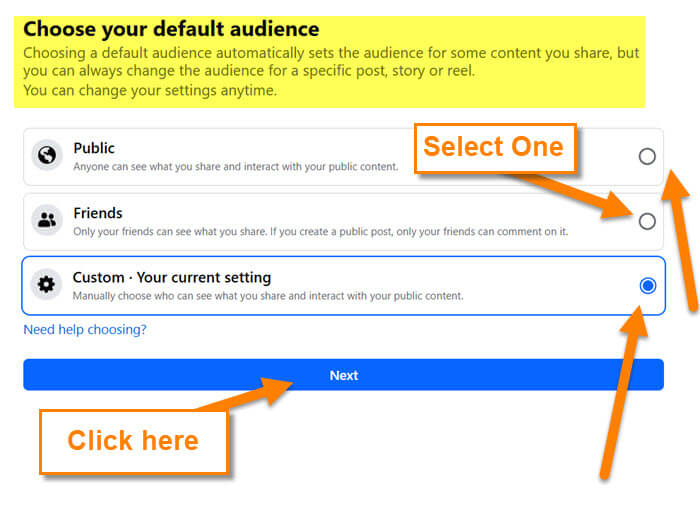
Step 5: On the next screen you are given some choices which you can choose from:
Choose your default audience: Choosing a default audience automatically sets the audience for some content you share, but you can always change the audience for specific post, story or reel. You can change your settings anytime.
- Public (Anyone can see what you share and interact with your public content)
- Friends (Only your friends can see what you share. If you create a public post, only your friends can comment on it)
- Custom – Your current setting (Manually choose who can see what you share and interact with your public content)
For my example, let’s click on the circle to the right of Custom. After you select one, click the Next button at the bottom.
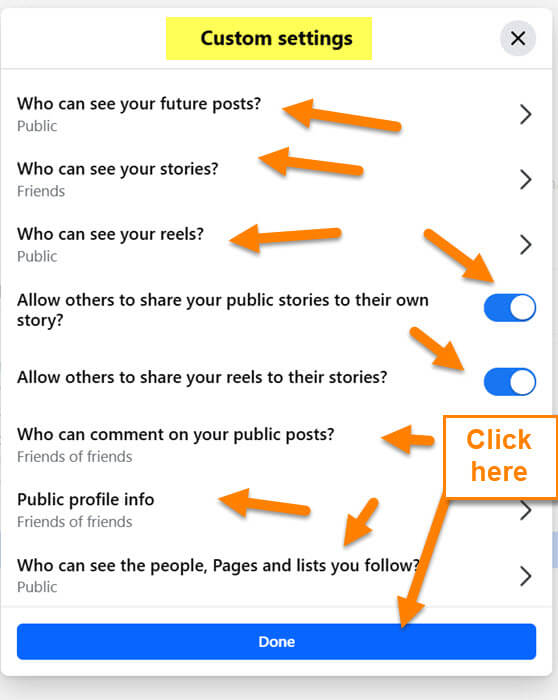
Step 6: The custom settings will pop up. Here you can adjust who sees your stuff:
- Who can see your future posts? (Below each one will tell you how you have them currently set)
- Who can see your stories
- Who can see your reels
- Allow others to share your public stories with their own story (The switch to the right will let you turn this on or off)
- Allow others to share your reels with their stories? (The switch to the right will let you turn this on or off)
- Who can comment on your public posts?
- Public Profile Info
- Who can see the people, Pages, and lists you follow?
- So you want search engines outside of Facebook to link to your profile? (The switch to the right will let you turn this on or off)
There are many things you can adjust here. Once you are done, click the Done button at the bottom.

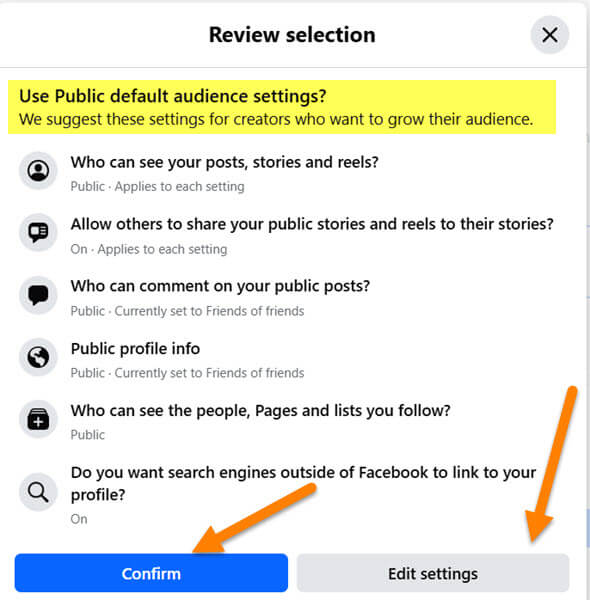
Step 7: At the end, you will get a Confirmation window. If you are good with what you have done, click the Confirm button. If not, click the edit button and it will take you back to the custom window. You will get an Audience Updated Confirmation screen. Click the Done button at the bottom. All good to go. This will effect all devices you use Facebook on.
That is how you do this on the website. Now it is time to show you how this is done on the mobile app.
On App
This will be shown on my Motorola Edge Android phone.
Step 1: Find the Facebook app on your mobile phone. Tap it.
![]()
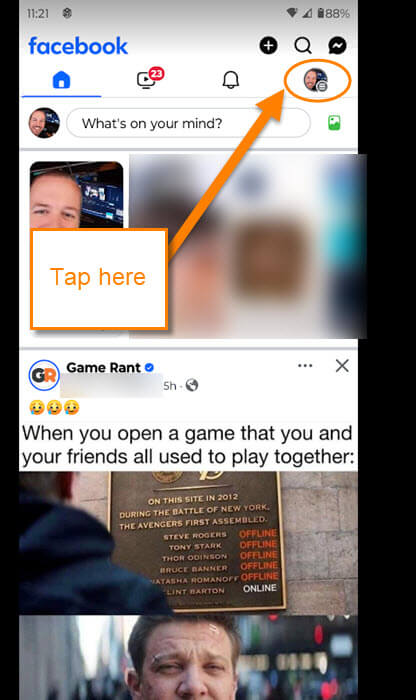
Step 2: Once on your home screen look to the top right and find your Profile Image. Tap it.
Step 3: On the next screen scroll down and find Settings & privacy. Tap it.

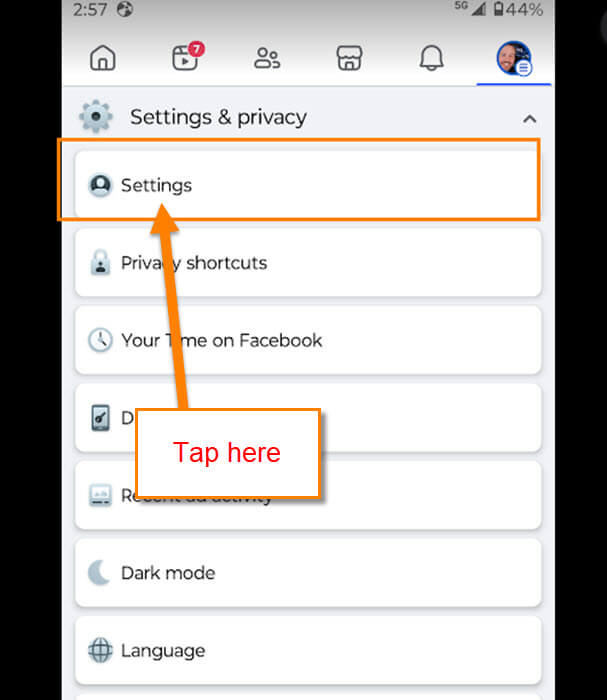
Step 4: Now you will want to tap on the Settings link. Tap it.
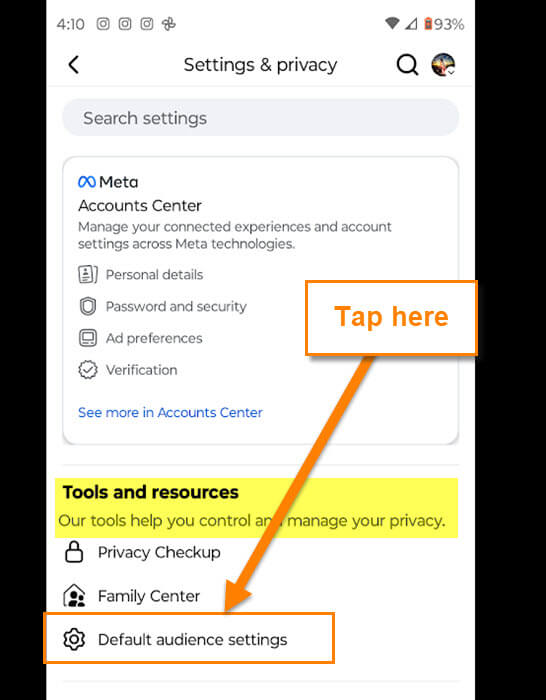
Step 5: On this screen look under Tools and resources. You will find Default audience settings. Tap it.
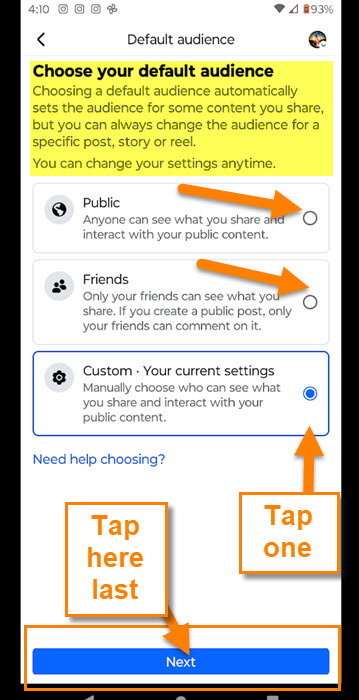
Step 6: Like on the website, you are given some choices:
- Public (Anyone can see what you share and interact with your public content)
- Friends (Only your friends can see what you share. If you create a public post, only your friends can comment on it)
- Custom – Your current setting (Manually choose who can see what you share and interact with your public content)
For this example, we will tap on Public at the top. Now you will need to tap the Next button.
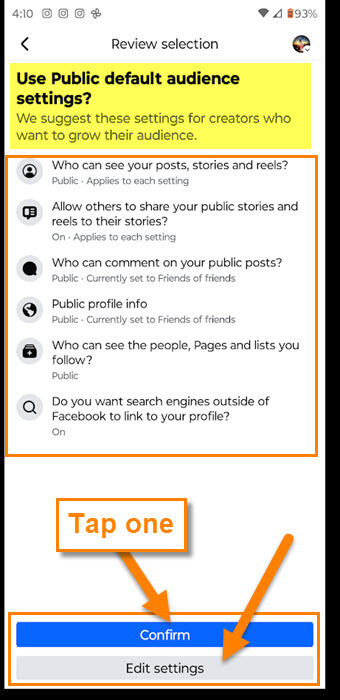
Step 7: This will bring you to the Review and Confirm screen. If everything looks good, tap on the Confirm button at the bottom. If it does not, tap the Edit settings.
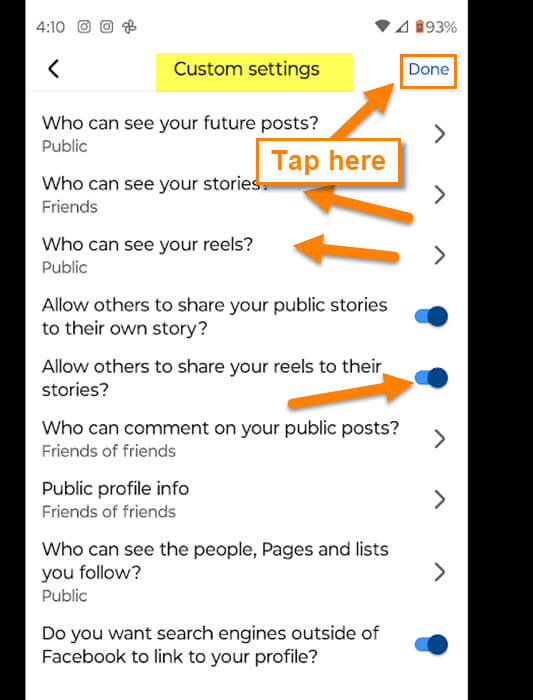
Step 8: If you tapped the Edit settings button, you will show up on the Custom settings screen. Fix the parts you want, and tap Done at the top right. Either way, you will get an Audience Updated Confirmation screen. Tap the Done button at the bottom. All good to go. This will effect all devices you use Facebook on.
Now you know how to adjust this on the website and the app. Time to share your new knowledge with the world.
—