As you all know, I despise using extra time and keystrokes when I am working in Word. I am all about making my task as easy and efficient as I can. Why on earth would you continue to do something the hard way when an easier method exists? So let me tell you about the Hanging Indent.
The Hanging indent sets the position of the left side of your paragraph. When you move the left indent, your first line indent or hanging indent are moved also. This comes in very handy when you are working on a document that requires numbered data. You key in your number and then tab, right? That works great until you get to the second line of that paragraph and it wraps right back to the beginning. When you set a hanging indent it moves your text exactly to where your first line of text after the number begins.
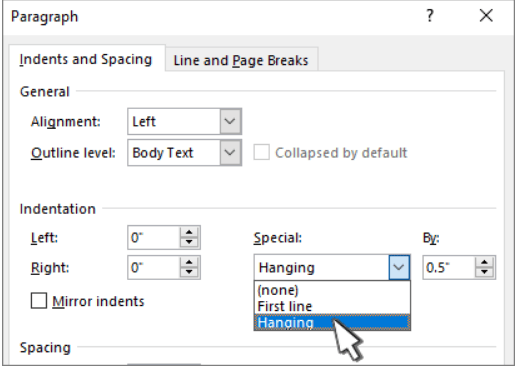
Follow the steps below to learn how:
- Select the text where you would like to add your hanging indent.
- Go to Home | Paragraph dialog launcher | Indents and Spacing.
- Under Special, select Hanging. You can adjust the depth of the indent using the By field.
- Select OK.
Easy peasy!
—