A couple of weeks ago at my day job my co-worker was working on a newsletter and needed to get an image off a website. She needed to save them to her computer as a JPEG file. This should have been a very simple task for anyone with her tech skills, but we found out that Google Chrome decided not to offer JPEG as an image saving option. Instead, they only had WEBP files which I never previously even paid attention to. For those of you that don’t know what this file is, here is the Wikipedia definition:
WebP is an image format employing both lossy and lossless compression. It is currently developed by Google, based on technology acquired with the purchase of On2 Technologies.
As a derivative of the VP8 video format, it is a sister project to the WebM multimedia container format. WebP-related software is released under a BSD license.
The format was first announced on September 30 in 2010 as a new open standard for lossy compressed true-color graphics on the web, producing smaller files of comparable image quality to the older JPEG scheme.[10] On October 3, 2011, Google announced WebP support for animation, ICC profile, XMP metadata, and tiling (compositing very large images from maximum 16384×16384 tiles). (Wikipedia)
Blah, blah, blah, you get the idea now. Since it is now being used more and more, how do we save images as JPEG files? That is a great question and I will be showing you a trick on how you can still save those images off Google as the file we are used to. The WebP file does not show up all the time but this will give you directions of what to do when it does. Now open that browser and let’s learn something new.
How To Save WebP Images As JPEG
Important: This might not work on every site but it did work on the ones I tested it on.
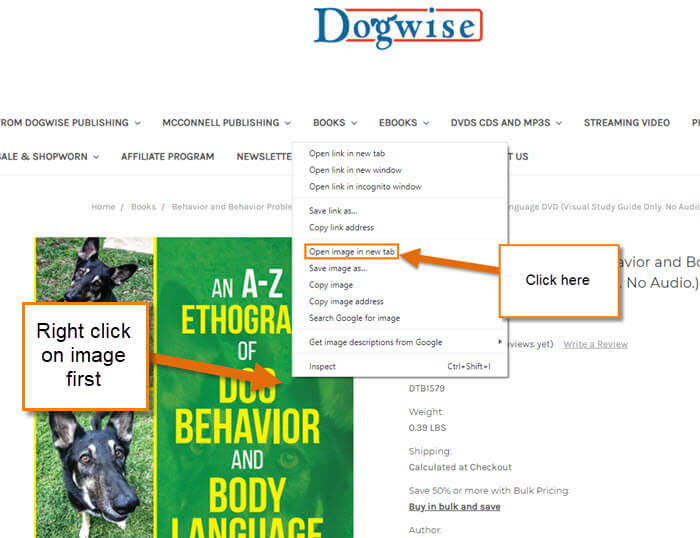
Step 1: You will need to open up your Google Chrome browser and head to the image you want to save. I’m going to go to Dogwise.com for my image.

Step 2: Once on the website, right-click on the image you want to save. If you click ”Save image as” it may default to the WebP file (this does not always happen but is becoming more common). This is not what we want to do. Right-click on the Image again and choose ”Open image in new tab”
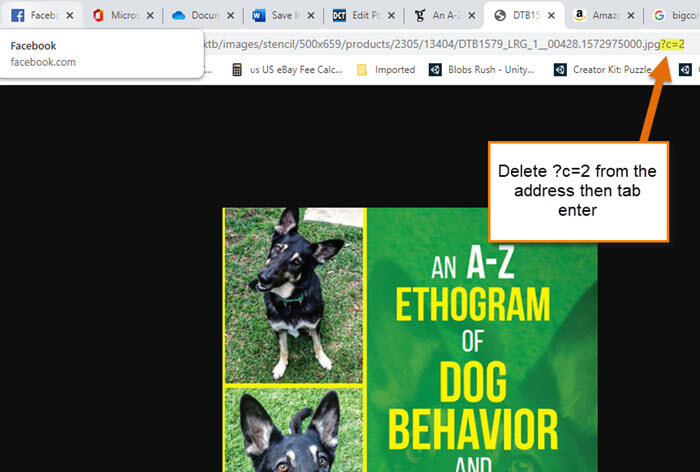
Step 3: Now that we are looking at the image in a new tab it is time to look to the top at the address bar. In the address bar look at the end of the web address. You should see “?c=2” at the end. Erase that part from the address up to the .jpg and then hit Enter. If you see something other then ”?c=2″, you still need to erase it up to the .jpg.
Step 4: After the page has refreshed it is time to right-click the image again for the menu and click on “Save images as.”

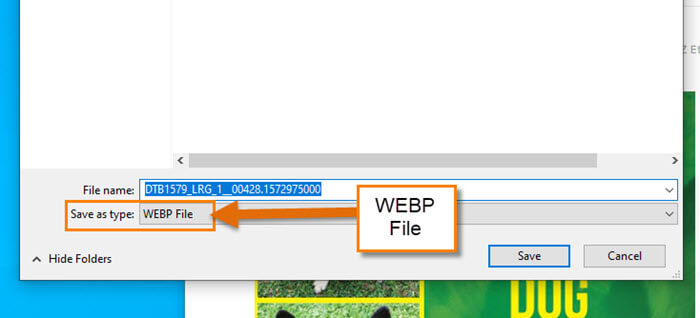
Step 5: You should now see that it offers to save the image as a JPEG. Name the image and click Save at the bottom right. Done!

That is how you save a WebP image in Google chrome as a JPEG file.
—
I run Linux Mint so I just ctrl/scroll the image to a decent size onscreen and use Shutter to grab and save it.
You could also do the same in Windows using their snipping tool.
😉
I just open the saved WebP image with Irfanview and save it from Irfan view as a jpeg.
I lurve me some Irfanview! –(even installed it into my Linux Mint)– just figured I’d post a way that doesn’t require any other installations.
🙂
I just take a screenshot of what I want to save.
Cool! Thanks buddies.
There’s a much simpler solution in Windows:
1) Drop-down the box where WEBP is shown as the default, and select All FIles (*.*)
2) In the file name box, remove the extension(s) – usually .png.webp – and add .jpg
(3) press Save. Works every time for me.