At work this past week I had a co-worker ask how they could delete/remove an email address from the Office 365 Web App. They wanted to remove the address from the auto-fill part of the email. She was asking because someone on the list changed their email address and the old one kept popping up. This can cause mistakes when emailing the right address if the former address stays on the auto-fill email list. With her question, I did a little research and found an easy way to remove that unwanted email address. Time to open-up those Outlook 365 Web Apps and learn how.
I will be showing you how to do this on my PC using Google Chrome:
Step 1: Log in to your Office 365 online account. I like to log in through the Office portal here at http://portal.office.com/. Whichever way you log in to your Microsoft Office, do so.

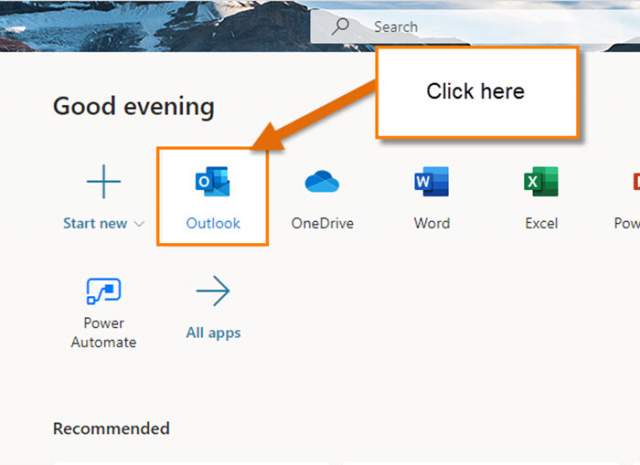
Step 2: Once in your account, click on the Outlook icon.

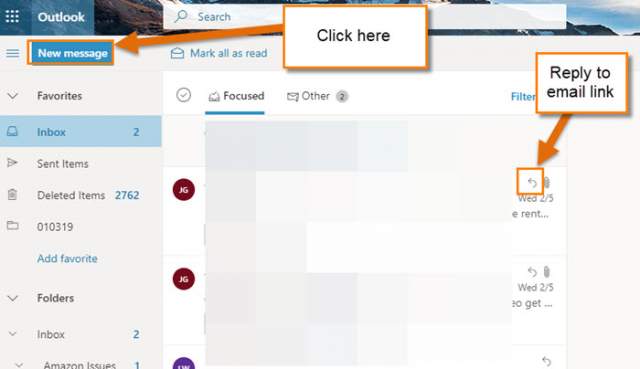
Step 3: Now we are in the Outlook 365 web App. From here we need to either open a new email or respond to an email. For this article, we will create a new email to show how this works. Click New Message at the top left.

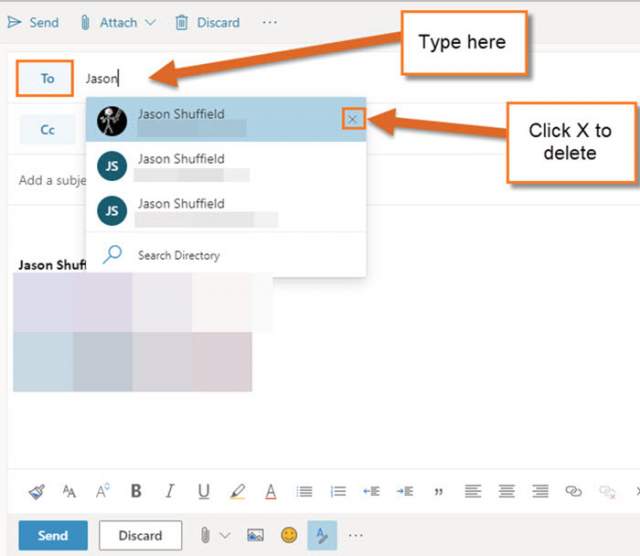
Step 4: In the To: box start typing the person’s name or email you wish to delete. Once you see the email address you are looking for, hover your mouse over the name. This will show you an X to the right. Click the X. Done.

Now the person’s wrong email will be removed from the autofill when you email them again. This should work the same way on the desktop version of Office 365. Now it is time to remove those unwanted email addresses that keep getting in the way.
—
Very good. Do you know of a similar process for Gmail or any others? I’m not seeing that X when I start typing in the Gmail To: field.