


Mail Merge In Word

Suppose though, you need only print a portion of your merged documents? For example, if your merged document takes 120 pages, and you only need to print the last 20 of them? A lot of folks think the answer is to print a range of pages, meaning pages 100-120.
However, if you try this method with a mail-merged document, you will not get the result you expected. Matter of fact, you won’t get any result at all, because Word inserts a section break between each merged record it adds to your document. So, if you are printing 120 copies of a single-paged document, you have 120 page ones, not pages 1 through 1320.
Sections
It can be confusing if you do not understand how sections work in Word. Every time you start a new section, Word starts counting page numbers again. You have three choices to choose from to get around this problem:
- First, you can simply start deleting pages until you only have your desired pages remaining, which is very tedious and time consuming
- Secondly, you can simply replace all the section breaks in your merged document with line breaks
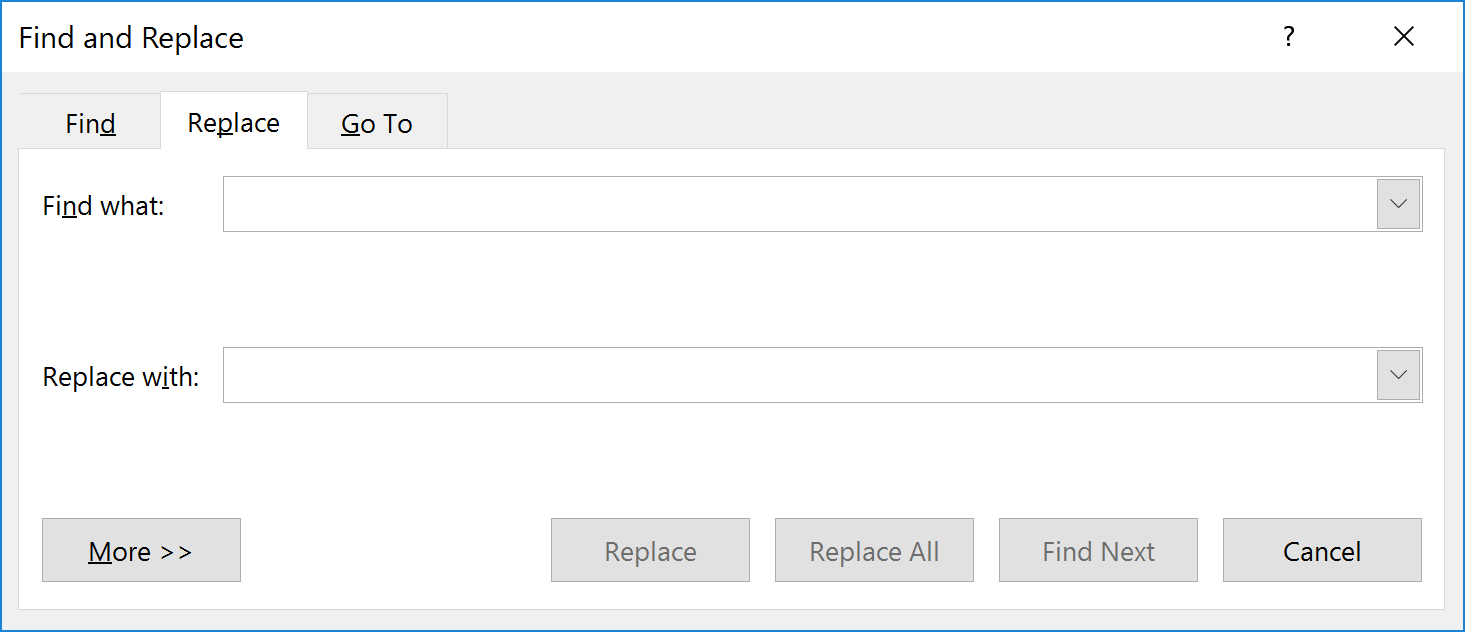
Follow the steps below to learn how:
- Type Ctrl+H. Word will display the Replace tab of the Find and Replace dialog box
- In the Find What box, key in ^b, which is the code for a section break
- Click No Formatting , if it is available. This will remove any formatting specifications in what you are searching for. You may need to click on More to see the No Formatting button
- In the Replace With box, key in ^m, which is the the code for a page break
- Click on No Formatting , if it is available. This will remove any formatting specifications in what you are replacing with
- Click on Replace All
Now, you can print as you normally would, entering a range of page numbers you would like to print.
- Now comes the third resolution which is the fastest and easiest. Just remember that in your merged document you are working with sections, instead of pages. So, if you want to print out the form letter for records 100 through 120, you would follow these steps:
- Type Ctrl+P, to display the Print dialog box
- In the Pages box, enter s100 – s120. Note the inclusion of the ‘s’ at the beginning. This tells Word you are specifying a section range, as opposed to a normal page range
- Click OK
Your selection will now be printed.
—

