
Some of us might not like our phone automatically setting the date and time for us. The system uses this for time stamping your text messages and many other functions that require the time and date. The reason this came up is my work schedule. I like to be a little early to work so I don’t end up being late. Since my phone is my watch nowadays, I needed to change the time to be five minutes faster than what is currently shown. With that being said, you might want to change your time to military time, or change the time zone or even change the date. If this is something you always wanted to know how to do, then you have found the right article. Time to pull out those Android phones (sorry iPhone users) and let us learn something new.
How To Manually Set Time/Date On Android Phone
I will be showing how to do this on two different phones: one will be my Android Samsung Galaxy A20 and the other is my wife’s Motorola Moto G6 Play. We will start with mine.
Samsung Galaxy A20
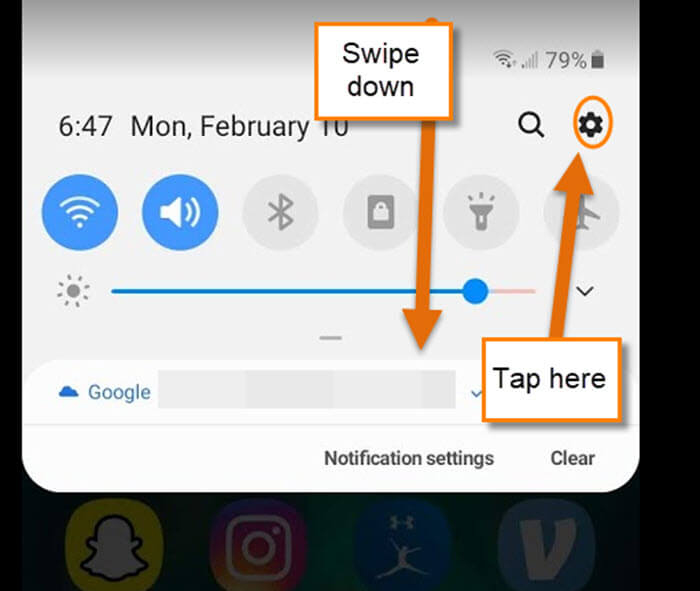
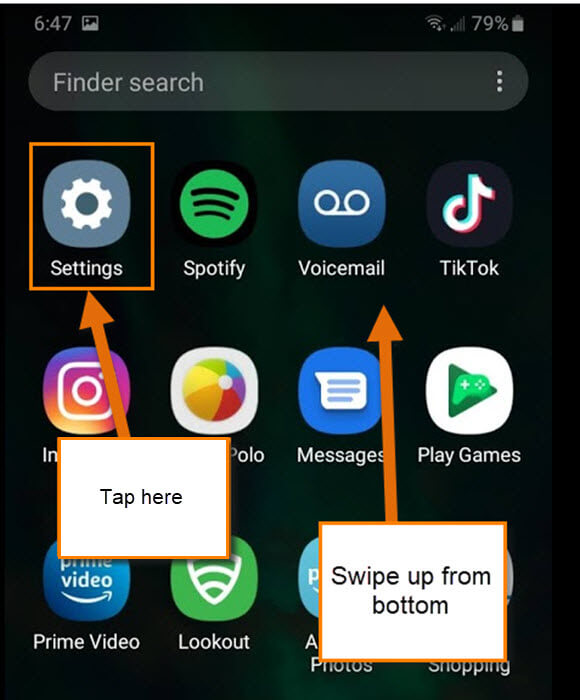
Step 1: The first step is to head to the settings screen. You can get there by swiping down from the top and tapping the Gear icon. Or we can swipe up from the bottom and tap on the Settings icon here. Pick one and tap.
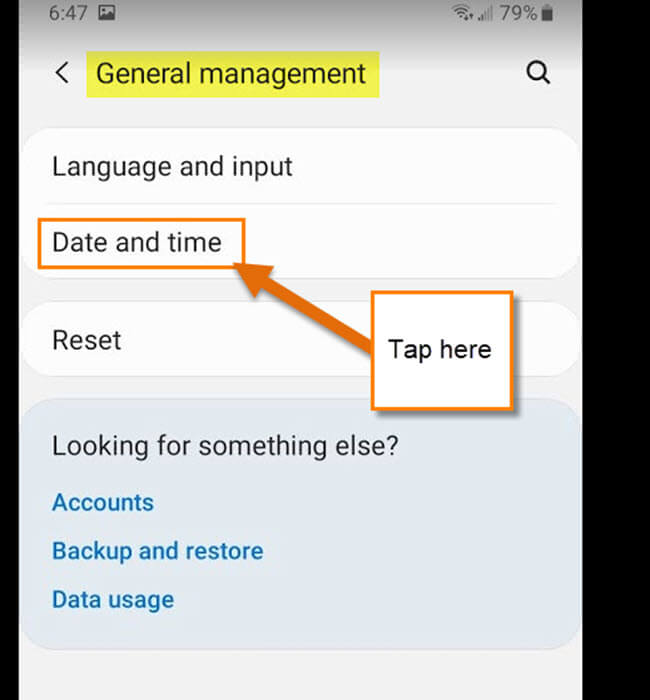
Step 2: Once on the Settings screen, scroll down until you see General Management and tap it.

Step 3: On this screen tap on the Date and time link.
Step 4: Here is where you can turn off the Automatic Date and time. Tap it.
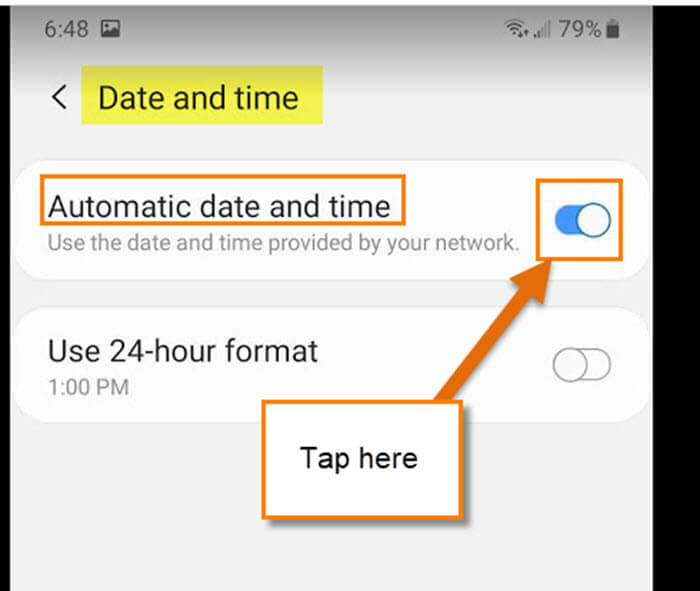
Step 5: Now there should be some options to change the Time Zone, Date, and Time. All you have to do is tap the one you wish to change. Once you have changed these settings you are all good to go.

Step 6: There is one other option that you will see. It is the Use 24-hour format (Military time). For you military timekeepers, that one is for you. Tap it.

Now it is time to show how this is done on a different Android phone. That will be shown on my wife’s phone, the Motorola Moto G6 Play.
Motorola Moto G6 Play
Step 1: On this phone, you need to swipe down twice from the top to open the full menu. From here you need to tap the Gear icon at the bottom right. Tap it.
![]()
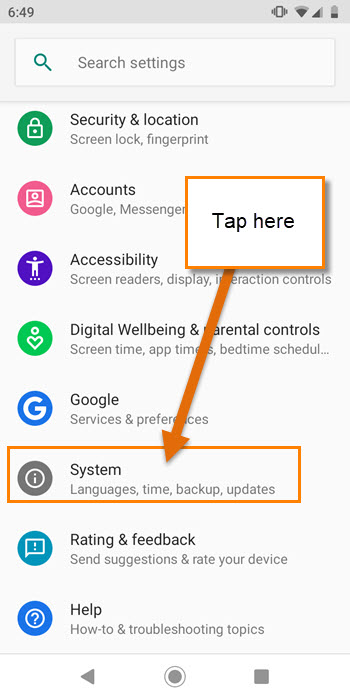
Step 2: On the Settings screen look for the System option. Scroll down until you find it. Tap it.
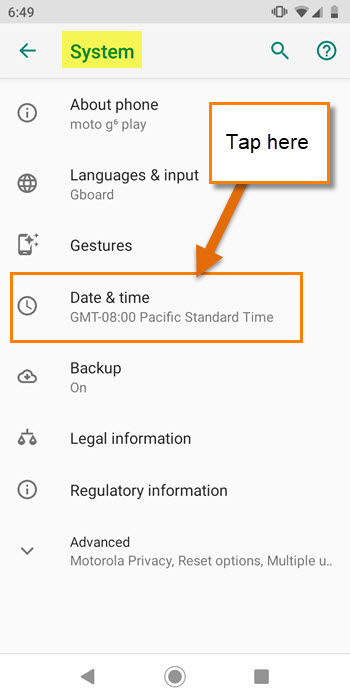
Step 3:Now that we are on the System screen, look for Date & Time. Tap it.
Step 4: Here is the screen where all the magic happens. Like we did on the last Android device, you can tap on the option you wish to update including turning off or on the Automatic Date and time setting. You will notice on this device it offers an Automatic 24-hour format which the other device did not. Either way, this is where you can edit your time and date manually.

That is how easy it is to manually update your date and time on your Android phone. Time to update those phones so you are always on your time.
—