 We all know how annoying Twitter Notifications can be. Whether on your phone, computer or any other device on which you installed Twitter. If you didn’t know, when you set up a Twitter account, or install the app on your smart phone, the default is to send you notifications on almost everything. When I set up mine I did the same thing you probably did, just clicked OK and Continue just to get it installed so I could get to using the app. We seldom pay attention to the settings until it starts doing something that annoys us. Just like my car! Drive it until it makes a weird noise and then figure out what is wrong. You would think someone like me would never have these issues – perfect in every way 🙂 Nope, I think most techs are just like everyone else, it’s just that we generally know how to fix an issue if it bothers us. With all that said, I was thinking I should share some easy steps to help you deal with this problem. Make your life a little less crazy and give you the power to control your notifications.
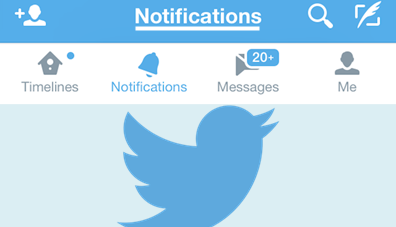
I’m going to show you how to manage the notifications on your Android/mobile phone (LG Volt) and on the Twitter website itself. I figure this is going to cover most of you out there. These steps are very similar on every device. So let’s start with the Twitter website which you probably access on your computer most of the time.
Managing your Twitter notifications on the website:
Step 1
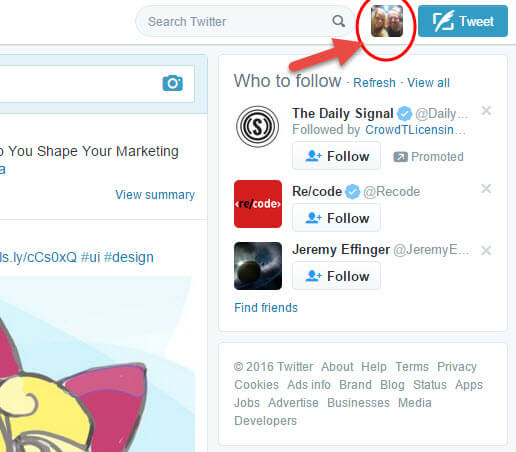
Go to twitter.com and log in to you account. Once you have logged in look at the top right of your screen. Here you will see a little image of your profile picture. Click on this:
Step 2
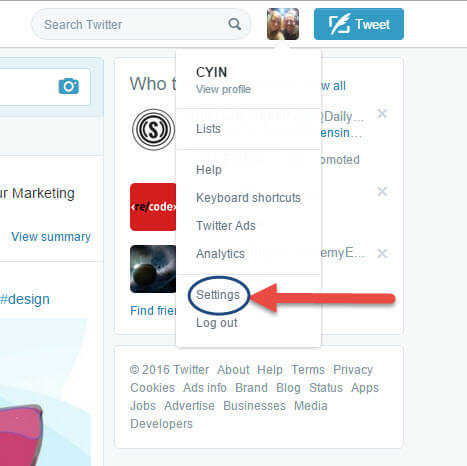
This will drop down a menu with these options you see below. Click on the one that says “Settings”
Step 3
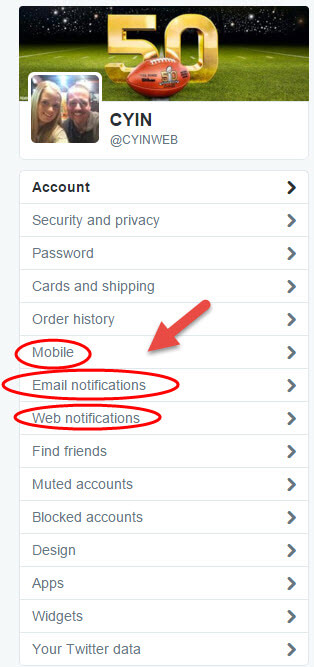
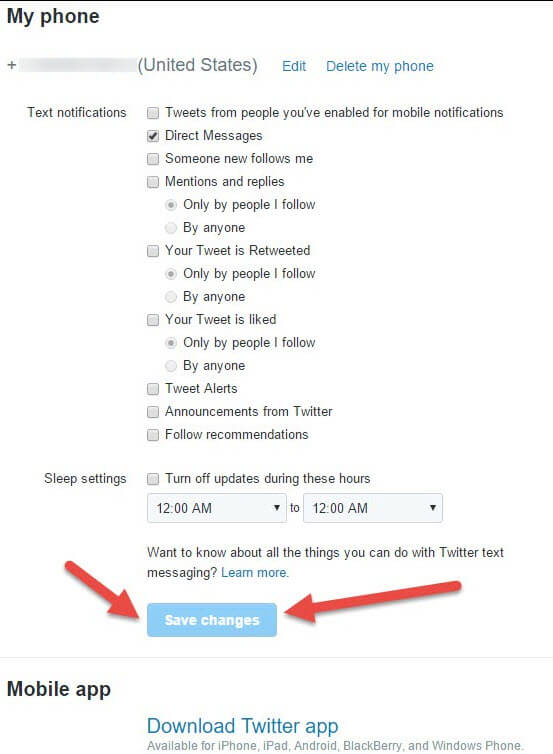
This page will show you all your account options from securities to widgets. Now you will notice here that two options say Notification but you might not know that there is a third one you will need manage too. That would be Mobile, which is the setting that controls notifications that go to your mobile device. So the three we need to manage are Mobile, Email Notifications and Web Notifications. We will start with Email Notifications first.
Step 4 will cover all three options
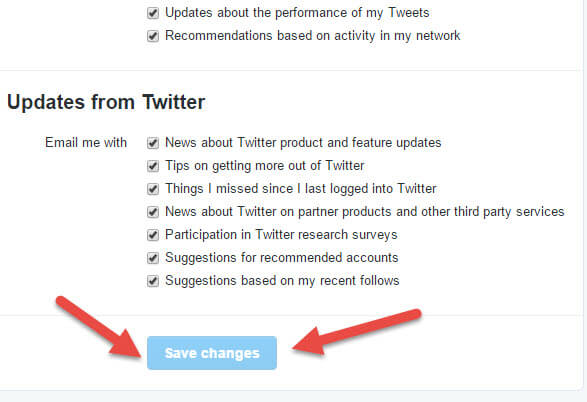
Click on the option “Email Notification.” In this page you will be able to manage what Twitter will email you. There are many options here to manage and set to your liking. As you can see the default for Twitter is to select everything. Check and Un-check what you would like to be notified about in your emails.
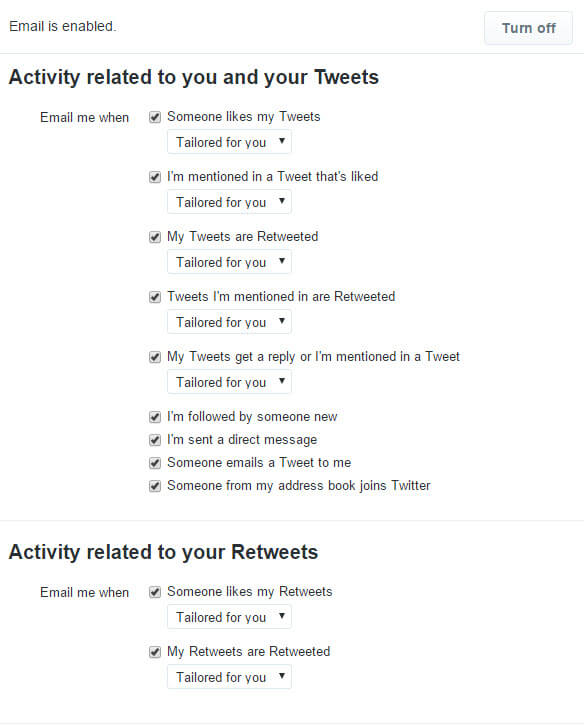
Once you have done that go to the bottom of the page and Click on “Save Changes”.
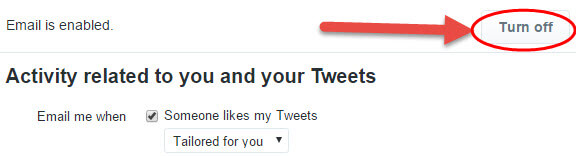
You can even select “Turn Off” (at the top right) which turns off all email notifications.
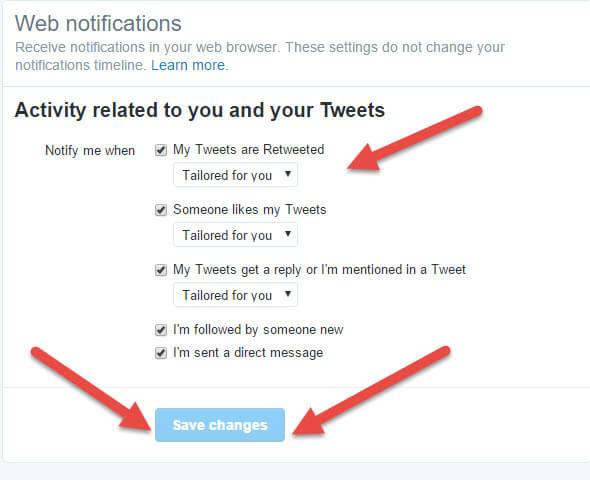
Next we will go over Web Notifications. This one affects when you get notifications via your web browser. These notifications are in the form of pop-ups which display in your web browser. It will notify you about Direct Messages, follows, likes, Tweets and Retweets from other twitters, when you are logged in to twitter.com. This is where you can control all that. As with the previous one, just select which ones you want and don’t. Once done click on the “Save Changes” button at the bottom.
Now the last one is the “Mobile” option. This will affect notifications that go to your mobile device. Just for your information, if you setup a Twitter app on your mobile device you will also have to adjust those options directly on that device. We will get to that next but let’s finish up here. Select the Mobile option and in here you will follow the same procedures as you did for the previous two. Select what you want and then click “Save Changes” at the bottom.
Managing Twitter notifications on your App/mobile device.
(I used an LG Volt smart phone to show how to do this)
Step 1
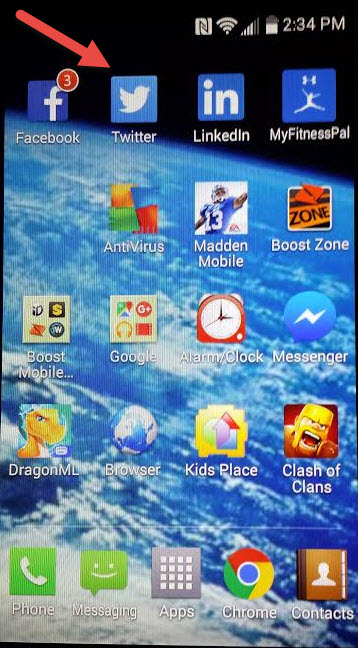
So now you know how to manage the Twitter Notifications on you computer/website. Now it is time for the mobile app you have installed on your phone or other device. Once you tap the Twitter icon on your mobile device it should open already logged into your account. If not sign in.
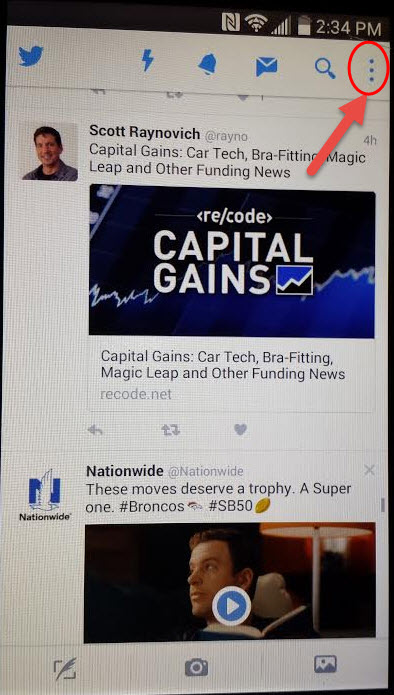
Step 2
Once in you should see 3 dots in a up and down fashion at top right. Tap on those:
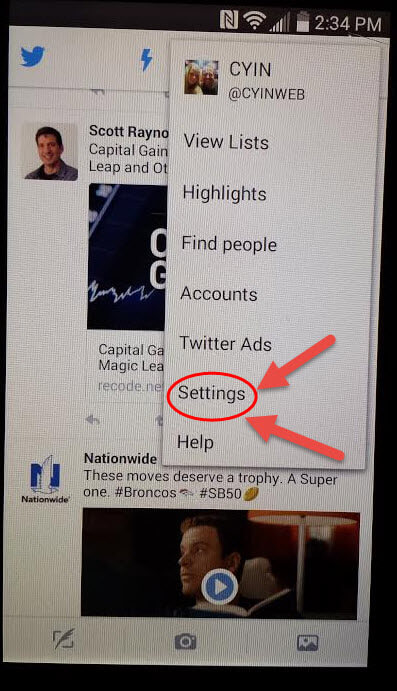
Step 3
This will bring up a drop down list. In this list you will see an option, most likely second from the bottom, saying “Settings,” tap it.
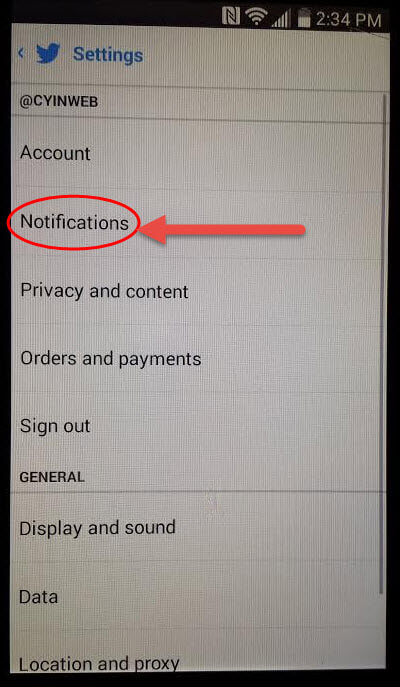
Step 4
Now you are in your Settings screen where you will see right near the top “Notifications,” tap it.
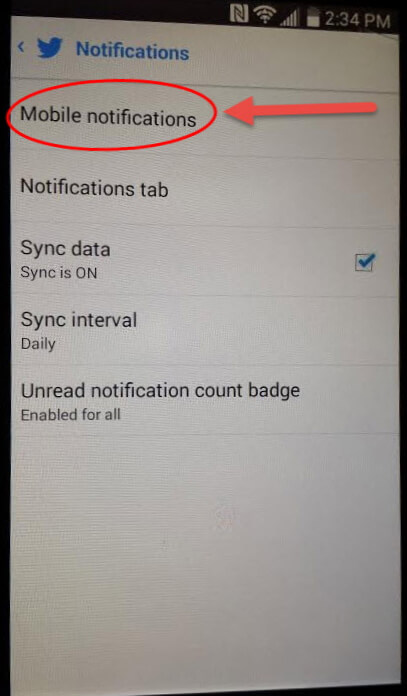
Step 5
Even with the mobile app you get more than one option with ‘Notifications’ in the list. The first one, and I feel to be most important, is the “Mobile notifications” option. Tap it.
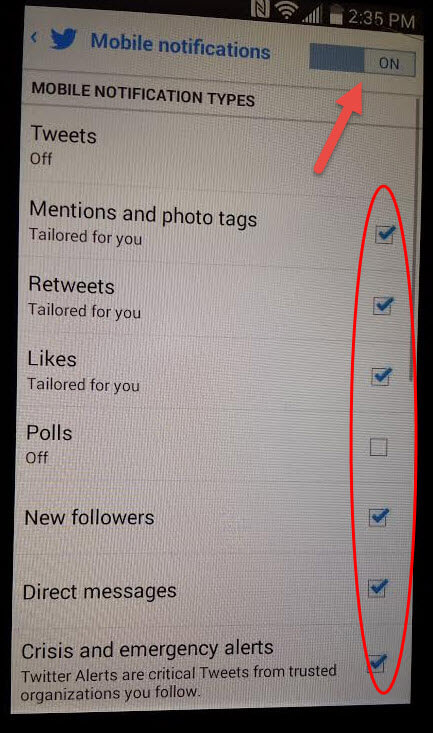
Step 6
You now have the option to choose the notifications you would like to receive or turn them all off at once. So if you would like to receive some then select those and they will be saved automatically. If you want them all off then, tap the ON and Off button at top right:
Optional Step
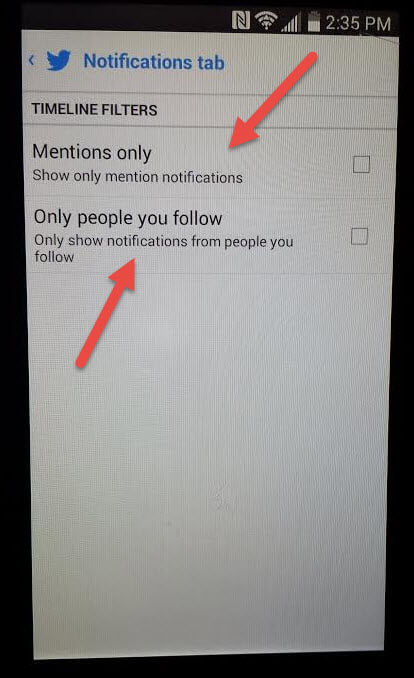
Real quickly, I would like to mention the other Notifications option that was on the main menu. The “Notification Tab”, tap it. This helps you manage the notifications on your timeline. I won’t go into details on this but wanted you to know where it was.
Now you have the power to manage all your notifications on your mobile device and your Twitter Webpage. With most apps and social media sites you will want to know how to control and manage them, and it’s always good to have the knowledge even if you never use it.