For the last two weeks, we have been going over some of the features of the new PS5. We will continue those lessons this week. This time I want to discuss how to manage your Microphone Settings. When you are playing online with your friends it is important to know how to manage these settings. Before we start this lesson, make sure to read the other two articles I have written about the PS5:
While you are at that, check out some other articles I have written about console gaming:
- How To Set Up User Passcode For PS4 Profile
- How To Set Date And Time On PS4
- How To Turn On PS4 Voice Commands
- How to Change Your PS4 Theme
- Connect NES Console To Monitor/Smart TV
Since that is out of the way, let’s get this new lesson started. In this class, you will learn how to adjust and manage the Microphone Settings.
How To Manage PS5 Mic Settings
This will be shown using the PS5 console.
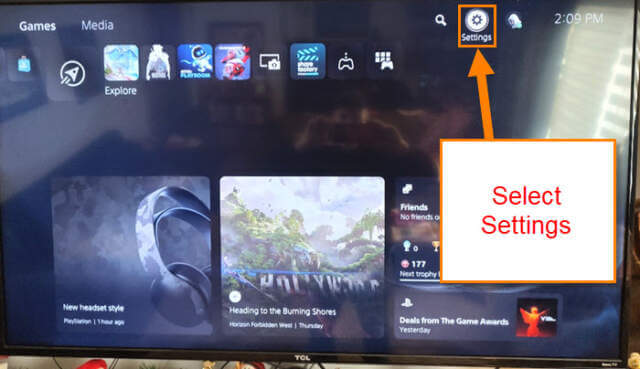
Step 1: Turn on your PS5 and sign in to your account. Once you are on the home screen, look to the top right. There you should see the Settings icon. Select it.
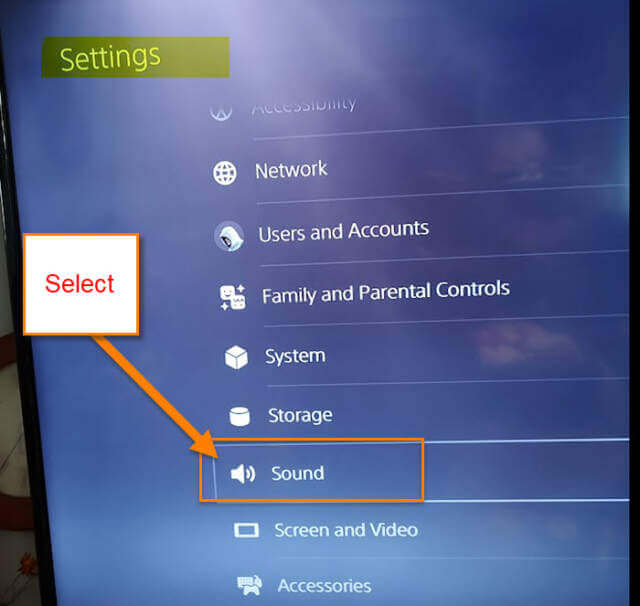
Step 2: On the Settings screen scroll down until you find the Sound option. Select it.
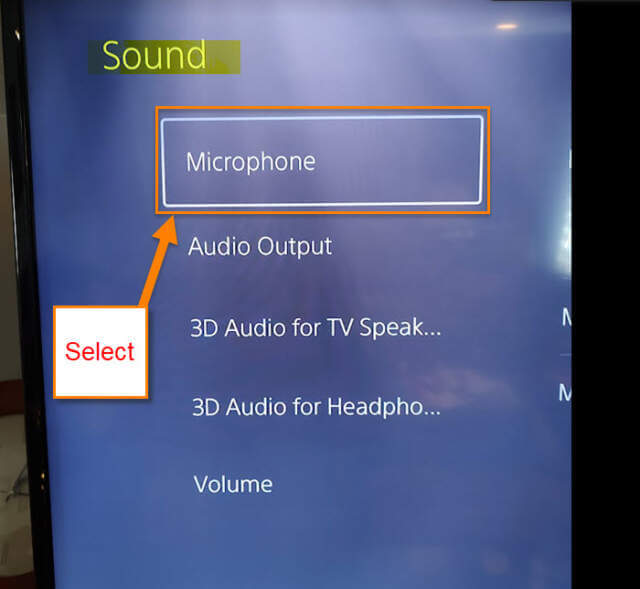
Step 3: On this screen, look to the left menu and select the Microphone option.
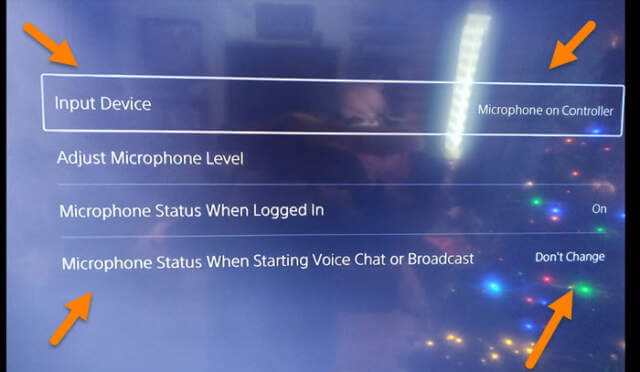
Step 4: Here we will be given a few choices:
- Input Device
- Adjust Microphone Level
- Microphone Status When Logged In
- Microphone Status When Starting Voice Chat or Broadcast
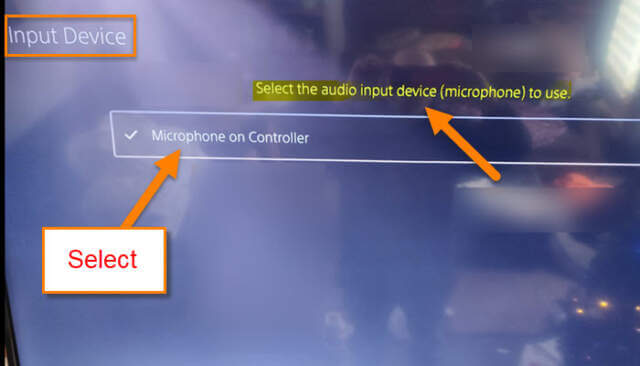
Let’s start with the top option (Input Device). Select it.
Step 5: After selecting it, you will see the Microphone options that you have.
Select the audio input device (microphone) to use.
Mine only shows the controller option for my device. If you have more than one option, select the one you want to use.
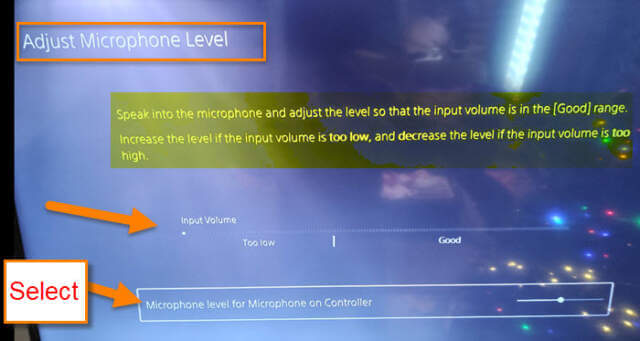
Step 6: Time to move on down the list and select Adjust Microphone Level. Once in this option, you have this message at the top.
Speak into the microphone and adjust the level so that the input volume is in the (Good) range. Increase the level if the input volume is too low, and decrease the level if the input volume is too high.
Select the option at the bottom (Microphone level for Microphone on Controller) to adjust the volume. Done…
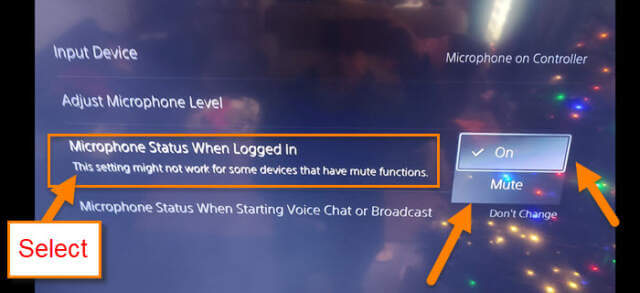
Step 7: The next option we want to go over is, “Microphone Status When Logged In.”
This setting might not work for some devices that have mute functions.
Once you select this you are given two choices:
- On
- Mute
Choose the one you wish to have it set at. I like to have it on Mute when I log in to a game.
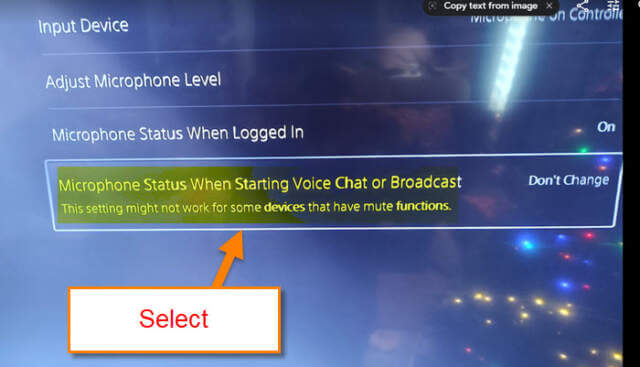
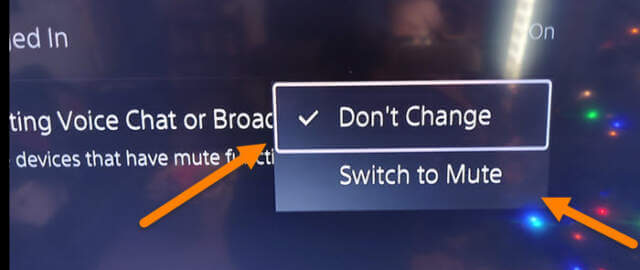
Step 8: We have now come to the last option in this section which is called, “Microphone Status When Starting Voice Chat or Broadcast.”
This setting might not work for some devices that have mute functions.
After selecting this option you will be given two choices:
- Don’t Change
- Switch to Mute
Like in Step 7, I like to have mine set to mute when starting. This has mostly to do with having four kids in the house. Done!
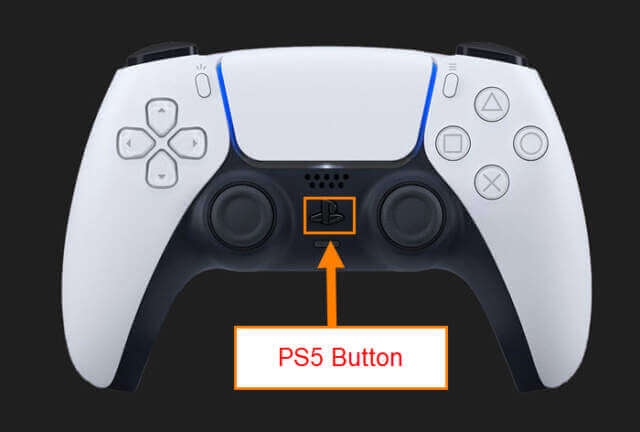
Bonus Tip: I wanted to give you a bonus tip today. To get to some mic settings quickly, push the PS5 button in the middle of your controller.
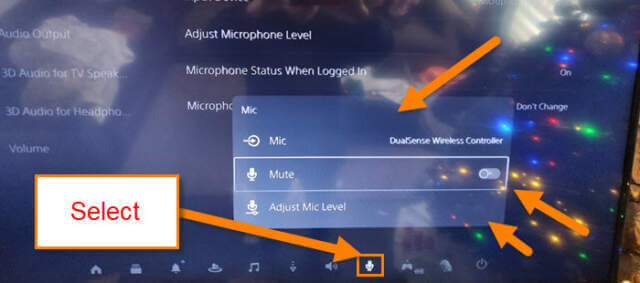
This will bring up the quick menu at the bottom of the screen. Select the Mic icon and you will get this menu:
- Mic
- Mute
- Adjust Mic Level
Adjust it the way you want and head back to gaming.
You now know how to manage the Microphone Settings on your PS5. Time to share this new knowledge with all your gaming friends.
—

