


When you own a Facebook business page you might have others set up with Page Roles. “What is that, Jason?” Good question! Facebook defines it like this:
Everyone who works on your Page can have a different role depending on what they need to work on. There are 6 different types of roles for people who manage Pages. When you create a Page, you automatically become the Page’s admin, which means you can change how the Page looks and publish as the Page.
Want to learn more? Go to this Facebook help page.
Now that we have an idea of what this is, I can tell you how you can manage it. Recently, my wife asked me to remove her as an Admin on my CYIN Facebook page. After she asked me this I thought that others might want to know how to remove/manage others in Roles. Now I have a chance to show you how you can manage the Page Roles, plus my wife will be happy not to be attached to my account which keeps me happy. Time to gather those other managers/social media helpers and learn how to manage those Page Roles.
How To Manage Facebook Page Roles
In this article, I will be showing you how to add/remove people, plus give you an overview of this Facebook feature. WARNING: If you change someone or add someone as an ADMIN, they will have the same permissions as you do to make changes to this page, including removing yourself.
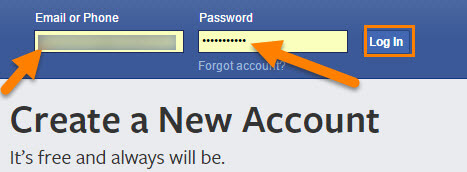
Step 1: Log in to your personal Facebook account.
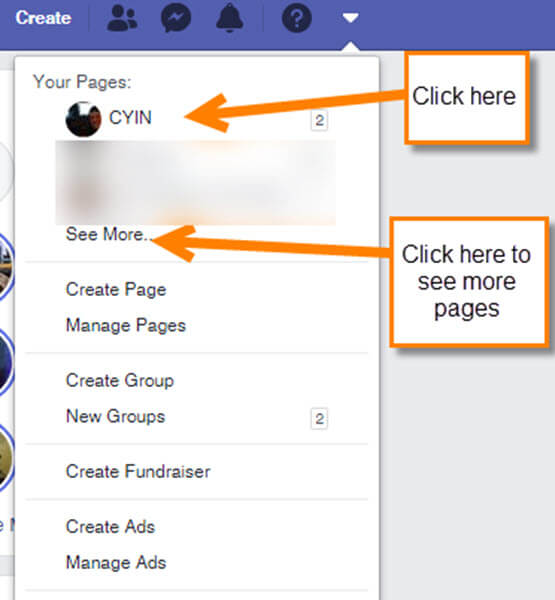
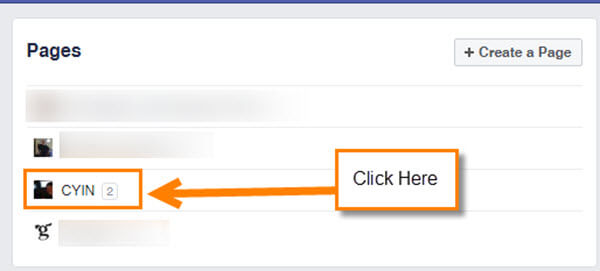
Step 2: Once on the home screen head up to the top-right and click on the down-arrow next to the question mark. This will bring up a menu. In the menu, you should see the Page you manage (click it). If you do not see it, click on the see more link right below the other pages. You should see the page on this next screen. Click it.
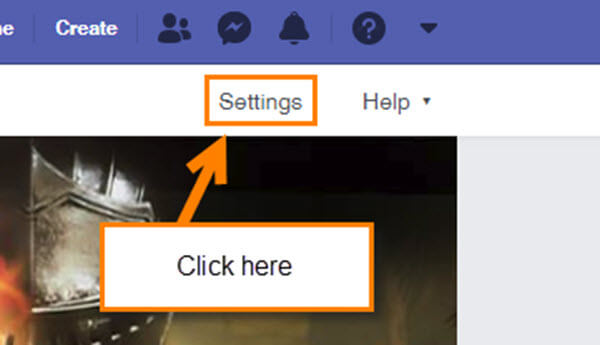
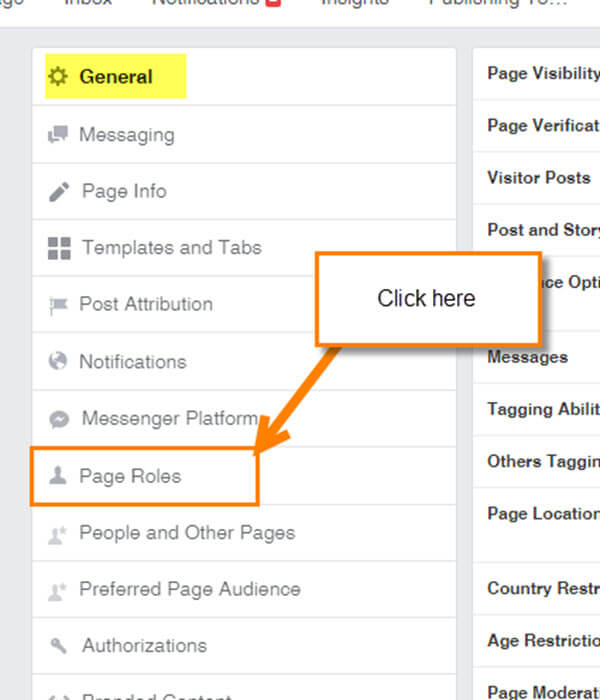
Step 3: Now we are on our business page. From here head to the top-right again and look for the Settings link. Click it.
Step 4: On the Settings screen look to the left menu for Page Roles. Click it.
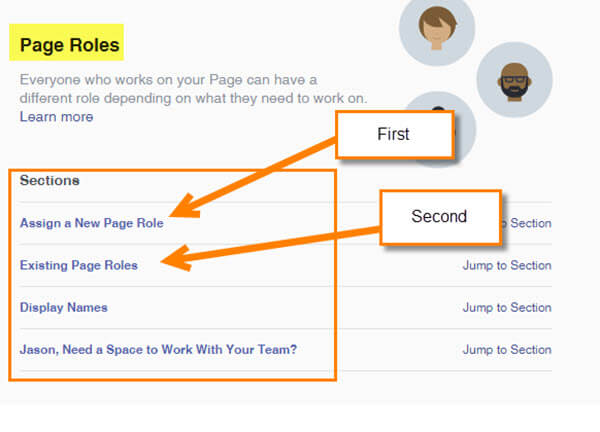
Step 5: We are on the Page Roles screen where you can manage it all. You will see that they break this page up into sections as you can see at the top:
- Assign a New Page Role
- Existing Page Roles
- Display Names
- Work With Your Team
The main two I will be focused on are Assign a New Page Role and Existing Page Roles. Let’s start with adding someone.
Assign a New Page Role
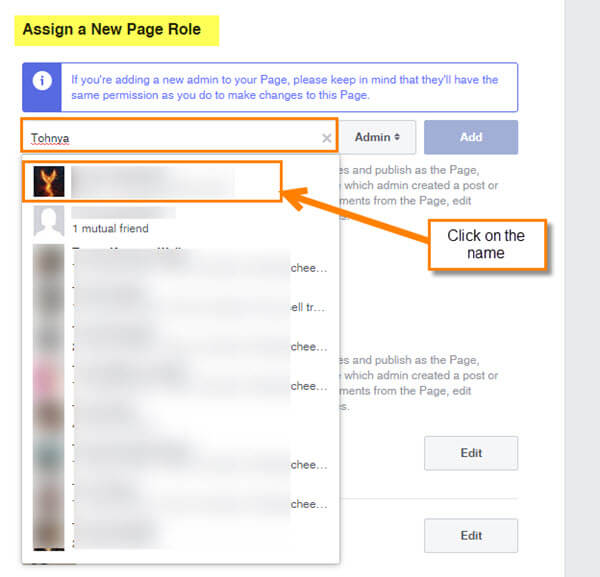
Step 6: If you are wanting to add an employee, friend or family member to the page, you will want to look under Assign a New Page Role. Here you can type their Facebook name which will bring up a list of people to choose from. You can even type an email address but I noticed that this never works for me, so stick with their Facebook name. Once you choose, go ahead and click the menu button to the right of the name box. This will let you pick what this new person’s role will be. Now click Add.

Step 6.1: Once you click the Add button, this verification box will appear. You will need to type your Facebook password in to verify you really want to add this person. After you click Submit, it will send an email to the person asking them to accept the invitation.

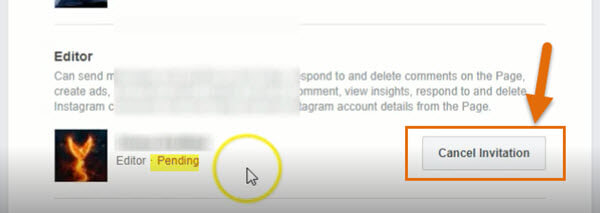
Side note: You will have the option to cancel the invitation you sent. After sending your invitation, the person will show below the existing Admins and other moderators. Click Cancel Invitation if you wish.
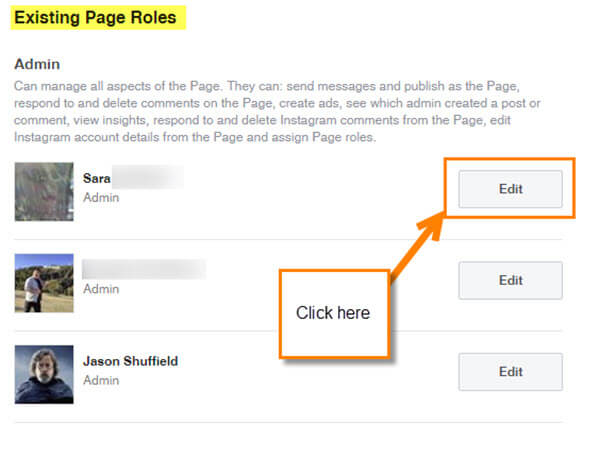
Edit Existing Page Roles
Step 7: Now that we know how to add someone, it is time to show how to manage them or remove them. Look under Existing Page Roles and click edit next to the person you wish to Edit.
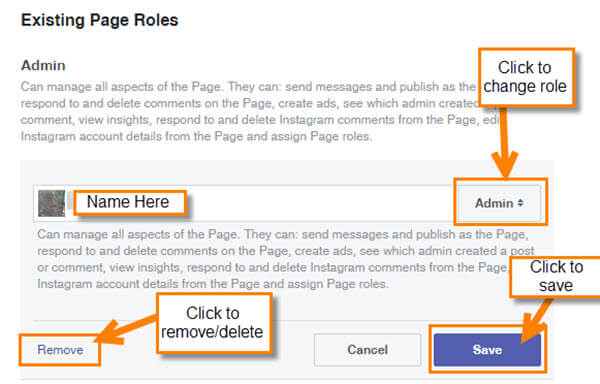
Step 8: Here you can change their role or Remove/Delete them. Click on the menu button next to the name and you can change their role. Then all you have to do is click Save. To delete or remove them altogether, click on the Remove option to the left.
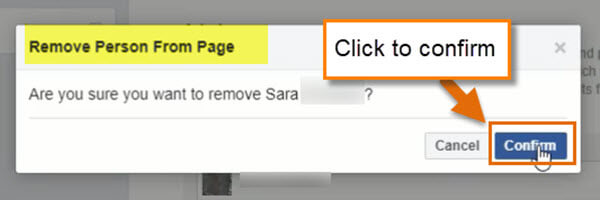
Step 9: Now that you clicked Remove, a little window will appear. This is to confirm that you wish to remove this person from this page. Click Confirm. Done!
Other Options
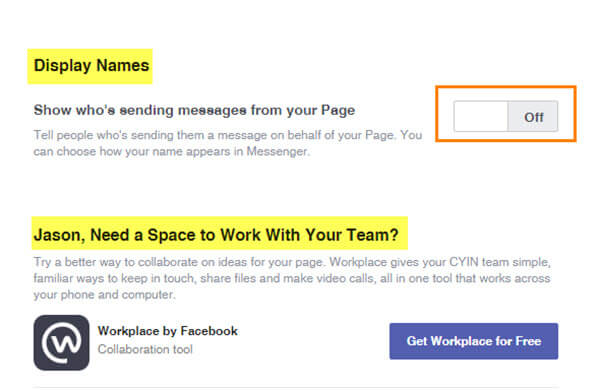
The other two options they offer you on this page is turning off or on the Display Names– tell people who is sending them a message on behalf of your Page (you can choose how your name appears in Messenger), and creating a Workplace by Facebook. Both of these you can research, but the most important ones are the first two when managing your page.
Now you should be all set to manage all those little helpers you have.
Here’s a Short Video Demonstrating the Process

To watch more How-To videos like this one, check out our Dave’s Computer Tips YouTube Channel. We’ll be adding more videos in the future.
—

