

I’m back with another How-To on the social media platform, Instagram. Last week, I covered How To Manage Hidden Words. If you missed that, you can see it here:
How To Manage Hidden Words – Instagram
Now that you have that knowledge, let me show you something new! Some of us need to watch our data usage to keep the bill lower. In this article, I want to show you how you can save that data from being used so much by this app. All apps like to use as much data as they can. Here I will show you how to limit it inside the app itself. Before we get into the lesson, make sure to check out my more recent lessons here:
- How To Check Your TikTok Account Status
- How To Change Facebook Video Notifications
- How To Change Facebook Chat Settings
- How To Unblock People On Facebook
- How To Block People On Facebook
It’s time to start our class, so grab your devices, pencils, or whatever you need to learn.
How To Manage Data Usage On Instagram
This will be shown on my Motorola Edge Android using the App.
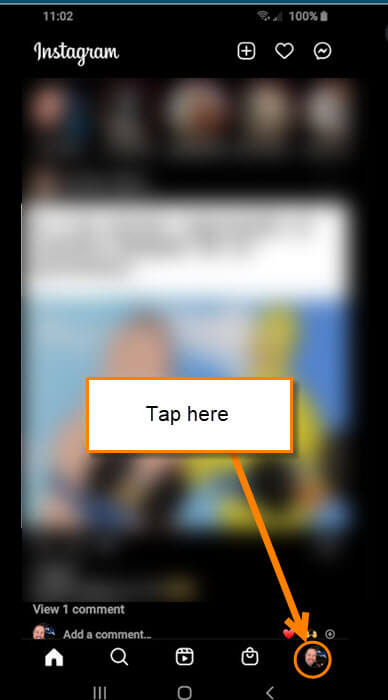
Step 1: Find the app on your device and tap it.
![]()
Step 2: Once Instagram opens, look to the bottom right. You will see your profile image. Tap it.
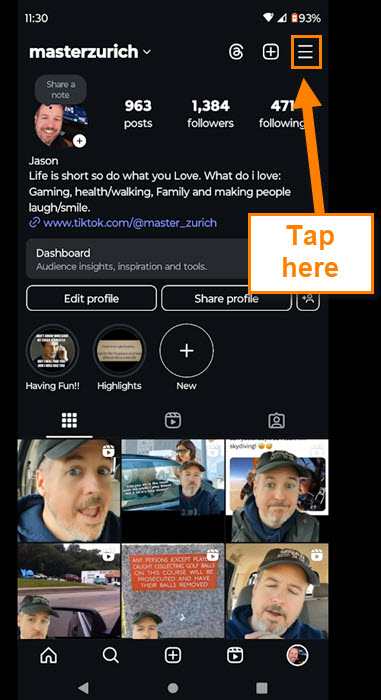
Step 3: You will now be on your Profile screen. Look to the top right for the menu link (3 horizontal lines). Tap them.
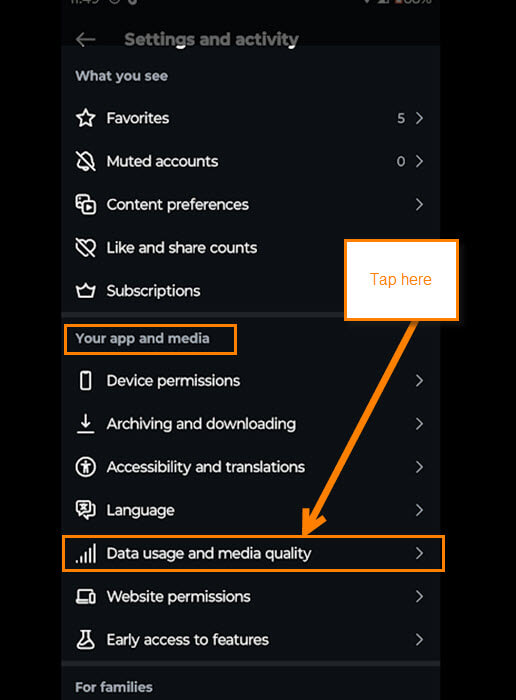
Step 4: We are now on the Settings and activity menu. Start looking for the section called Your app and media. Under that, you will see Data usage and media quality. Tap it.
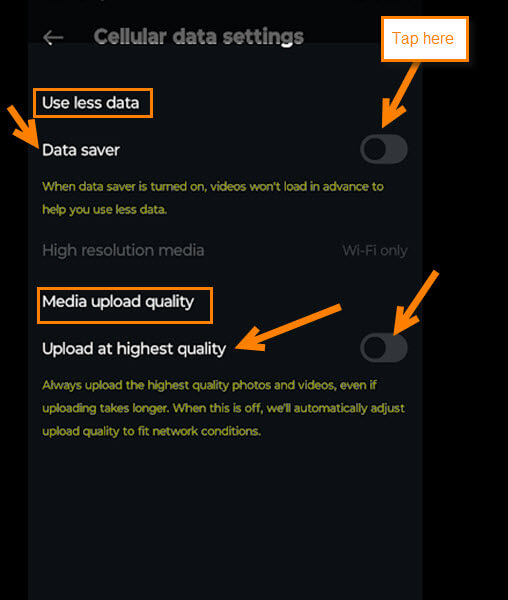
Step 5: The title they give to this screen is Cellular data settings. Here you are given some choices:
Use Less Data
- Data Saver (When data saver is turned on, videos won’t load in advance to help you use less data)
- High resolution media (Before you can tap this option, you must have the Data Saver switch turned On)
All you need to do is tap the switch to the right of Data saver to turn this on. This will give you access to the second option. Tap on “High resolution media”.

Step 7: This will give you a few options that will help with data usage:
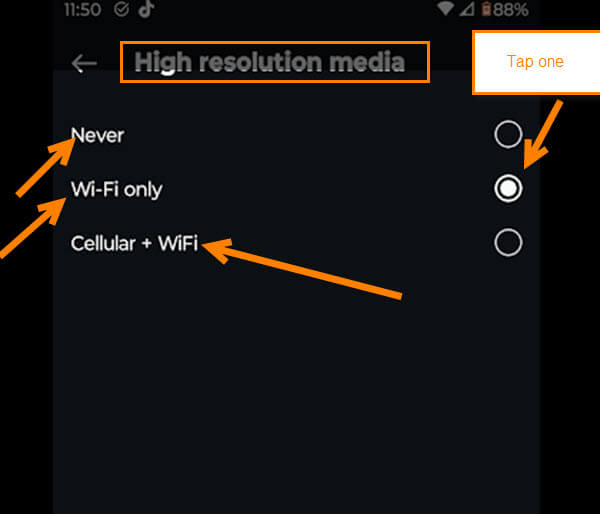
High resolution media
- Never
- Wi-Fi only
- Cellular + WiFi
If you want to save on your data usage, select the Wi-Fi only option. That way, it will not use your mobile Data at all when watching media. Tap the circle to the right of it.
Step 6: The last option under the section called Media upload quality is Upload at highest quality.
Media upload quality
- Upload at highest quality (Always upload the highest quality photos and videos, even if uploading takes longer. When this is off, we’ll automatically adjust upload quality to fit network conditions)
As before, you can turn on the Upload at highest quality option by tapping the switch to the right of it. Done!

Now you know how to manage your data on Instagram. It’s time for you to take your new knowledge and share it.
—


Thanks! I appreciate these tips to help protect our privacy. Jackie