In my family, we have many different streaming services we use from Hulu to Netflix. Since I have four kids, I like the services to offer the ability for individual profiles for each person. Like, with my Netflix account, I can set up a profile for up to five people. This makes sure that I’m not getting suggestions on my profile of a show called Booba (not my favorite kid show). The reason I bring this up is that the Amazon Prime app started prompting me on my TV to choose which profile I wanted to log in with. This is the first time it has ever offered this so I’m thinking it is a new option. So, in this article I wanted to show you how you can add and manage your profiles on your Amazon Prime account. Now, if you would like to know how to do this on Hulu, you can check out How To Create Delete Hulu Profiles
Now it is time for us to learn how to manage our Amazon Prime profiles. I will be showing you how to do this in your web browser and on the Amazon Prime app on my smart TV.
How To Manage Amazon Prime Profiles
Web Browser
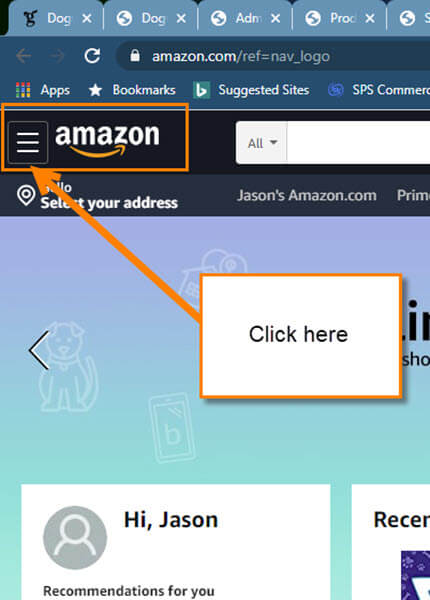
Step 1: Head on over to Amazon and log into your main account. Once in, look to the top left and click on the three horizontal lines.
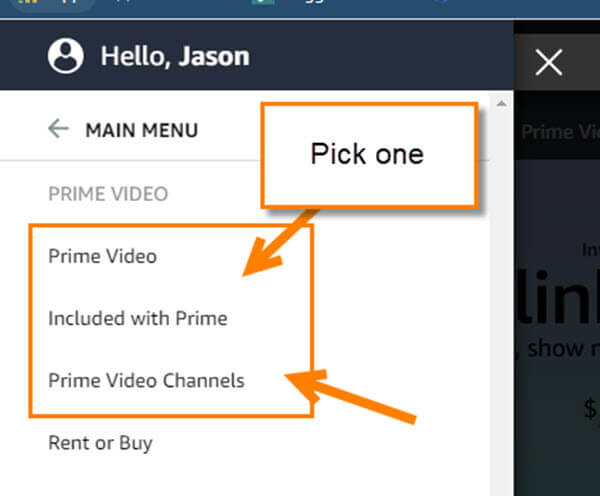
Step 2: This will bring up the Shop by Category menu. In this menu, click on Prime Video.
Step 3: In the Prime Video menu click any of the top three choices. Pick one.
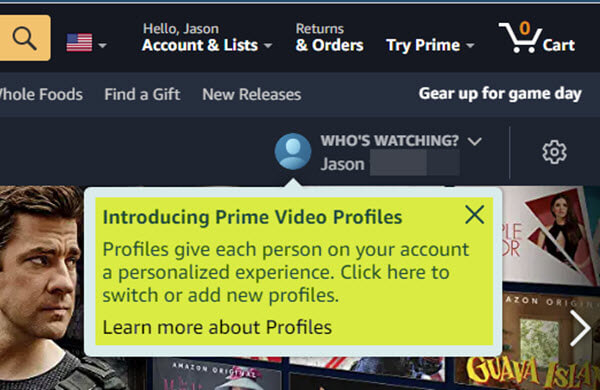
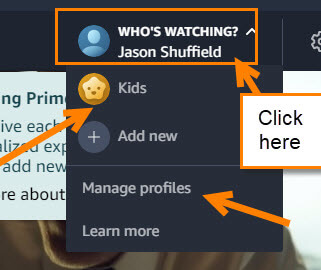
Step 4: Here you might see the information box on the right of the screen introducing the new Prime Video Profiles feature. Now click on the Who’s Watching link at the top right. Your profile name should be there, too. In the drop-down menu, click on Manage profiles.
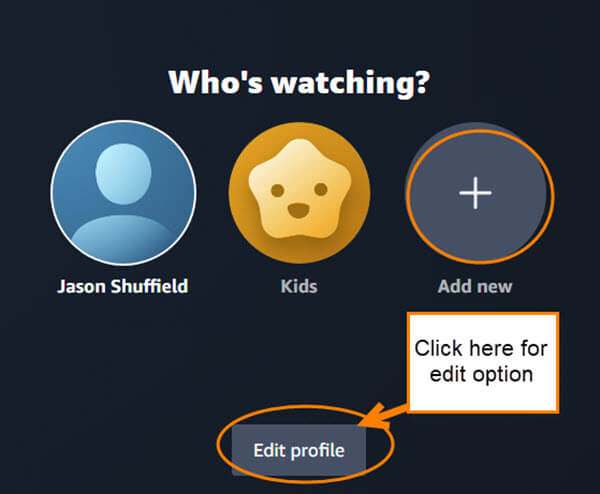
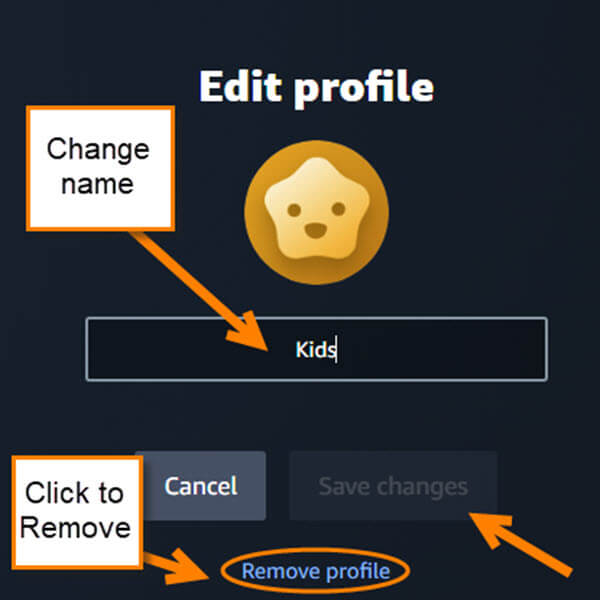
Step 5: The Who’s Watching screen will show all the profiles you have set up. Now since we are new to this, I only have me, and the Kids’ one they set up by default. There are two options to choose from: Edit profile, or Add new. We will start with the Edit profile. Click the Edit Profile Link. This will give you the Edit Pencil icon on each profile. Now click on the profile you wish to edit. I’m choosing the Kid’s profile.
Under this edit screen, you can change the name of the profile or Remove it altogether. Once done with the edit, click the Saves Changes button at the bottom.
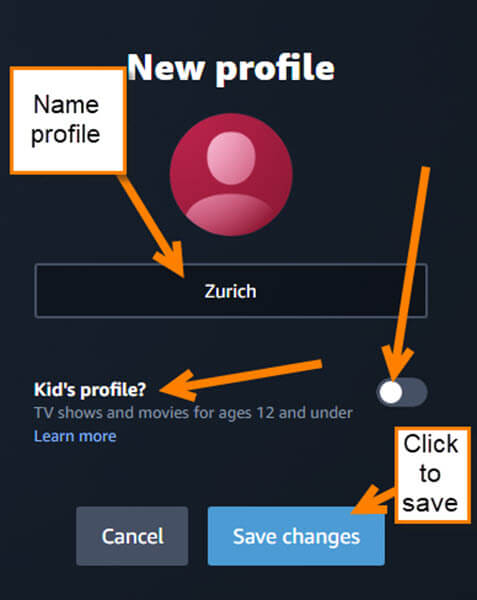
Step 6: If we wish to add a new profile, go back to the Who’s Watching screen and click the Add new option. Once you do that, you will end up on the New Profile screen. Here you can name the profile and you have the option to make it a kid-friendly profile. To do that, click on the switch to the right of Kid’s profile. Hit Save changes when you are done.
If you are wondering what the Kid’s profile does, mainly it ensures only age-appropriate content (12 and under) is visible in kid’s profile. You can read more on this in the image below or follow this link: Amazon Kid’s Profiles
That is how you can manage it on your Amazon account through a web browser.
Smart TV
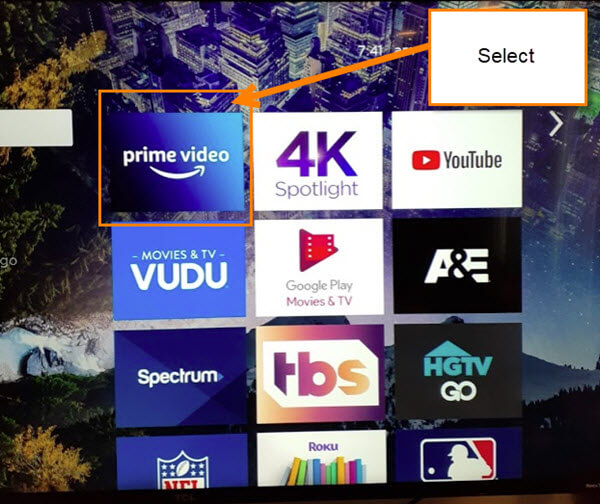
Prime App: Time to show you how to do this on a smart TV. I’m using a Roku TV.
Step 1: Turn on your smart TV and find the Prime Video app. Open it.
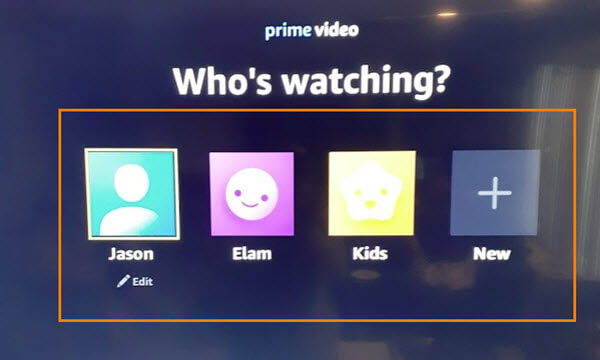
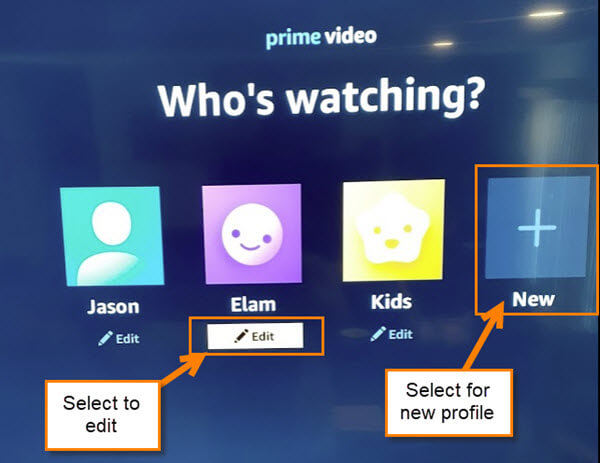
Step 2: It will ask you which profile you would like to log in with. This is the screen where we will be managing the profiles for our Prime service. As before, you get two choices: Edit Profile or Add new. We will choose Edit first. Move down to the Edit Pencil below one of the profiles. Select it.
Here is where you choose the one you want to edit. I’m choosing Elam for this article.
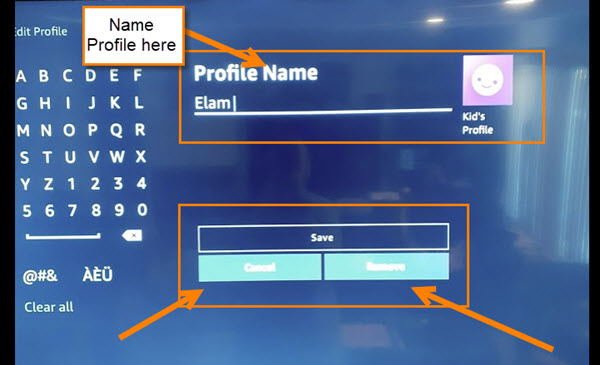
Step 3: On this screen, you can change the name or remove the profile altogether. Select Save when done.
Step 4: When you select the add new profile this is the screen that appears. You can name your profile and make it a Kid-friendly account by selecting the box next to Kid’s Profile. Once you are done select Save. Done.
I do wish they gave you more options when managing the profiles, like changing the Image of the profile but for now, you all can manage these profiles on your TV and your web browser. Hopefully, additional personalization will come with new updates.
FURTHER READING:
-
How To Check Amazon Prime Expiration
-
How To Organize Your Amazon Watchlist
-
How To Access Amazon Photos
—

