


The text cursor is that little vertical blinking line you see in a dialogue box or document that lets you know where you’re at. Sometimes the text cursor gets lost and is difficult to find, and for people whose eyesight is not the best, it is not that distinct to begin with. This is another of those adjustments available via Ease of Access settings specifically designed to help users with special needs.
Make The Text Cursor Easier To See
- Go to Settings > Ease of Access and, in the left-hand panel, click Text Cursor
- Switch the option Turn on text cursor indicator to On
From here, you can change the size and color of the text cursor indicator as well as change the thickness of the text cursor itself.
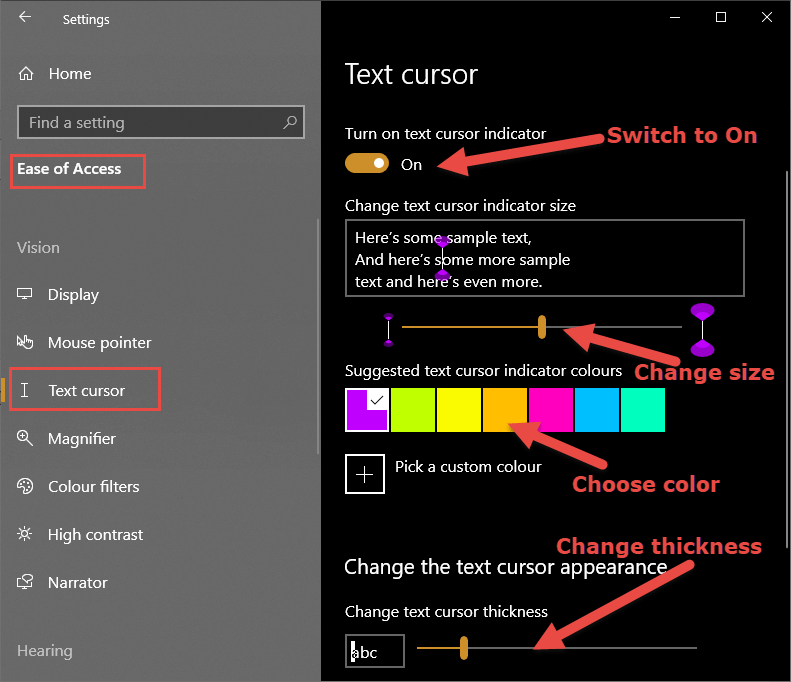
- Change size: move the slider to change the size of the indicator
- Choose color: choose from seven default colors or Pick a custom color
- Change thickness: use the slider to thicken the text cursor
Here is a screenshot of the text cursor before and after applying the settings as per the above screenshot- indicator size set to 4, cursor thickness set to 3:

BOTTOM LINE
During testing, I found the text cursor settings a bit hit and miss. They work fine in all current applications but not so much in older software, such as older versions of Office for example. Still, for anyone whose eyesight is not the best, or has trouble locating the text cursor for whatever reason, these settings can surely help.
FURTHER READING – RELATED ARTICLES

