

It is great to have the assurance that if my computer fails, I can restore from a backup image file and have all the programs and data back. This is what this article is about– how to restore a damaged system from the image backup you have previously made.
There are many good backup programs available, even for free. I have used EaseUS, Macrium, iDrive, and others. My last article, How To – Let’s Talk Backups, was about using Easeus and this one will show you how to restore your computer using that image.
Why would you need to restore?
- Your hard disk drive fails. There is no way to tell how long yours may last. It could be years, or tomorrow that it quits along with all your data
- If you have been attacked by ransomware, don’t pay the ransom. Just restore your system from your image
- If you have lost files and need to recover them
Restore Lost Data
You have deleted a folder or file that was on the system before your last image backup. You need to get it back.
![]()
The EaseUS software must be installed on your computer for this to work but you do not need to open the application. Plug your external drive that contains the last image backup file into a USB port. Open File Explorer and locate the image file.
Double-click it and EaseUS will open it in file explorer. This will look just like any other disk drive in your computer. You can drill down into it and locate any file or folder. Locate the data you need and drag (or copy/paste) it to the appropriate location on your C: drive. You can also right-click the file or folder and take one of the options presented. When you have restored the data then close the explorer window and then safely remove the external drive.
Replace Hard Drive
If your hard drive crashed (actually stopped working), you must locate a replacement drive for your computer. With the prices coming down for Solid State Drives (SSD), you might consider using one of them rather than a mechanical drive. The replacement drive does not have to be the same size as the old one. If your old drive was a 1 TB drive and you were only using 250 GB, consider a 500 GB SSD.
When replacing a hard drive in a laptop, I try not to guess how to remove it. A desktop is much easier. Years ago you could turn the laptop over and open a cover by taking out a couple of screws and the hard drive was right there. Not any more. I use YouTube to locate a video on how to replace the hard drive in my model of laptop. You probably will find one with excellent detail including pictures that will walk you through each step.
If your hard drive does need replacing, even though it might not be usable because of some type of malware, you can just proceed to the Restore Image instructions.
Create An Emergency Disk
Unlike restoring files and folders, restoring a previously created image requires booting from an emergency disk or a USB drive made from within EaseUS. You should make this while your computer is working but if you did not make one, find another computer you can use and install EaseUS to create an Emergency Disk to boot your crashed computer.
Open EaseUS and then click the menu button (three horizontal lines in the upper left of the screen).
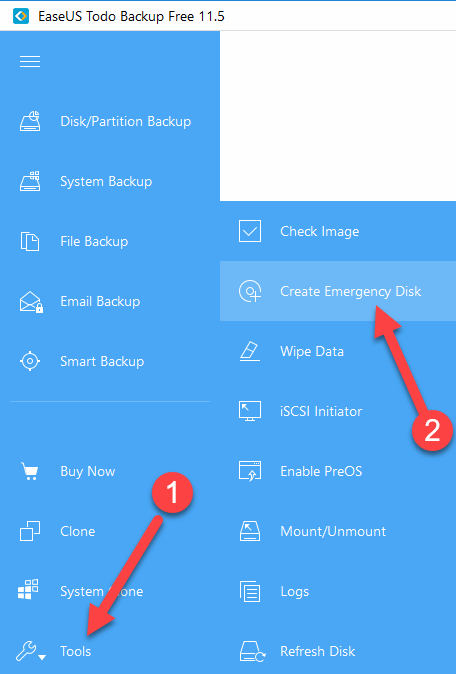
Click Tools (1) and then Create Emergency Disk (2)
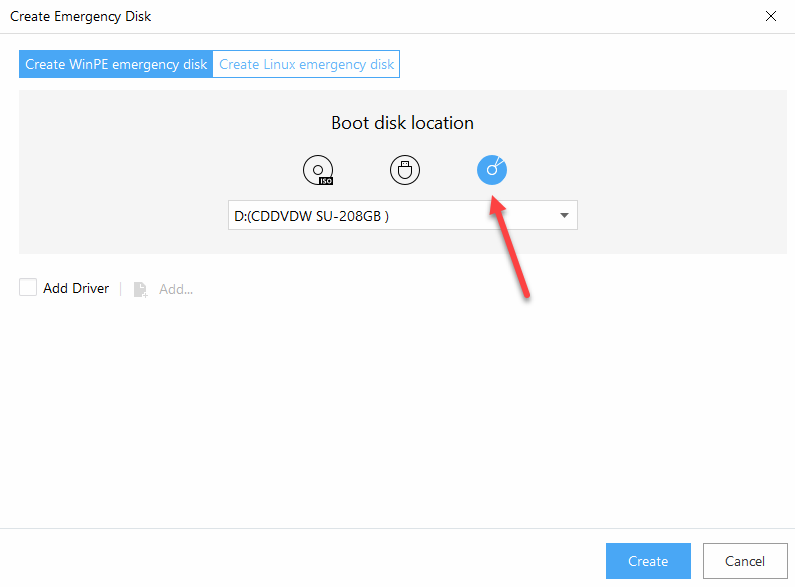
Insert a blank CD into the CD/DVD drive and choose the picture of the CD and then click Create.

The bootable Emergency Disk will be created. A progress bar will show how far along the process is.

Look for the “successfully exported” message and then click Finish. The CD will pop out. Remove it and label it “EaseUS Emergency Disk”.
The CD you use could be either a blank CD or a DVD. If you had chosen the center icon, a picture of a USB drive, a bootable USB drive would have been created.
Whichever you created, save it for future use when restoring an image. To be sure it will work, you might want to try booting from it to be certain. The CD you create will work on any computer to restore from an EaseUS image file.
Restore The Image
Now we are ready to boot the computer with the Emergency Disk and restore the latest image to the new hard drive. Attach the external drive containing the backup image to the fastest USB port (typically blue for USB 3.0). Boot the computer from the Emergency Disk you created.
Be patient. It takes a while for the system to boot from the Emergency Disk.
Note: The images in this section were taken with my phone. There was no way to capture the screens from the Emergency Disk boot.
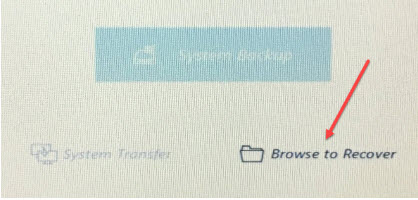
The opening screen looks like the one from the backup program with all the options grayed out except Browse to Recover.
Click Browse to Recover.
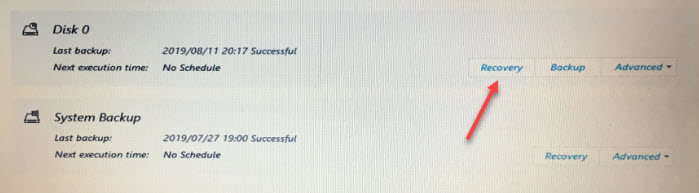
From the list displayed, choose the backup image to be restored. If your external disk has multiple images, choose the most recent one. Click Recovery.
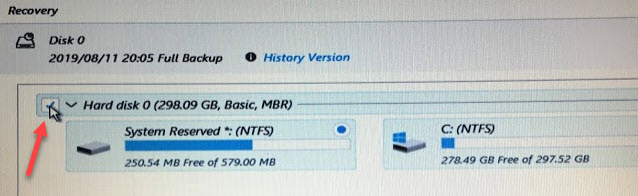
You are shown what the image you chose contains. We want it all so we check the box next to “Hard disk…” Click Next.

This screen asks what drive we will recover to. It shows both the internal hard drive (disk 0) and the external backup drive (disk 1) because they are both available. Make sure you choose Hard disk 0 by checking the box and then click Next to continue.
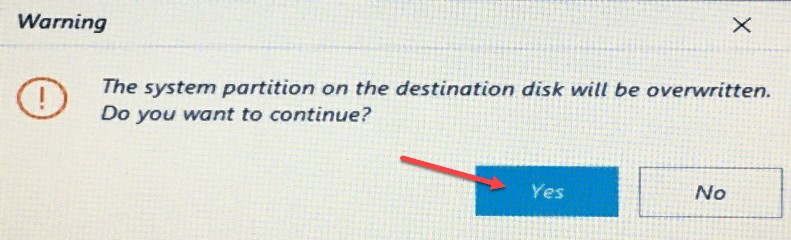
At the Warning screen, click Yes.
This screen shows the Source and the Target drive information. If all looks correct, click Proceed.
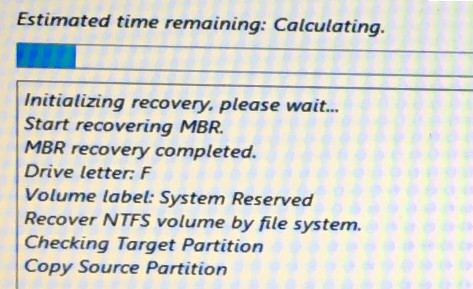
The recovery is in process and the progress bar and the information below it shows you what is happening. Estimated time to finish and time spent are also displayed. Depending on how much is being restored this could take a long time.

When finished, the above Recovery completed message will appear.
Shut down the computer and unplug the external drive. Reboot and you will be right back to Windows 10 at the point in time you made the backup image.
To summarize, install EaseUS, make an Emergency disk, and run the backup often. You might think you don’t add much data, but Windows 10 and your other applications are updating their software all the time. You may not have much data to lose, but restoring from a six-month-old image will require many updates.
Keep your Emergency disk with your external backup drive and place them in a safe place away from your computer. You may use the same external drive for many backups and for backups from other computers. When you fill it up, delete the oldest images.
Dick
—
Just used a easeus system image to move W7 off a small SSD to a WD Blue 1tb drive, have other plans for the SSD. Each to their own but I find the Linux rescue disk much easier to use than the windows pe disk.