- Note: The Google Play Store and Android apps are not supported in this version. You might want to first read a list of other known issues.
- Warning from their site: Chrome OS Flex is currently released for early access testing and is not suitable for production use. Seems to be BETA.
I’m going to install a version of the Chrome OS Flex on a Toshiba Satellite laptop. It originally had Windows 7 then I upgraded to Windows 10. Slow as molasses on this one and crashes with a BSOD on occasion.
Prepare Flash Drive
So first you will need a flash drive that is 8GB or more. Now go to the Neverware site and download the USB Maker
Scroll down the page and click on the orange DOWNLOAD USB MAKER button. It will help to make it easy to set up your bootable flash drive. Download and run it. Insert your flash drive into your computer.
The first screen is the welcome screen… just click on Next

It gives you a warning about not using Sandisk for some reason. Click Next.
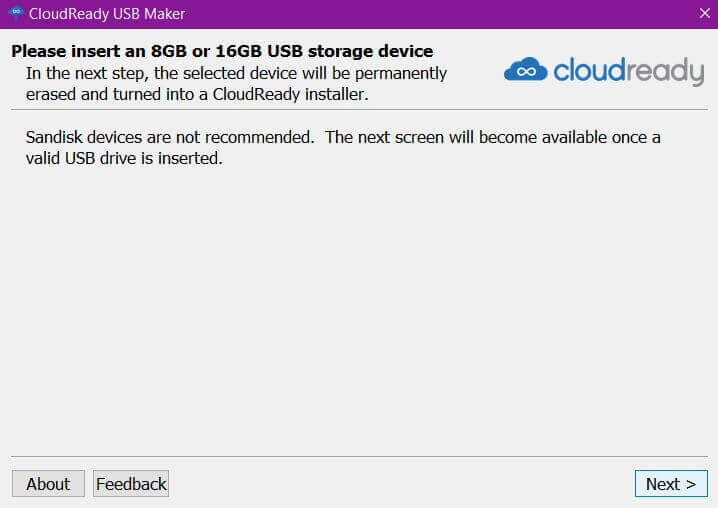
Then select your drive and click on Next. Now it will download the necessary files to prepare your drive. Click on Finish.

Now you have a bootable version of Chrome OS Flex. Boot from it on the computer of your choice. On newer systems, you might have to disable Secure Boot first. Check online according to your system. On my old Toshiba, I only have to click on F12 during startup and go into the boot menu and choose option 4, labeled USB.
Install Chrome
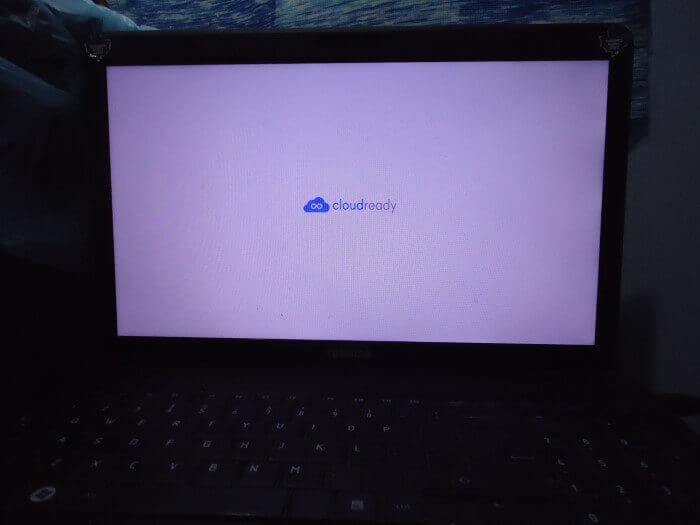
Boot from the flash drive and you’ll get a CloudReady screen… wait for it.
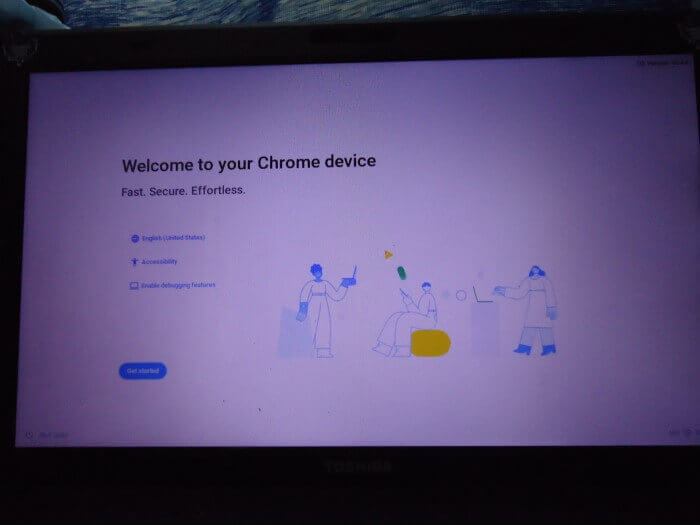
Then you’ll get taken to the Welcome to your Chrome device screen. Click on the blue Get started button.
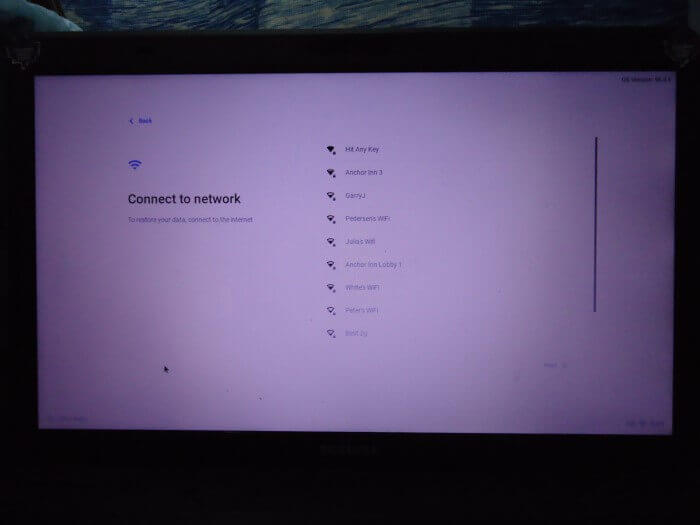
Then you’re prompted to Connect to your network. Click on your network.
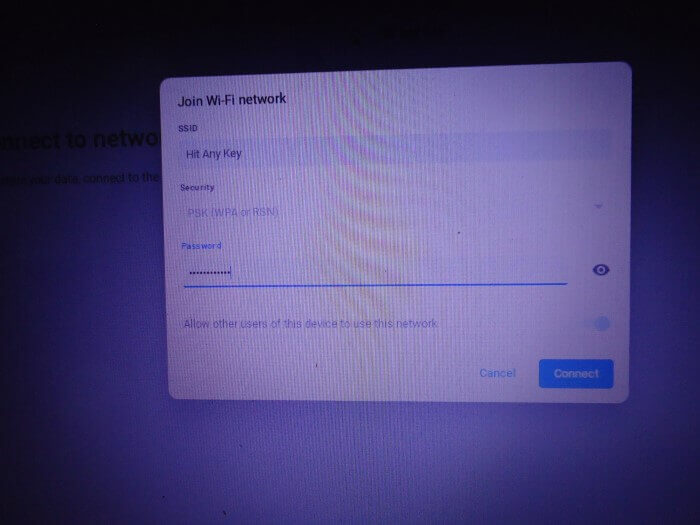
Enter your wireless password and click on Connect.
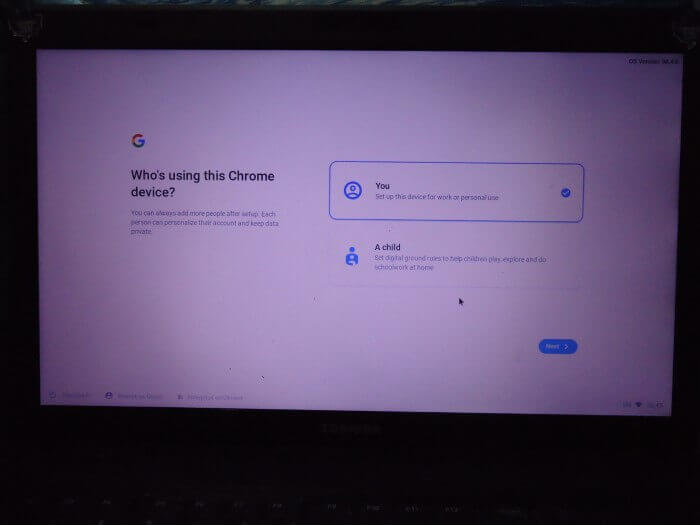
On the next screen, click on You as the user and click Next. You can click on A child if you are setting this up for your kids and want some control over their online activities.
You’ll need a Google account. Sign in with your Gmail account and password. Click on More options (blue letters under where you insert your email address) to get the option to create an account.

On the next screen, click on the blue Get started button.

Now you should be on the Google Chrome Desktop. But it is not yet installed. You’re booting off the flash drive and can use it like that to give it a tryout. Or, you can install it.
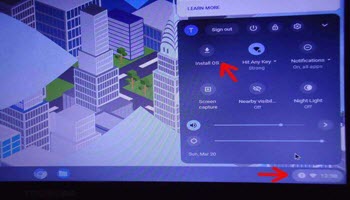
Click on the section down by the clock and you’ll get a control panel popup. You have various options there like screen brightness, volume control, and so on. If you want to install it on your hard drive, click on Install OS.

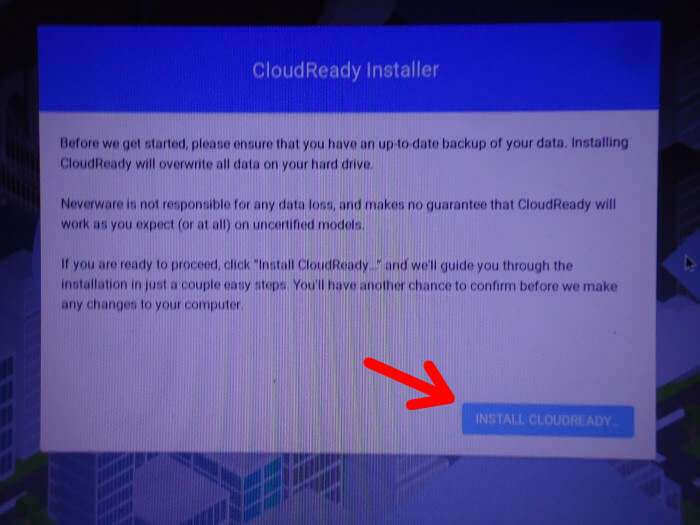
In the next window, click on Install CloudReady…
In the next window, click on Erase Hard Drive & Install CloudReady. Make sure this is what you want to do. It doesn’t give you any partitioning options like Windows. This is an early version. Newer versions will probably give you more options. Only time will tell. Just wait…

At this point I had to leave it, something else came up, and when I got back to it the laptop was shut down. So I turned it on again and basically I had to run through the same first-time setup steps, only this time from the hard drive. Sign in and that’s it.
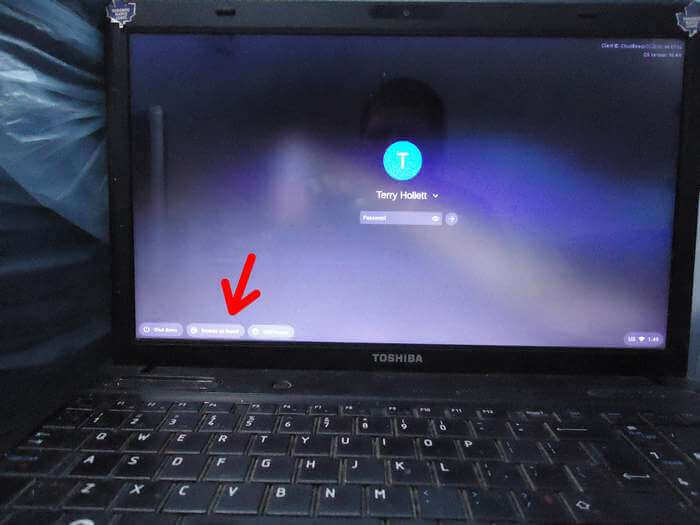
So now when I power on the system, I go to the Login screen. If you want to save your bookmarks and any other customizations and whatever Chrome OS offers, you need to sign in with a Google account. If you don’t want anything saved, click on the Browse as guest button in the lower left-hand corner of the login screen. With this version, you need a Google account to set up and log in the first time.
If you have Google sync enabled on another device and you sign in with the same account, your bookmarks, passwords, etc, from the Chrome browser are ready to go.
FURTHER READING: