Android For Windows 11
 Getting your head around the fact that there are an astounding two billion computers in use in the world is hard enough. A quick breakdown might help understand the reason that Microsoft’s acceptance of giving users the ability to run Android Apps within Windows is really a big deal.
Of those two billion computers Microsoft has the largest market share by far with Apple a distant but solid second. Their combined share means that most PC users are only capable of running Microsoft or Apple Apps.
But while two billion PC users are impressive, there are 6.84 billion smartphone users and three-quarters of all smartphones in the world run Android. With that many users familiar with Android applications, Windows creating a subsystem that allows the use of Android on Windows 11 is going to make a lot of people happy and it makes a lot of sense.
Android In Win 11 Setup
If your computer meets the requirements for Windows 11, you meet the requirements for installing Android. However, you must have virtualization enabled before it will work. To check if you have virtualization enabled, open Task Manager by right-clicking on the taskbar and selecting Task Manager. 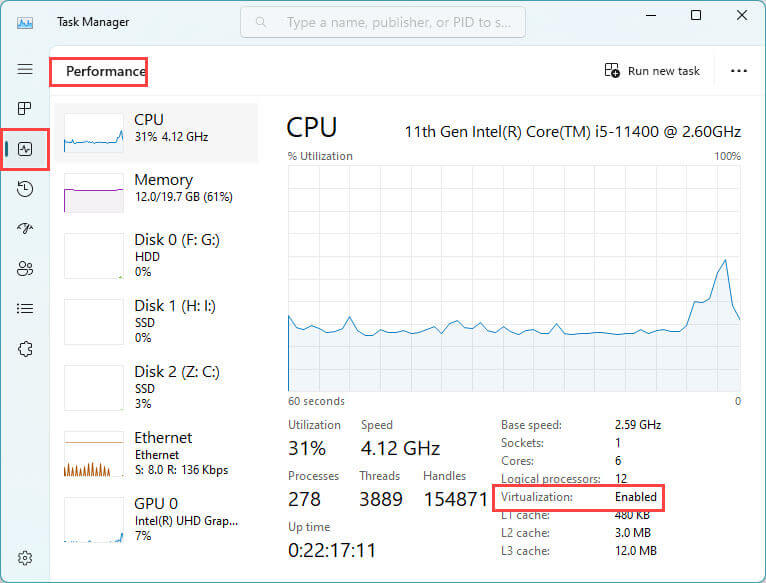 If it is enabled, you can skip steps 1- 3 below. If you do not see it enabled, you will have to take the following steps:
- Access the UEFI (or BIOS)
- Save any work or open Apps.
- Select Start >Settings>System>/Recovery> Advanced startup. Then select “Restart Now.”
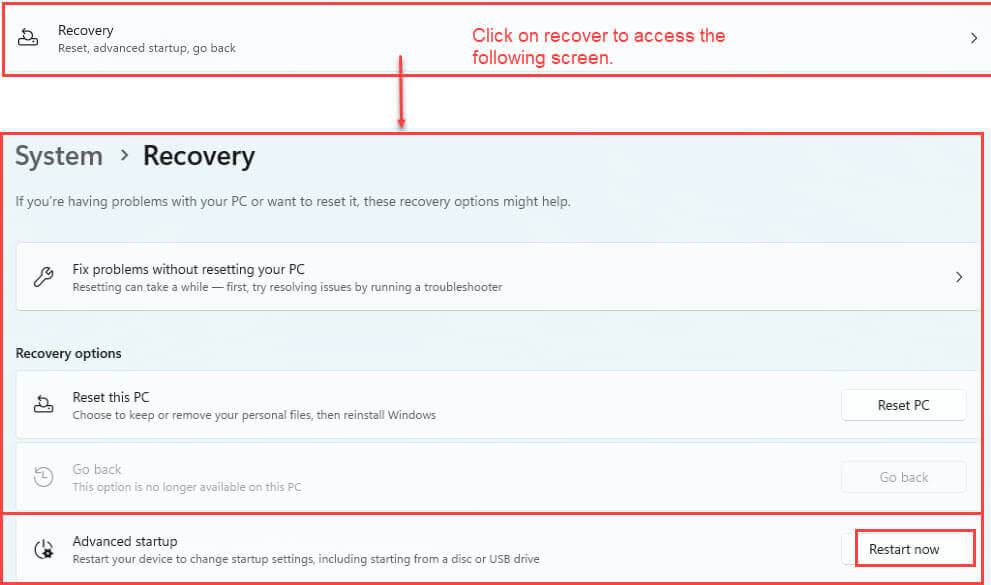
- Choose the option Troubleshoot > Advanced options > UEFI Settings > Restart

- When your computer restarts, you will be on the UEFI or BIOS screen.
- Make changes to the UEFI (or BIOS )
- Follow the instructions provided by Microsoft Support for Acer, Asus, Dell, HP, Lenovo, and Microsoft. If you do not have one of the manufacturers listed above, you will have to refer to your PC’s documentation or what is listed on their support site.
- For AMI and Phoenix manufacturers, you will need to Refer to your firmware documentation.
- Turn on the Virtual Machine Platform on Windows
- Many Windows 10 PCs and all Windows 11 PCs come with the Virtual Machine Platform enabled but if you upgraded your Windows 10 to Windows 11, you may need to follow these directions:
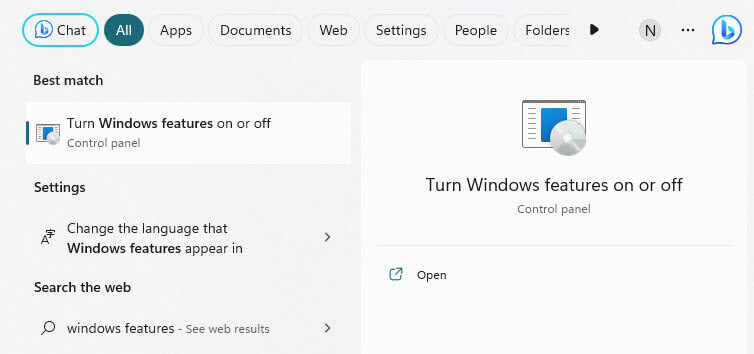
- Select Start, type in “Windows Features”, and select “Turn Windows features on or off”.
- Scroll down and ensure the Virtual Machine Platform is checked.
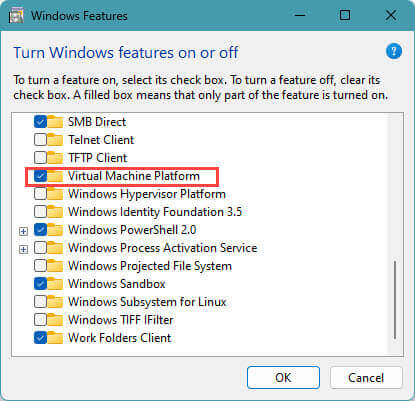
- Select OK and restart your PC.
- Many Windows 10 PCs and all Windows 11 PCs come with the Virtual Machine Platform enabled but if you upgraded your Windows 10 to Windows 11, you may need to follow these directions:
Why Virtualization
While you will be able to run Android applications within Windows you will be doing it in a subsystem created for Android. Virtualization enables you to run multiple instances of Windows, create a subsystem for Linux, or create a subsystem for Android.
Installing The Android App Store
Navigate to the Microsoft Store and in the search area, enter Amazon Appstore and click on Install. This will start the installation of the Windows Subsystem for Android.
After that, it is a simple matter of signing into your Amazon account and the Appstore will appear giving you access to all your favorite Android apps.
Summary
I believe this new feature will prove beneficial to both Microsoft and the billions of people who have their own favorite Android app.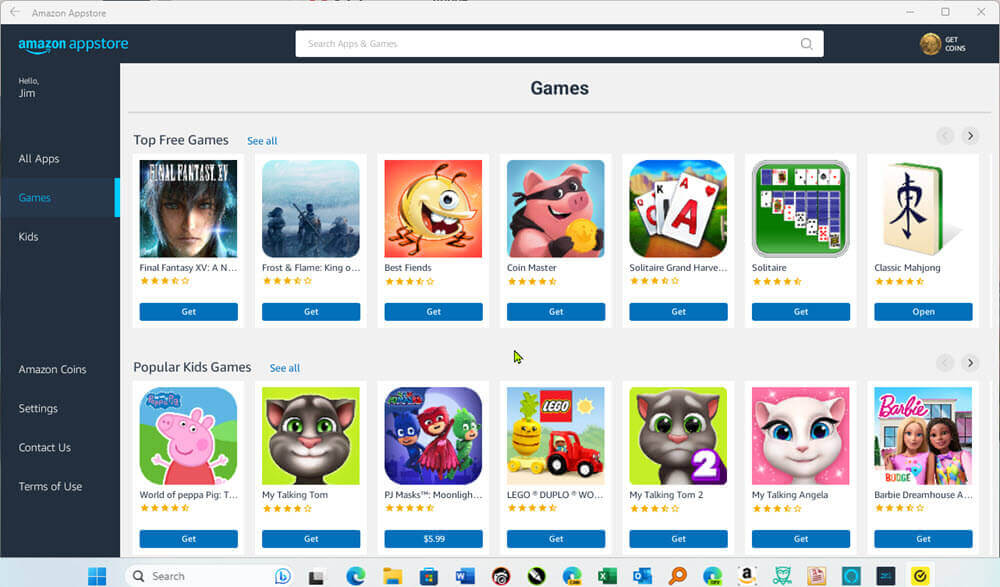
Once the Amazon Appstore is installed, it does ask you to sign into your Amazon account, and because I have an account, it was straightforward. However, you can create an Amazon account without purchasing Prime so if you create the account, I don’t see why this would not work for you.
—
Jim,
I assume this article applies to Windows 10 as well – correct?
Thanks,
Dan
Yes it will. As long as you have Virtualization enabled capabilities. Thanks for asking.