Facebook Business Page
In my business I have helped many clients with setting up their Facebook Business Pages. I have even done evaluations of their social media where I made sure they are set up to best utilize their page. With any social media page you need to have it set up to bring attention to your services, products or whatever it is you are offering. Even with my own social media I need to every-so-often evaluate it to make sure there is nothing new that I could be doing to help my business.
As we all know, Facebook and many other social media sites add new features periodically which could help you. The reason I bring this up is because just the other day I noticed that I needed to edit my Facebook Business Page template a little due to one such update. When you are busy helping your clients, you sometimes neglect your own. Now, since I need to do this for myself, I figured I would show you how you can edit your own Business Page to bring yours more attention. Are you ready to improve your Business Page? Here we go!
How to Edit Your Business Page Template
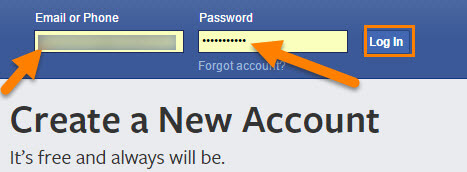
Step 1: Log in to your Facebook account. Since you already have an account you probably know how to do this. So enter your info and click Log in.
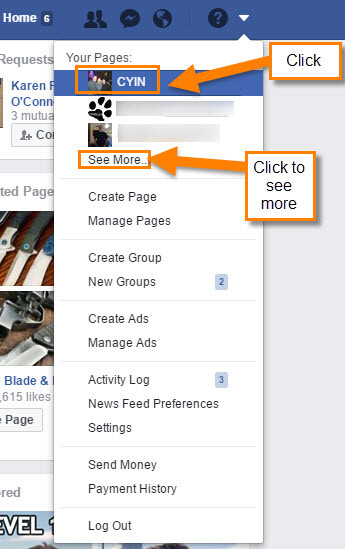
Step 2: After logging in, head up to the top-right and click on the Down Arrow next to the question mark. This will bring up a menu. Look at the top under the wording Your Pages. You should see the page name you are looking for here. Just click on it. If you don’t see the name of the Facebook page, click on See More.
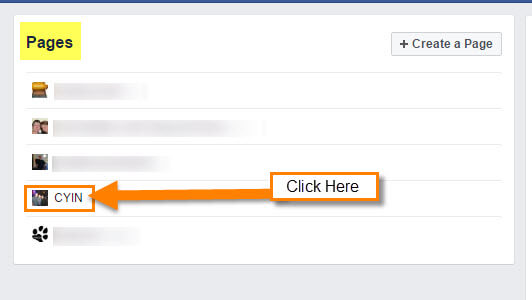
Step 2.1: After clicking on See More you will see the list of pages you manage. Find the one you would like to edit and click on it.
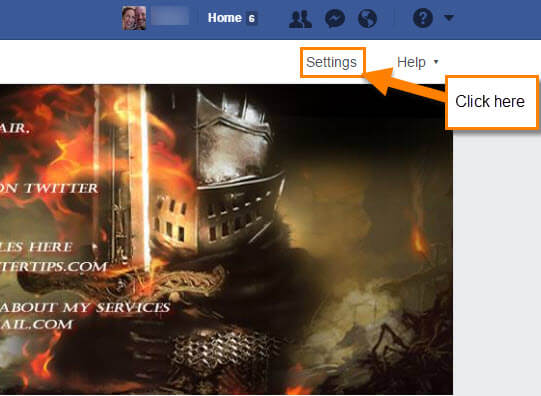
Step 3: Now you will be on Your Business Page. From here, look to the top-right and select Settings.
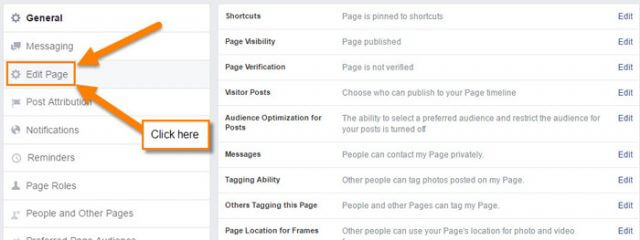
Step 4: You will want select the Edit Page option from the left menu.
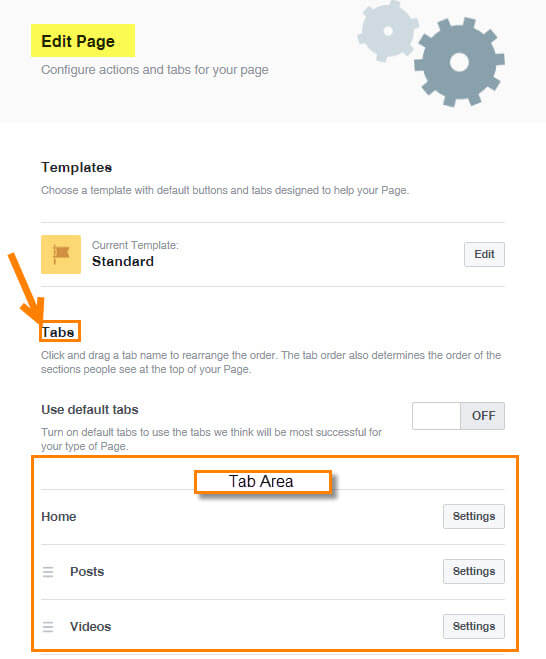
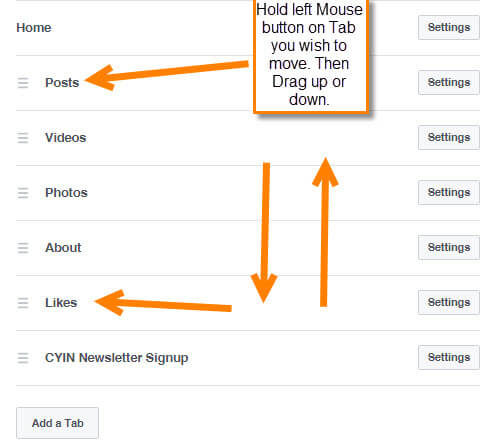
Step 5: Here is where all the fun starts. This is where you configure actions and tabs for your page. First, we will go over the easy part– arranging your tabs/links. Scroll down to the Tabs section and look for the tab you wish to move. To do this, hover your mouse over the name of the tab and hold down your left mouse button. Now, drag it up or down the list to move it. On your home page you will see this menu of tabs/links on the left.
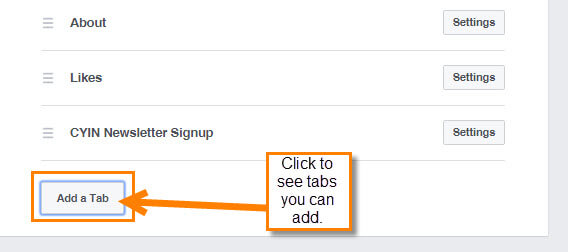
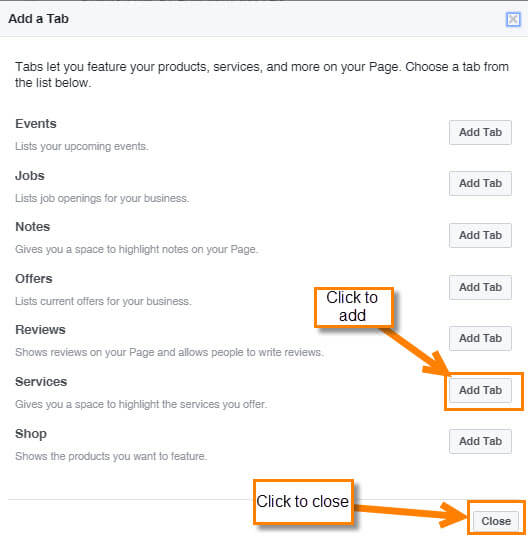
Step 5.1: You can also Add a tab from this page if there is one missing. Click on the Add a Tab button at the bottom. Here it will give you a list of tabs that you can choose from. Click the Add Tab next to the one you want. It is that easy. The bad part is they don’t give you the option of creating your own.
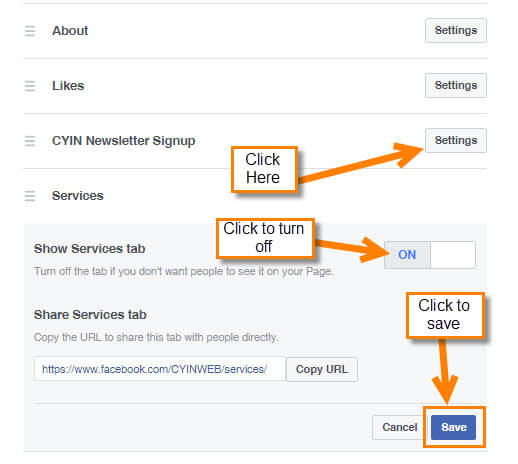
Step 5.2: If you want remove one of the tabs you can. To remove a tab, click on the Settings button next to it. Here, click on the ON/OFF switch. Done! It is now off and no longer on your page. One last thing that you can do with the tabs; near the top you will see Use default tabs, turn this ON and Facebook will decide which tabs will be most successful for your page.
Now you know how to arrange, add and remove tabs. What else can we do here? Good question!! This is one of my favorite features that Facebook has to offer– Templates. Yes, you have a few templates to choose from depending on your business, so let me show you how this works.
How to Add/Change a Template
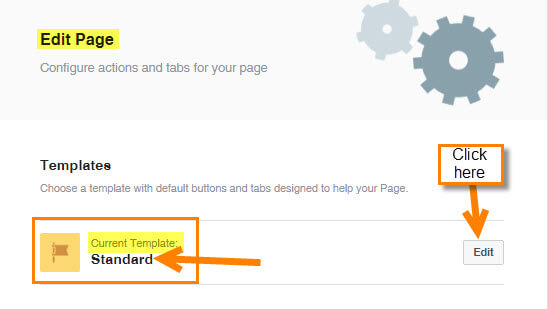
Step 1: On the Edit page you will see the word Templates near the top. Below that, you can see what your current template is set to. Mine is currently set to Standard, but I want to change it to something a little more suitable for what my business needs. Click the Edit button on the right.
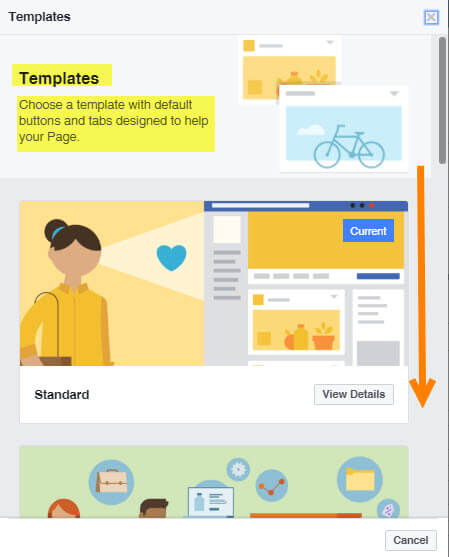
Step 2: Here you can look at each of the templates Facebook offers.
Templates:
- Standard
- Shopping
- Business
- Venues
- Politicians
- Services
- Restaurants & Cafes
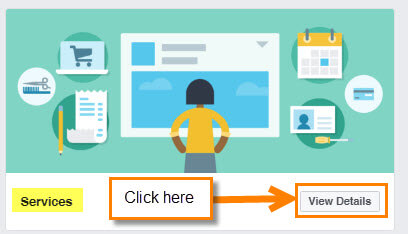
Each template gives you a View Details button. We will click on the Services template’s View Details button.
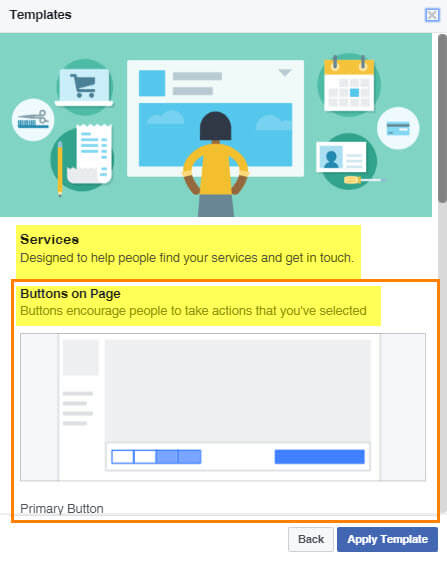
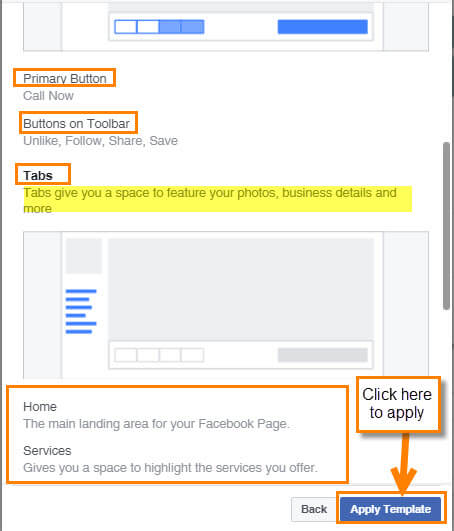
Step 3: Now this will give you a little overview of what this template will do for you. Services is designed to help people find your services and get in touch. It will also tell you what the Primary Button will be and what the buttons on the toolbar will be. Scroll down, and it will also show you what Tabs will be added to your template. As before, if you don’t need one, simply remove it (like I showed you in Step 5.2).
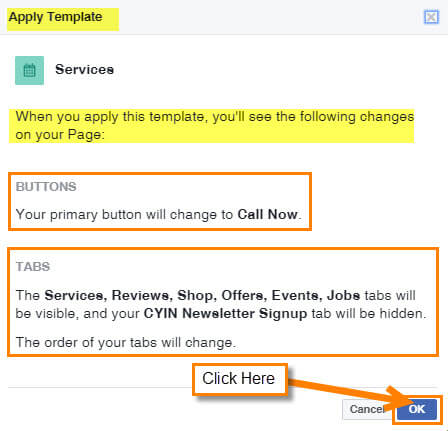
Step 3.1: Now all we have to do is hit the Apply Template button at the bottom of this window. After clicking, it will show you the Apply Template window which shows the changes you are about to apply. Click OK if everything looks good to you.
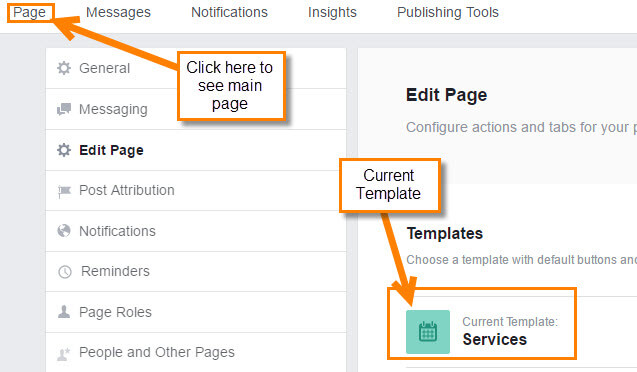
Step 4: Now you should see your Current template change to your new setting. On the left, select the PAGE link to see the changes on your main page.
If you don’t like your choice, then go back and change it. It is really that easy. I decided I didn’t want all the tabs/links they wanted to add, so all I did was remove the ones I didn’t want to offer. This will not redesign your page to exactly to what you want, but it is helpful. You still will need to fill in all your information on your Contact, About, Services or any other pages that require custom information. On your Front Page, click on each tab/link and make sure it is all filled in. Now, get in there and update your template to what works for you.
Which template would work best for you?
—

Why don’t I have the “apply” option when changing my template?
Hi Elise,
When you click on the View Details below the Template you do not see a Apply button? Not to sure why you would not see what I’m seeing. If you are able to see the template options you should see apply after hitting the View details button.
You could try to do these steps on a different browser. I know that Facebook rolls out some features slowly but since you can see the templates then you should be able to apply them. If I remember right they still say these features are in beta. Wish I could be more help on this but Facebook is in control on this one. The best thing to do here is try and contact Facebook and see if they can let you know what is going on with your account.
Thanks
Jason