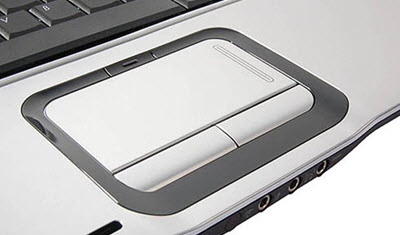
You ever want to know how to disable the touchpad on your Laptop? Some of us don’t like this little feature especially when we are typing. Yep, when I’m trying to write you an article my palm will sometimes brush the pad, and when that happens my mouse picks a whole new place for my cursor without me noticing. Now my article looks like I was having a spaz attack. That is definitely what I want. If only there was a way to disable it. There is! and I’m going to show you how to do it in Windows 8.1 & Windows 7. Let’s start with Windows 8.1 since that is the OS I like using most.
Before I go into this, make sure you have another mouse/pointing device that you can connect to your laptop. Once you disable your touchpad you need the mouse to do any cursor moving.
How to disable the Touchpad in Windows 8.1
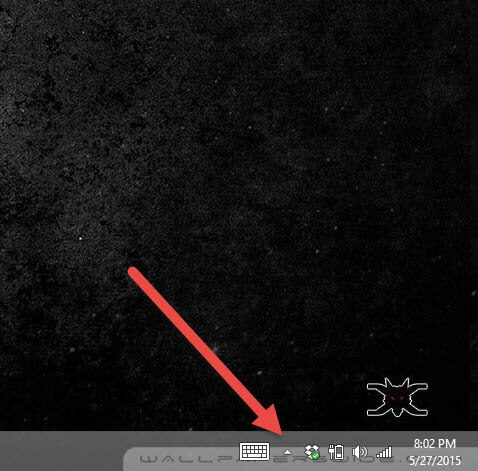
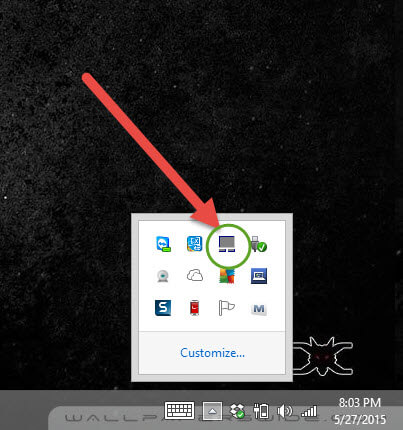
First you will want to go down right side of the screen and double click the touch pad icon. If you do not see it right away you will see an up arrow that will show more hidden icons, click it. You should see the touch pad icon there.
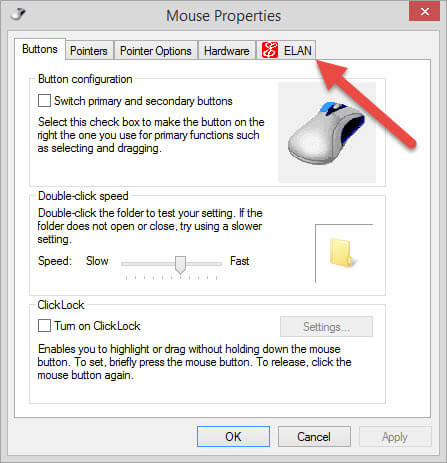
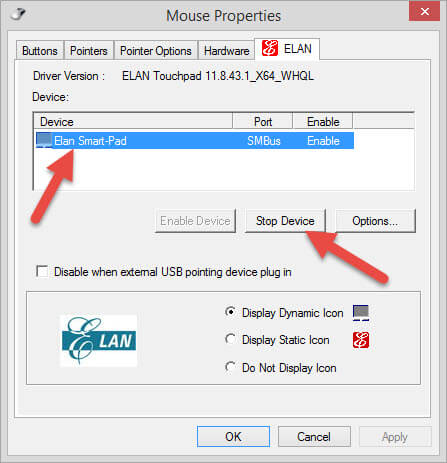
Next a screen will pop up called Mouse Properties. Here you should have a tab that shows the name of the touchpad software you are using, mine is “Elan.” Click that tab.
Now in this screen it should have already highlighted your touchpad device. Just click on Stop Device.
There are different touchpad softwares for different laptops so mine might not be quite the same as yours.
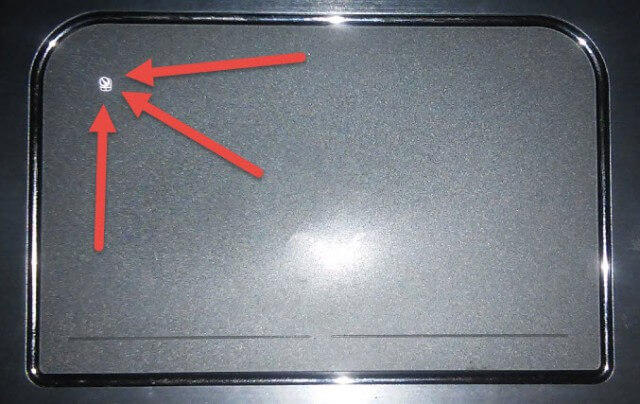
That is how you disable it on a Windows 8.1 laptop. The cool thing about my laptop is it will actually light up a little icon on the touchpad showing it disabled.
Now let’s roll right on to Windows 7.
How to disable the Touchpad in Windows 7
First you need to go down to the bottom right of the screen and click on the arrow to show more hidden icons. Unless yours is already showing.
Here you will see, just like you did on Windows 8.1, an icon for your touchpad, double click it.
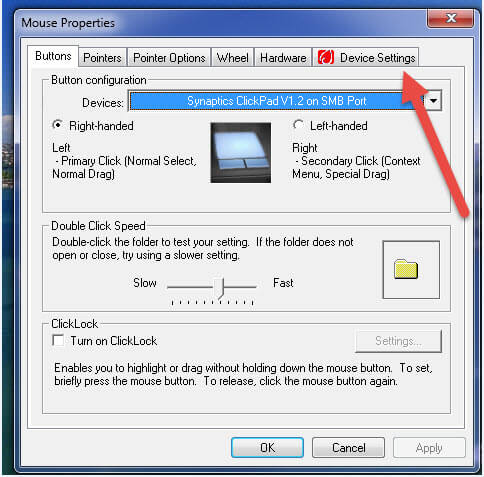
Now you need to click on the tab labeled “Device Settings”.
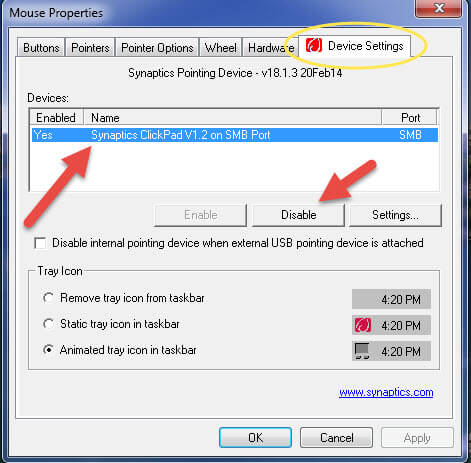
Your touchpad, or as it’s called in this case, “ClickPad”, will be highlighted; if not just click on that device. Now click Disable.
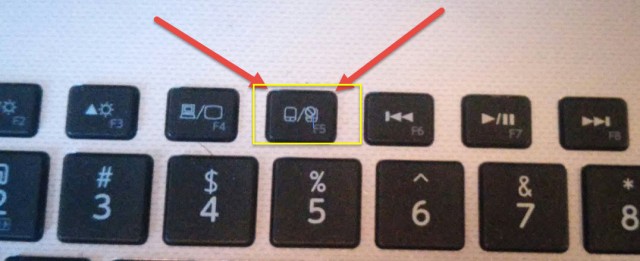
Quick Tip for you: your laptop keyboard might have a quick key to disable and enable the touchpad. Look at top row of your keyboard and you should see a mouse icon on one of the “F” keys, often F5. Just tap it and viola you have now disabled the touchpad.
I think it’s important to show you the longer way rather than just giving you the easy way out. Now you can get some work done without having that touchpad messing with your head. Remember, there may well be a number of different ways to achieve the same result but this article will at least point you in the right direction.
You could have other touchpad software installed on your computer from different companies. These might let you adjust the settings, which could fix that annoying behavior, or at least not have it be so sensitive, which could mean you wouldn’t have to disable the touchpad altogether.
If you know other ways to do this please share below.


Please disable the stupid scrolling feature you have on your site. It’s horrible UX.
What “stupid scrolling feature” are you talking about Mary? Please clarify.
Mary are you talking about the feature I have on my personal website? If so please direct suggestions for CYIN through my website. Just go to the contact tab on my page and email me. I’m happy to take suggestions.
Thanks
Jason
The touchpad icon just doesn’t seem to ne there on my HP.
I think you should point out that the other way is through Control Panel -> Mouse.
Thanks for the post. Rather than disable the touchpad completely, I prefer to tick the box underneath to disable when an external USB device (e.g. mouse) is attached.