Any Windows 7 or newer computer can be upgraded to Windows 10. All you need is the installation media. With it, you can upgrade an existing system to Windows 10 keeping the data and non-Microsoft software. Or you can use the media to do a clean installation.
The ability to create the media is on the Microsoft website for the current version of Windows.
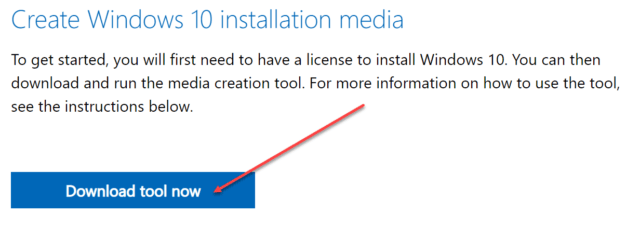
I found it on their website at this Microsoft page and clicked the “Download tool now” button, and then ran the program accepting the terms.
I clicked the Create installation media… radio button and then Next.
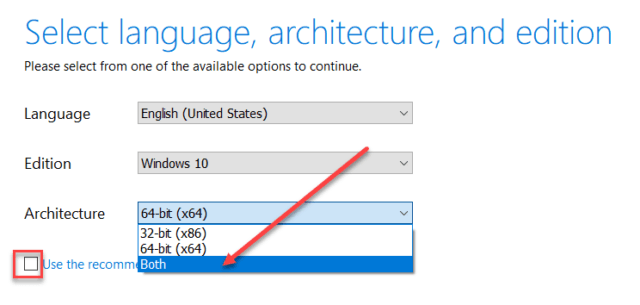
I unchecked Use the recommended options… which allows selections from the three options shown above. I like to have the USB drive work on both 32-bit and 64-bit systems. If the installation media is to be a DVD then the “Both” option will not fit on one DVD.
Then I clicked Next.
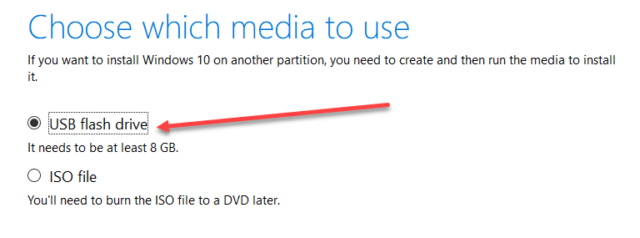
With a 16 GB or larger USB drive already inserted, I made sure the selection was set to USB flash drive and then clicked Next.
I selected the USB drive and then clicked Next. Notice that I had already renamed the drive to reflect the Windows 10 version I was creating.
The creation is done in the background so you can continue to use your computer. When completed you have a bootable USB drive that you can use to format a hard drive, update an existing PC to Windows 10, run a clean installation of Windows 10, or access the Maintenance programs available to diagnose and perhaps fix a problem with a Windows 10 installation.
To update an existing system to Windows 10, boot the old system and place installation media in the USB drive (or DVD if that is what you created), and use File Manager to locate the Setup.exe file. Then double-click it to start the upgrade.
Clean Installation
For a clean installation, place the installation media in the USB drive (or DVD if that is what you created) and boot from it. If the computer is set to boot from the internal hard drive first, you will have to access the Boot Selection Menu. For a Dell, that means tapping F12 as the computer is turned on. HP is usually F9. Check your computer manual to locate the selection menu on your computer.
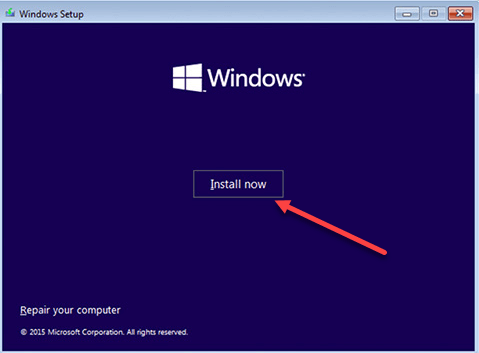
In either case, you will see the following screen.
At this initial screen, click Next.
Click Install now to continue.
Notice in the lower-left “Repair your computer”? This will bring up the repair options to diagnose and fix some Windows issues.
Also, notice the underlines. The I of Install and the R of Repair on this screen. Rather than using the mouse, you can hold down the Alt-key and tap the underlined letter instead.
On the product key screen, click Skip. Then Accept the legal screen.
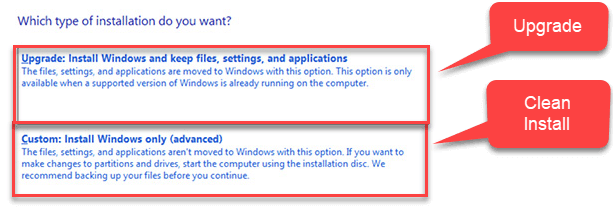
For a clean install, choose the second option. For an upgrade choose the first option. Then let the installation continue answering the questions as it moves along. The upgrade may take hours to complete so be patient. A clean install is fairly quick.
I hope you found this a useful addition to your toolbox.
Dick
—




Mr. Evans – Thank you for the clear instruction set on how to install w10 on an older computer. I question if you think Microsoft has made a recent change in their downloadable install code. What I have found recently is that you are now forced to go through all the setup sequences before you can complete the windows installation. The Microsoft download site gives no hint of a change being introduced.
As a PC refurbisher, I want to leave those setups to the new computer owner who will have unique desires of which app setups he wants, as well as email addresses and passwords.
Have you discovered a Hack to insert a “skip for now” or “Do Later” choice, so we can complete the basic recommended applications?
James McGrath, jmcgrat5@gmail.com
What I usually do is set up the refurbed machine with the username “User” and no password. When it asked for Internet access I answer that I do not have Internet. Do NOT have an ethernet connection or a WiFi one. This bypasses the need to set up an email address and a Microsoft account. When someone gets the machine they sign in to their WiFi and Windows asks other questions to finish the setup.
Thanks for your comment, it does simplify the w10 installation and gives the new PC owner complete autonomy.
Happy to help