This week I learned the hard way that I should have double-checked my security settings on my game consoles. Yep, found out that I forgot to set up a password/passkey for purchasing on my Xbox One. The other night when I was balancing my bank accounts, I noticed three charges that I didn’t remember doing. Yes, I said three charges! Now that was a shock but I knew that it had to be the little minions I created since the charges came from my Microsoft account. Looking into it I found out my 6-year-old was playing Roblox and accidentally purchase Robux three days in a row (hmmm, three times… really??). Knowing my little guy, he was telling the truth. So I went on my Xbox One and found out that while the passkey was set up, it was not activated. Since I figured out how to fix this oops of mine, I wanted to share with you the whole process on how to set this up for yourself. I want to make sure you do not find a surprise when you are balancing those books. It’s time to grab that controller and let’s get this started.
Create A Passkey On Xbox One
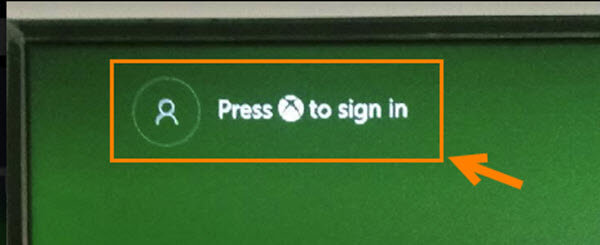
Step 1: Sign in to your Xbox One account.
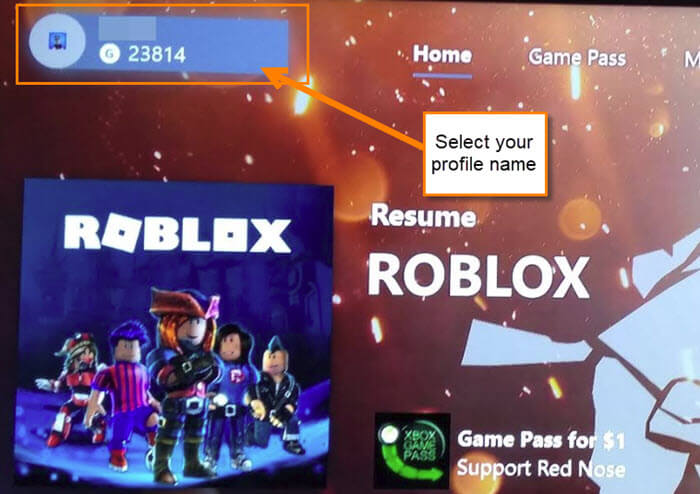
Step 2: Once logged in, head up to the top left again and select your profile name.
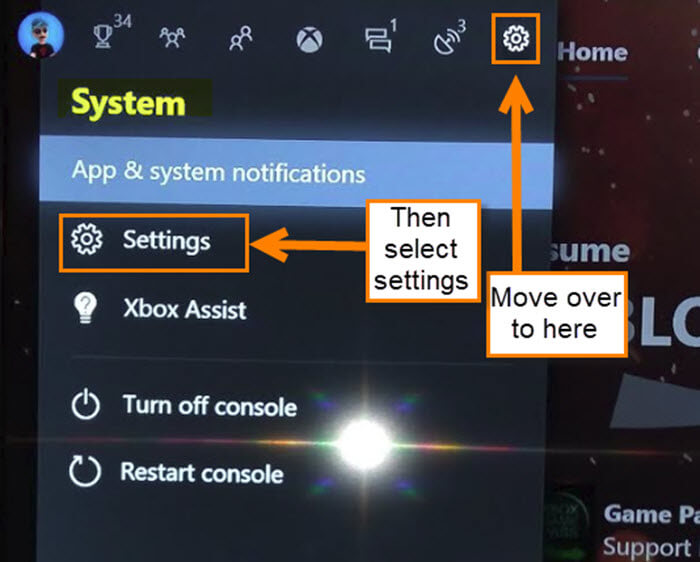
Step 3: Once the menu appears, you will need to move to the right with the left toggle and select the Gear icon. Now select Settings, which has a gear icon next to it, too.
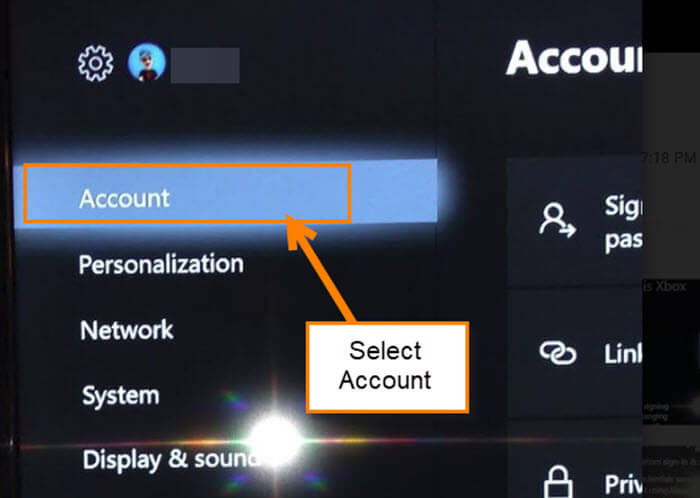
Step 4: In the next menu select Account, which is the top choice. Most likely you will already be on this option but if not, select Account from the side menu.
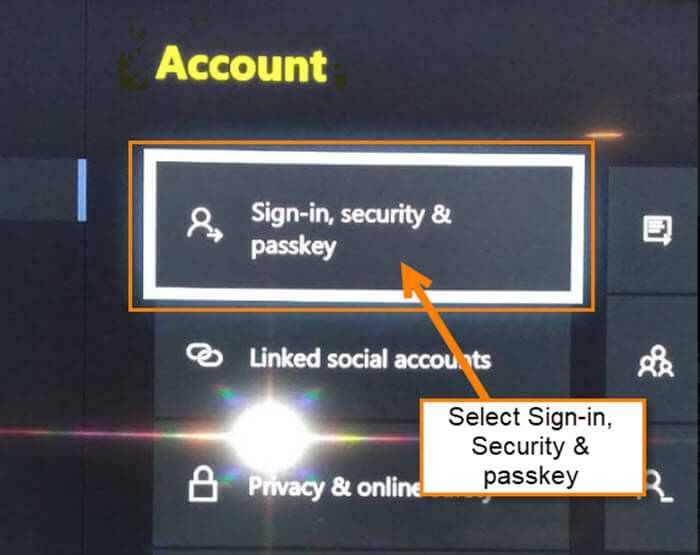
Step 5: On the Account screen, select the top option on the left that says, “Sign in, security and Passkey“.
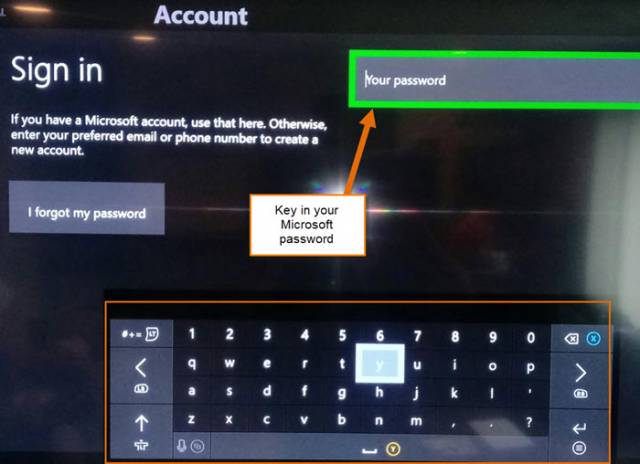
Step 5.1: You might see this screen that is asking you to sign in to your Microsoft account again. All this screen is asking for is the password. Key that in and continue on your way.
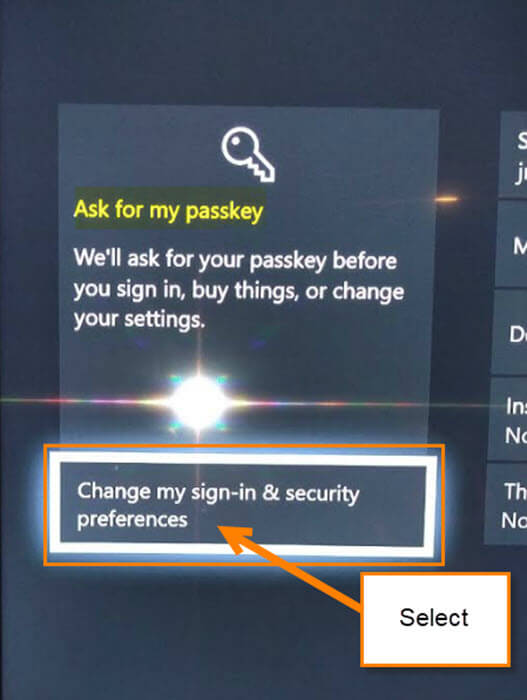
Step 6: On the next screen choose the first option on the bottom-left of the screen, “Change my sign-in & security preferences”.

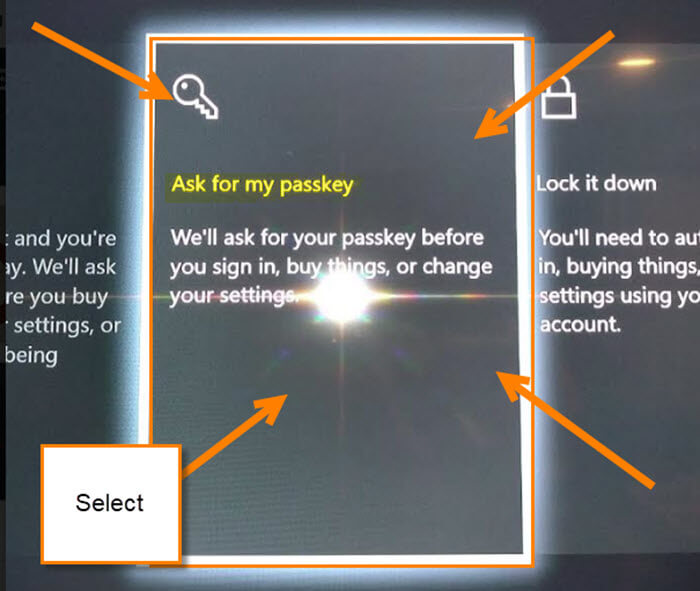
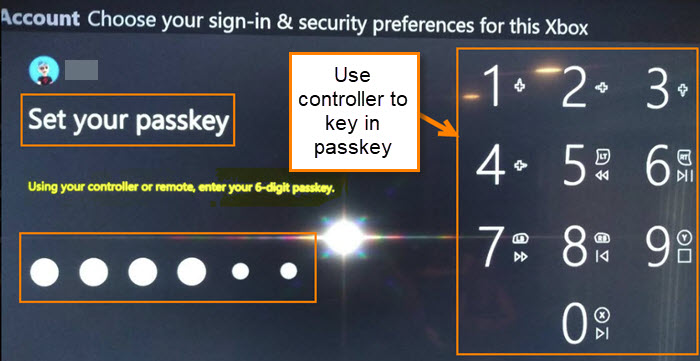
Step 7: Look for “Ask for my passkey” and select it. This will bring up the screen where you can create your passkey. Passkeys are required to be six digits long and they show you how to use your controller to pick the digits you want. After you enter it in once it will ask you to enter it one more time. The code is all set but we have a few more steps left to make sure it asks for the passkey before the minions try to buy something.
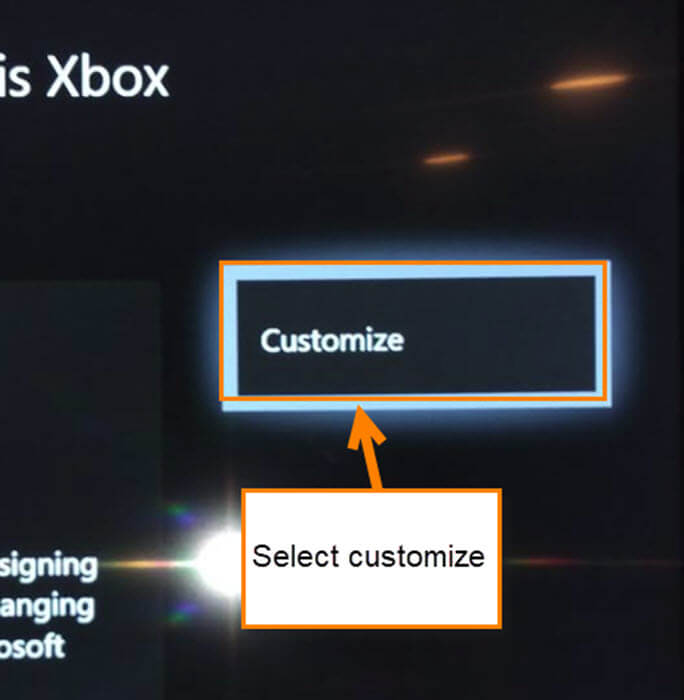
Step 8: Now you should be on the “Sign-in, Security & Passkey” screen again. Go to “Change my sign-in & security preferences”, and move all the way to the far right of the screen and select Customize.
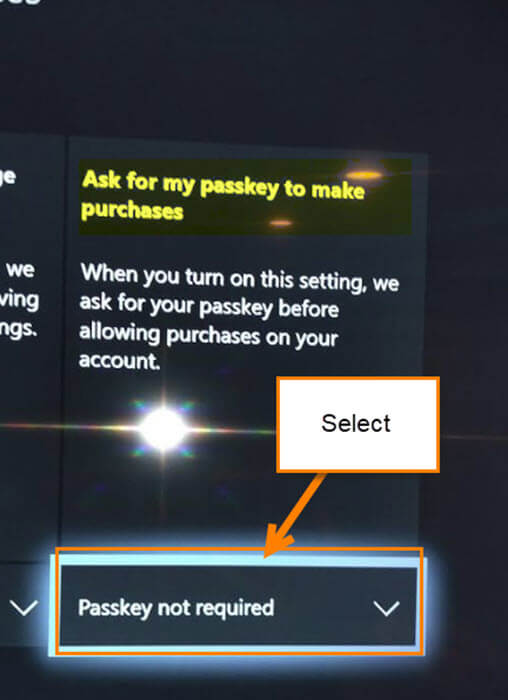
Step 9: On the Customize screen look for the section labeled “Ask for my passkey to make purchases”. Select this option and you will see two choices:
- Passkey not required
- Passkey required
We want to choose Passkey Required. This way, every time someone on your account tries to buy something they have to use the passkey.

On the Customize screen, you can also set the passkey to be required for other things like Signing in to the Xbox account, which might be nice if you want to tighten up that security on your account. Now tell those kids to do some chores if they want to purchase those Robux.
Here Is A Short Video Demonstrating The Process

To watch more How-To videos like this one, check out our Dave’s Computer Tips YouTube Channel. We’ll be adding more videos in the future.
—