
Android Battery Saver
You know how your Laptop has that a power saver mode, right? Well, your Android phone has that same feature on it. Recently I was wondering how I could configure the settings for my battery on my own cell. You might be asking, “Why should I want to do this to my phone?” Good question my friends. What does the Battery Saver Mode do for you? I have always thought it is important to ask why you should do something before actually doing it. Let me give the Why and then I will show you the How.
The Question
Why should I configure or change my Battery Saver settings?
The Answer
This helps prolong the life of your battery so you have time to get to a charger. As with your portable computer, it gives you extra time to save what you are doing before your battery life is gone. Here is a great example– you know when you are on a car trip and your phone is getting low? Then you realize you forgot your car charger? With Battery Saver mode set correctly, you will have more time to get to home and plug that device in.
Now that we know why you should do this, let me show you how to configure the battery to your liking. I will be showing this on two Android phones: mine, being the LG X Power, and my wife’s, a Moto G4.
Configuring Battery Saver Mode on Android
LG X Power
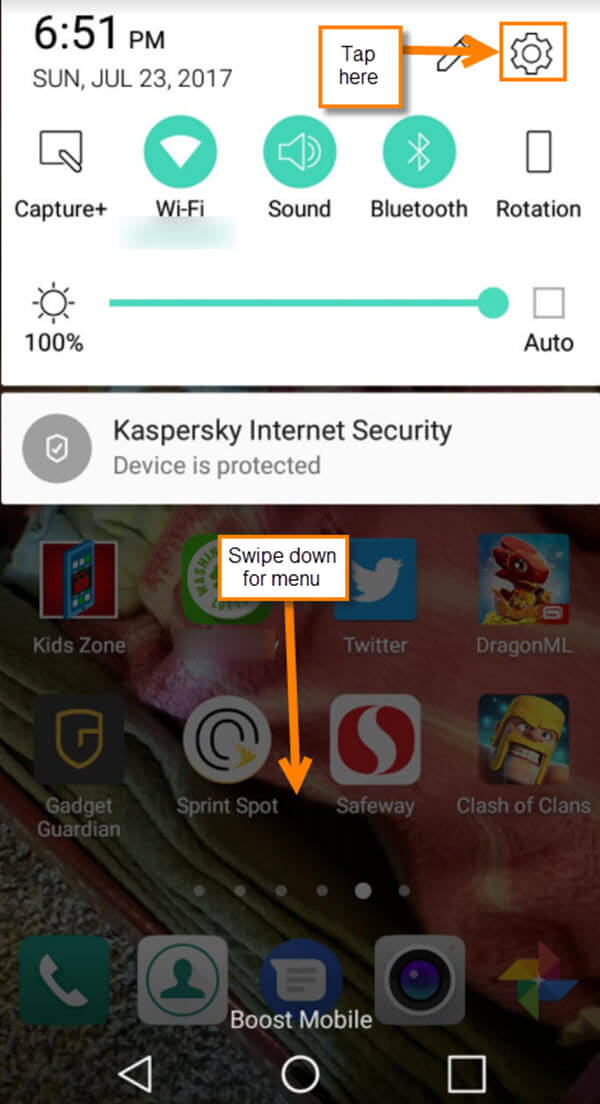
Step 1: First we will start with my phone. We will need to head to the Settings Screen. Swipe from the top down and this will bring down a menu. Now, tap on the Gear icon at the top-right.
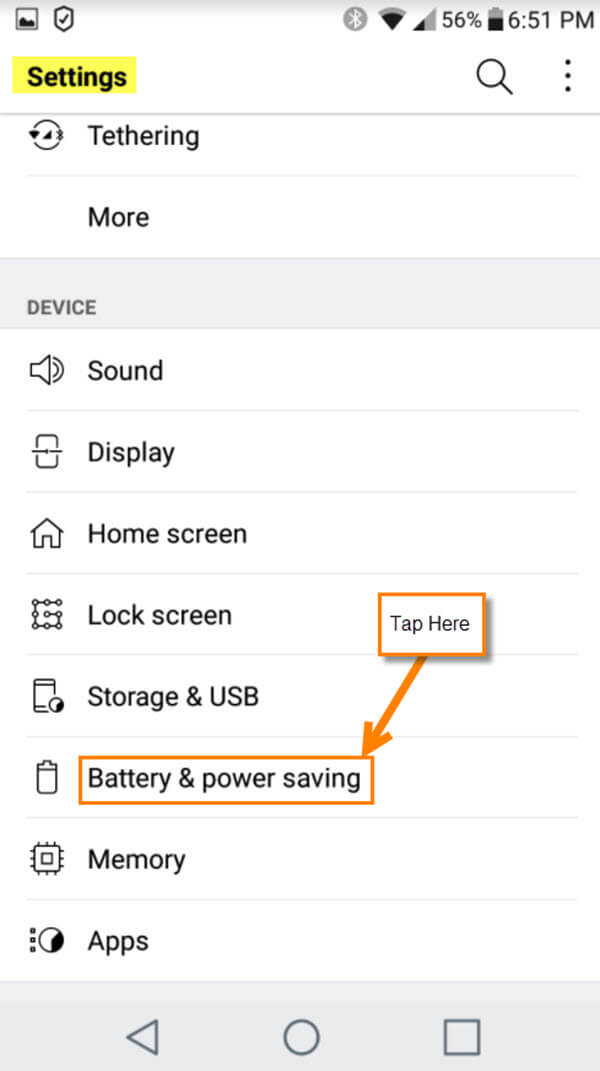
Step 2: You should be on the Settings screen now. From here, tap on the Battery & power saving option.
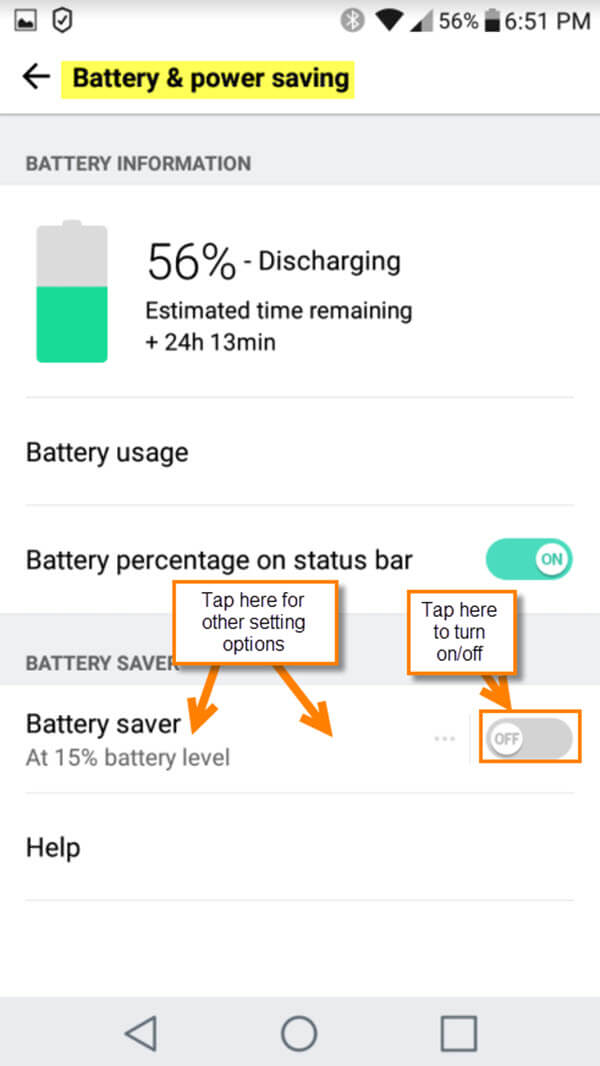
Step 3: On the Battery & Power Saving screen you will see the On/Off switch. Next to that, a spot that says what the percentage is set at before the power saver kicks in. You can just tap on the ON switch or tap on the wording to go into settings. We are going to go into the settings. Tap Battery saver.
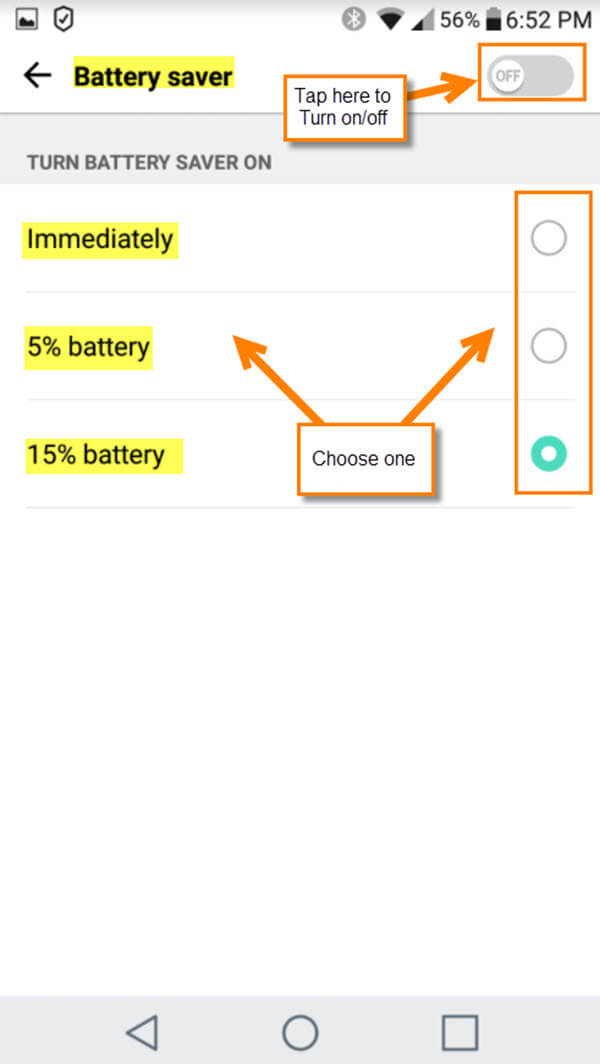
Step 4: Here is where you can choose when you would like to have the Battery Saver to kick in. As you can see, I chose 15%. After doing this, make sure you have it switched to ON. That’s it!
Now that we have seen it done on my Android phone, let us look at how to do this on the Moto G4.
Moto G4
Step 1: The Moto G4 loves doing things a little differently than my phone. First, swipe from the top down twice to have the menu you need to appear (you can swipe down once and then just tap the little arrow on the top-right, too). Tap on the gear on the top right.
![]()
Step 2: On the Settings screen, tap on the Battery option.
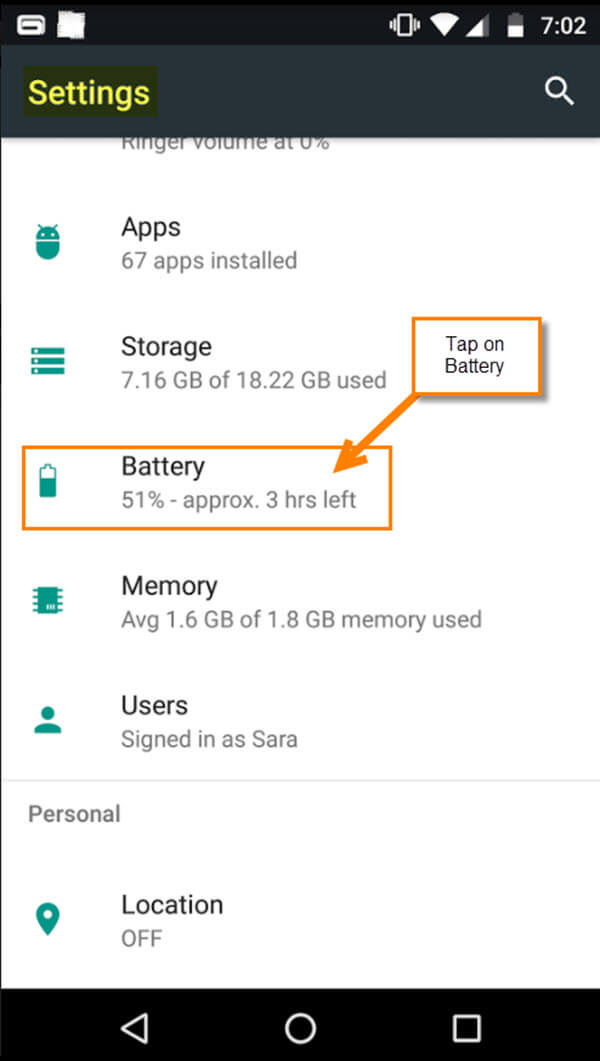
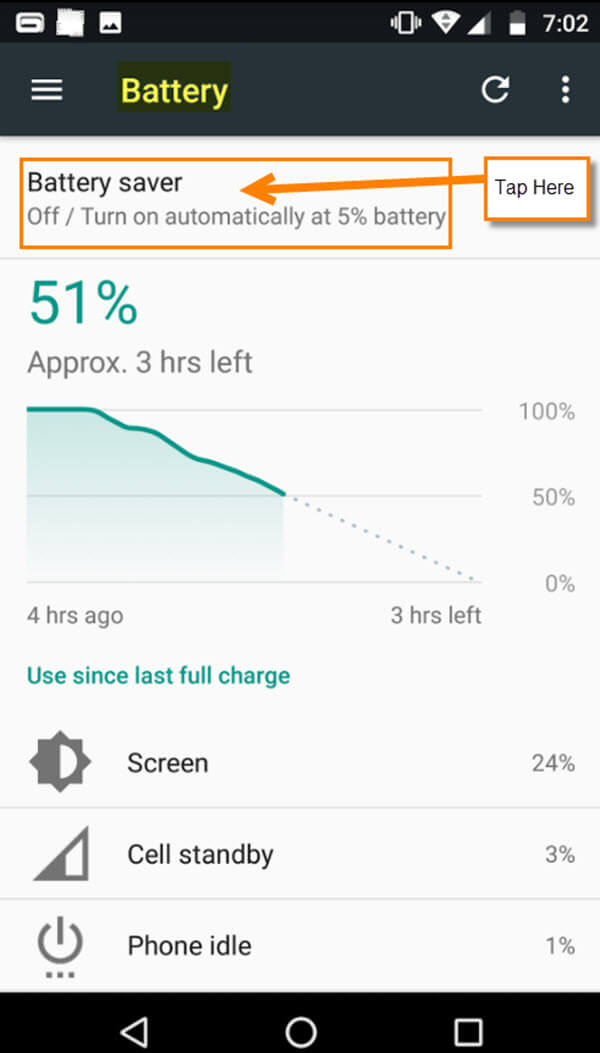
Step 3: Here you can see some information about your battery. What you need to do is tap on the Battery saver wording at the top.
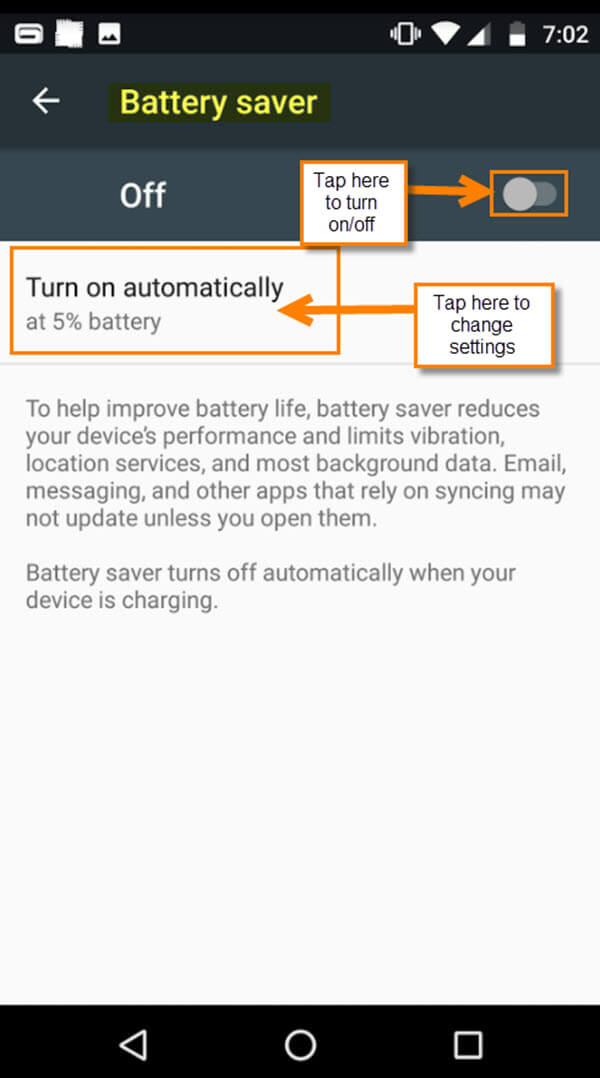
Step 4: Once in here you can turn On or Off your Battery saver just like on the other phone. We will want to tap on the Turn on automatically wording (or whatever wording is placed there for you). Tap it
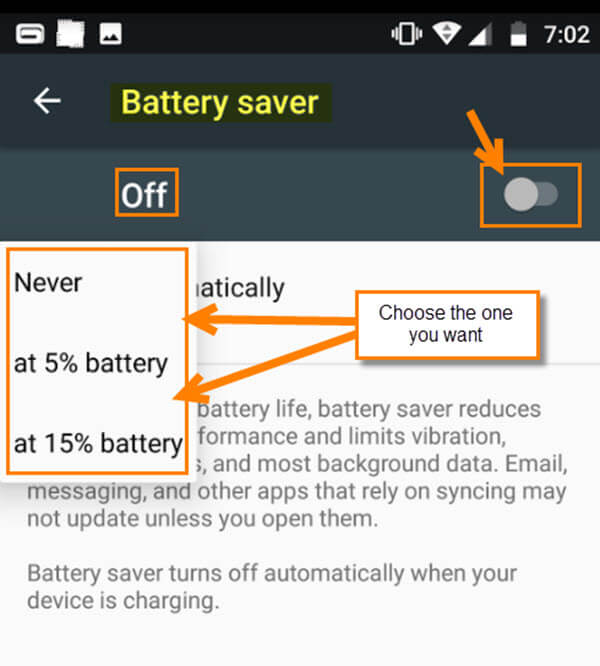
Step 5: Once you tap that you will see a little menu pop up. Here is where you can choose the setting you want. After choosing, make sure the Battery saver is turned ON. Now you should be all set.
The weird thing about my wife’s Moto G4 is that when the Battery saver is activated, the top and bottom turn to an orange color. I guess to make sure you know you have it on.
Time for you to setup your battery saver and keep you a little more relaxed.
What are your favorite tricks to save your battery?
—
Funny, my lenovo a10-70 also turns orange? thanks for the article!
Your welcome Rien! I noticed that too on my phone. But only after it hits the setting set to run the battery saver did it turn orange. Never noticed the orange until after I wrote this article :). To bad they do not let you choose another color. Would be fun to choose green or some other color.