Jim Hillier recently wrote about an online service to add colour to black and white photos.
Read here: Easily Add Color To Black And White Photos
They also have a program (Picture Colorizer) that you can download to your system. I decided to download it and try it out.
So I used my own mug. You people with smartphones have it easy. Taking a selfie with a digital camera is a bit awkward. I finally got a shot that probably won’t give too many nightmares. 🙂
The first thing I had to do is make it black and white. I did this in PhotoFiltre 7 by clicking on Filter then Aged effect then Black and White. If I used the Old photography effect, it’s much like Sepia, with a strong yellow tint. But the end result is basically the same.
So I saved the photo and then opened it up in Picture Colorizer. It supports drag and drop. And then I just clicked on the third icon in the top row, labelled Colorize! It only took a few minutes.
The bar under the picture turns blue and will tell you when it’s done. On the right-hand side of the program, you can play with the controls like Brightness, Contrast, and so on.
Then click on the Save As button.
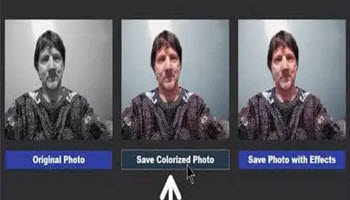
This will open a preview window, I just clicked on the middle option, Save Colorized Photo.
The following is the result: Number 1 is the original, Number 2 is the colour removed, and Number 3 is the colour added with Picture Colorizer. Before I did this one, I tried a few old family photos and they came out pretty good too. One thing I noticed is if you look at the very bottom of photo number 3, you will see the company logo and name as a watermark (only in the free version of this program). I did some family pics, the smallest being 286×234 in size, and no watermarks appeared on them. Probably because the watermark would have covered the entire picture. So this service and program get a thumbs up, all the way.
—

