I was just surfing online and all of a sudden my web pages refused to load. I checked the internet connection and everything seemed to be working. Using other browsers confirmed this. So, it was just Opera.
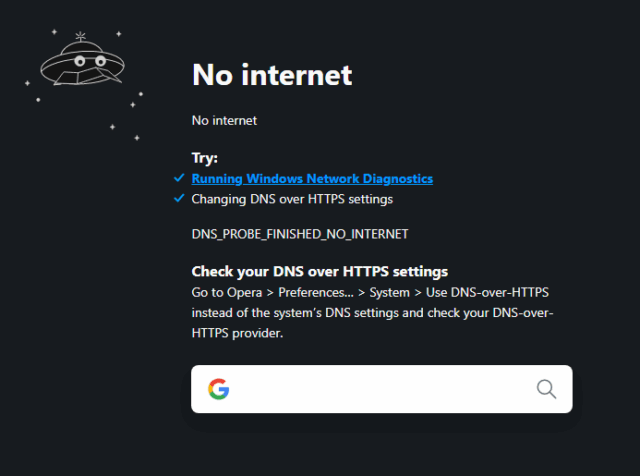
I got lucky this time because Opera did finally give me an error page suggesting where the problem was. It suggested changing the DNS over HTTPS settings.
These are basically settings to give you a little more security and privacy. If you want more detail, read this Wikipedia page.
Changing The Settings
In Opera
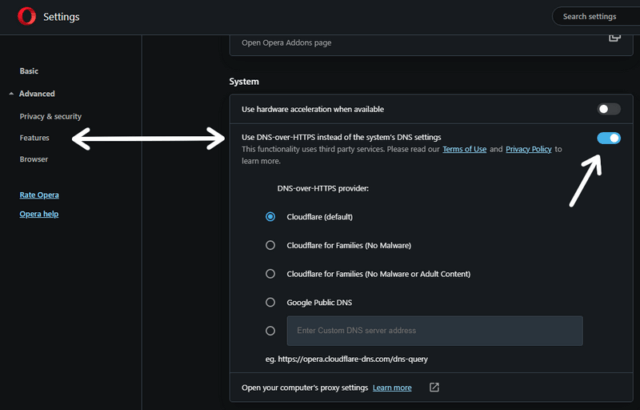
Go into the Opera settings using Alt + P or Ctrl + F12, and then click on the word Advanced in the left menu. Then click on Features. Scroll down from there until you see the System section and look for Use DNS-over-HTTPS instead of the system’s DNS settings.
Use the switch on the right-hand side to enable or disable and pick your choice of server from the list.
DNS Servers
The problem here is that Opera, as with other browsers, only allows you to choose one server and by rights, you should have two. If you check out your own DNS servers for your internet you usually have two.
To see your own DNS servers, type cmd in the search bar and then in the command prompt type ipconfig /all
Scroll down through the list of information almost to the bottom and look for the lines that read DNS servers…
Other browsers offer the same feature.
In Firefox
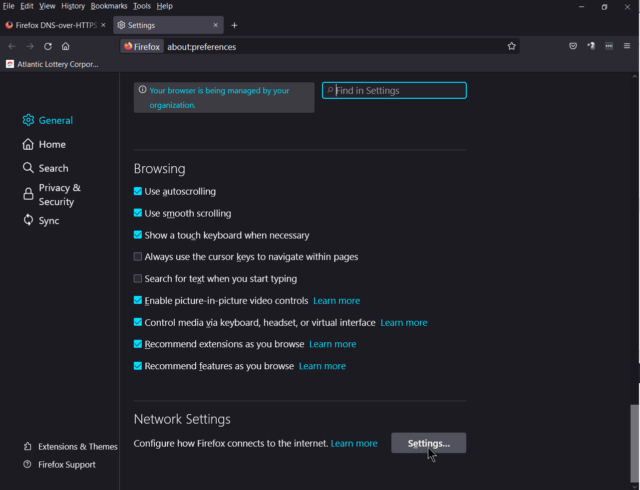
In the web-address bar or URL bar, type about:preferences and hit enter.
Scroll down to Network Settings and then click on the Settings button.
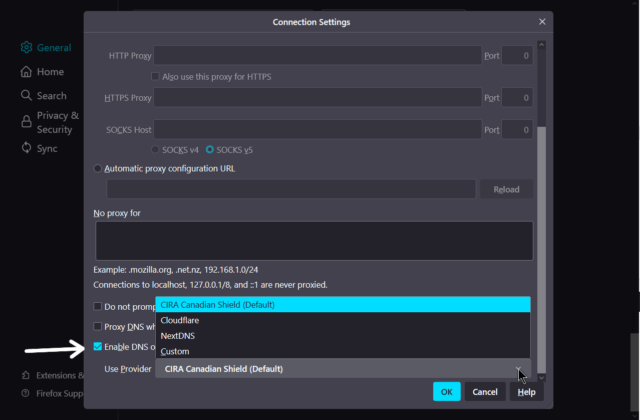
Then towards the bottom, you’ll see Enable DNS over HTTPS, check it and choose your server from the list — your choice.
In all cases, if you are not sure what to pick, just use the one marked Default.
In Chrome
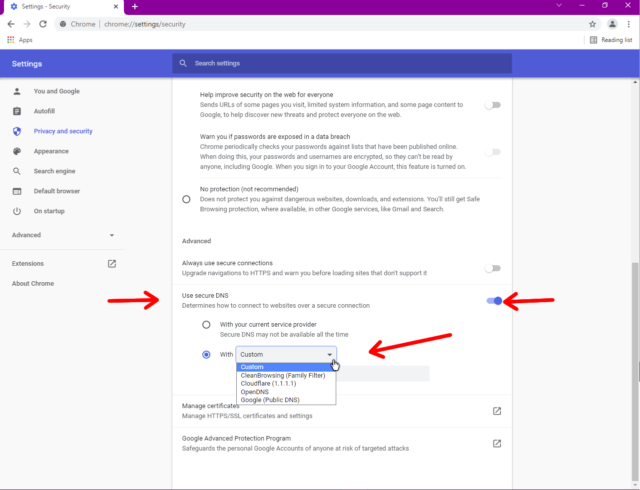
Go to chrome://settings/security in the URL bar.
Scroll down to the Use secure DNS section, turn on the switch, and choose your server.
In Edge
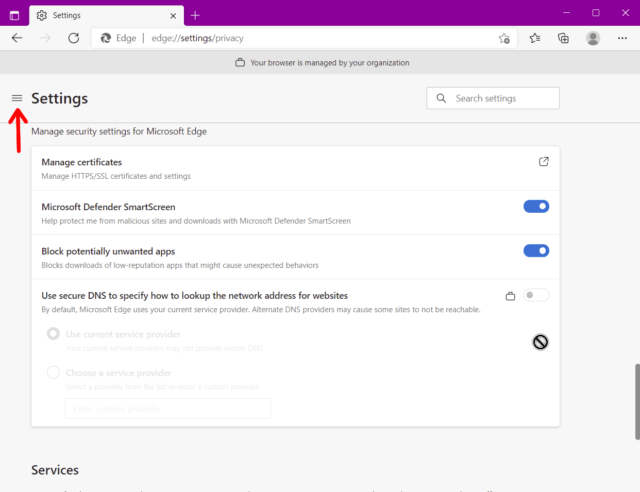
Go to edge://settings/privacy in the web address bar or URL bar.
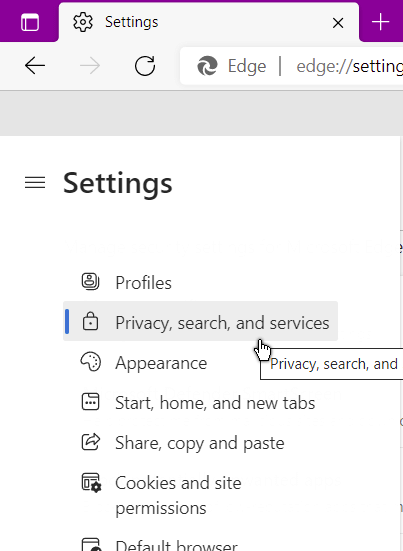
Click on the three-line or hamburger menu as it’s called sometimes, right next to Settings in the top left-hand corner. And in the menu that opens, click on Privacy, search, and services.
You’ll see at the bottom the option to Use secure DNS to specify how to look up the network address for websites.
Just enable and pick your server. As you can see, mine is greyed out and unclickable. From my screenshot, my browser seems to be “managed by my organization”.
—

Wow, it is like you read my mind posting this article. As of like the last month I go to a site and get this silly DNS nonsense, grrrrrrr frustrating. Thanks for the info. & fix.
Your welcome. As I mentioned, they should give you two DNS options and not just one. Hopefully, the browser companies will fix this issue by giving you more than one option.
I am using BRAVE guess it is based on Chrome so will try that fix when I get around to it. Thanks again! Great site for a novice computer person.
For the Brave browser type the following in the URL or web address bar (or copy and paste):
brave://flags/#dns-over-https
It then goes and shows “Secure DNS lookups” highlighted in yellow. Click on the button that says “Default” and choose “Enable” from the menu. Then you should notice a “Relaunch the browser “, button towards the bottom, click it. You do not get to choose your servers in this case.