
Tweaking Your Site With Additional CSS
As I mentioned in my previous article, How To Become A Webmaster, additional CSS can be added in WordPress to override settings that are coded in the theme that you’re using. As I’ve discovered over the last year or so, this is one of the most frequently asked questions in the support sites of most theme and plugin developers. For example, I want the text here to be white and over there to be black, but I don’t know how to do it is a typical question you’ll see on many a support pages and if the developers are worth their salt, they’ll reply swiftly with an answer. That answer could be additional CSS code or perhaps clicking a box in the theme options that the customer may have missed. Either way, there’s always a solution, so let me give you an example of how you can work that out for yourself without having to ask the developer and save yourself a great deal of time.
Tweaking The Theme With CSS
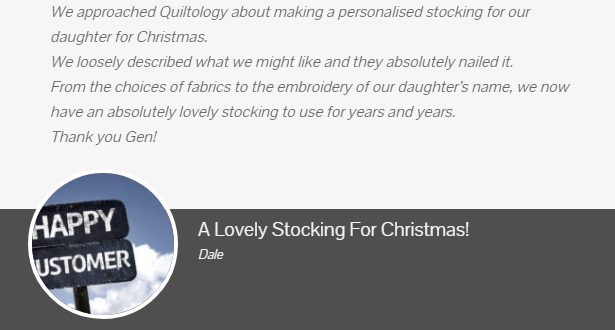
In this example, the background is clashing with the colour of the text making it almost impossible to read, so a font colour change is required.

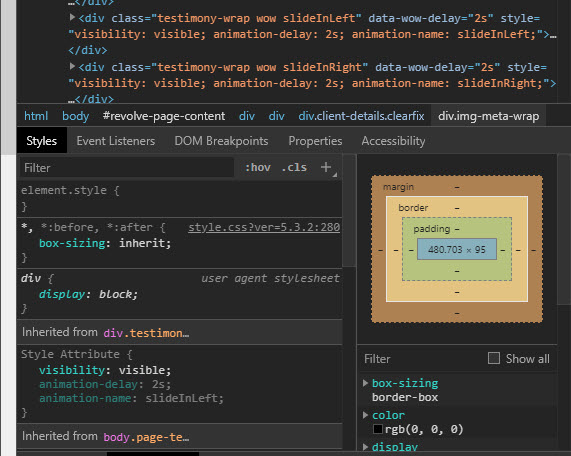
In the theme I’m using there isn’t an obvious way to achieve this, however, there is a tool available to everyone called site inspector which is invoked by right-clicking on the area in question and studying the lines of code similar to the image at the top of this page. In this particular case, the inspector showed this:
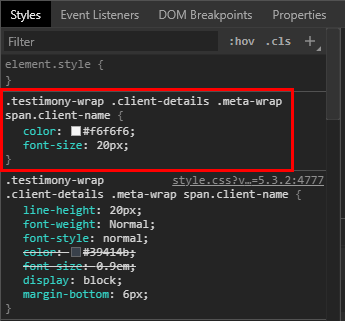
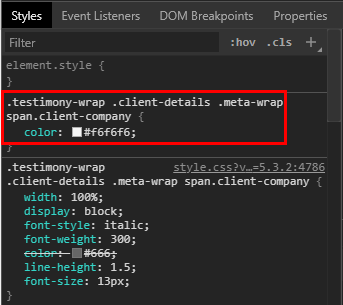
The above code tells you what the colour and size of the text should be for the first invisible line and the image below shows what colour the second line of text will be.
Using Additional CSS
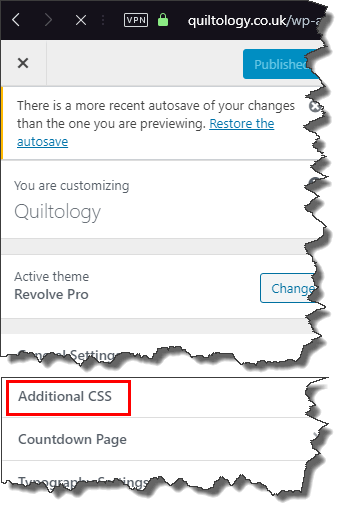
One has to use a certain amount of detective work here and I just happen to know from the theme, Revolve Pro, that the first line is the comment and the second line is the name of the happy customer on the testimonials page. Themes do not always follow logic in the way that you and I understand the word and some of the naming conventions in many themes can be confusing. So, in order to change the hard-to-read grey text to white we need to add code into the additional CSS section which can be found at customise>additional CSS, thus:
Once there, you’ll find a section that looks like this:
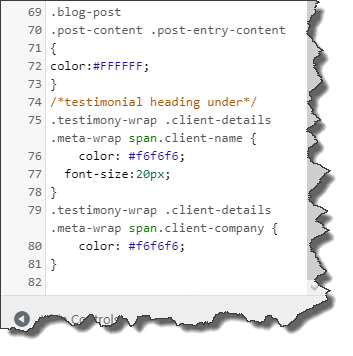
/*testimonial heading under*/
.testimony-wrap .client-details .meta-wrap span.client-name {
color: #f6f6f6;
font-size:20px;
}
.testimony-wrap .client-details .meta-wrap span.client-company {
color: #f6f6f6;
}
The first line enclosed in a forward slash and asterisk is simply to let you know what the code does, the next lines indicate which element is being referred to and the lines within the left and right braces are what the code does, i.e. colour and font sizes. Adding these lines instantly invokes these changes before your very eyes so that you can see for yourself that you’ve used the correct code. It’s very important to finish the code correctly with the braces, otherwise, a warning message will appear. This is the effect that the above code produces, changing the font to a more readable colour.
Notepad Is Your Best Friend

I learned the painful way that additional CSS code should be backed up using Notepad because on one occasion I’d decided to try a different theme, but not copied the CSS code, thus the new theme reverted to default with no additional CSS. Simply copy your additional CSS code to Notepad and save it in your website local directory for use at a later date if required or in case of a crash. It’s also very important to ensure that you’re using the correct syntax and all the other rules related to CSS. Having said that, once you’ve played around with it for long enough, you’ll soon begin to understand the mechanics and rules of how CSS works. Here’s a handy guide to get you started at W3Schools.com.
From my point of view, using the site inspector to reveal the code that needs to be tweaked is both an enormous time saver and a rewarding experience. For example, the theme developers for Revolve Pro, which is the theme I’m using in Quiltology, are based in Nepal so the time difference results in a significant delay in receiving a reply from their excellent support site. However, by figuring it out for myself, I can achieve the objective instantly and learn something along the way. How cool is that?
—